
Christmas Rice Krispie Treats
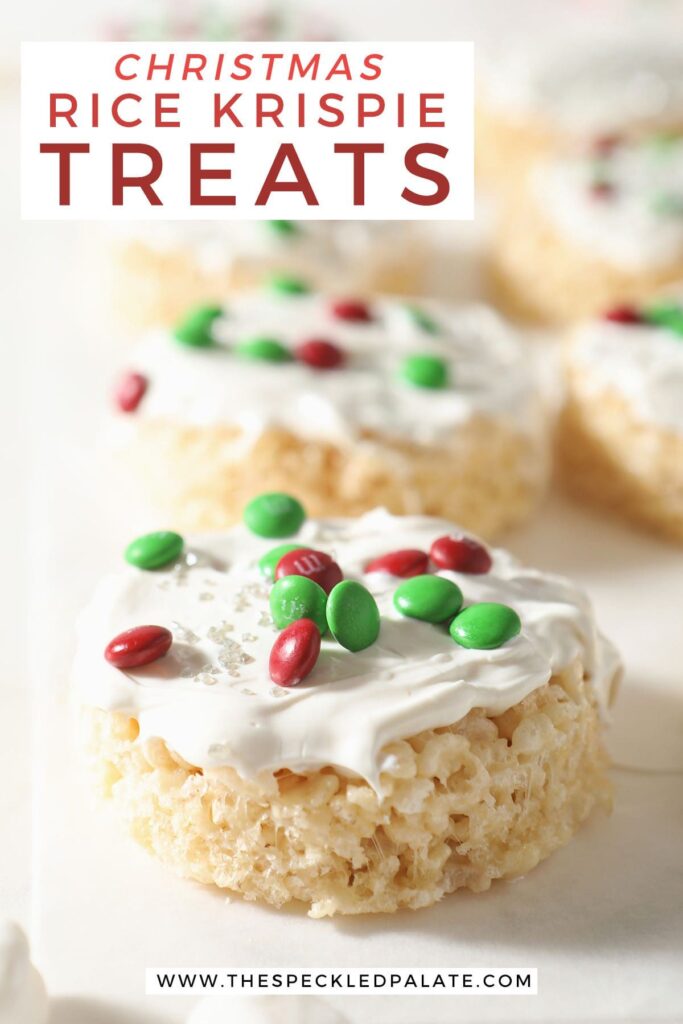
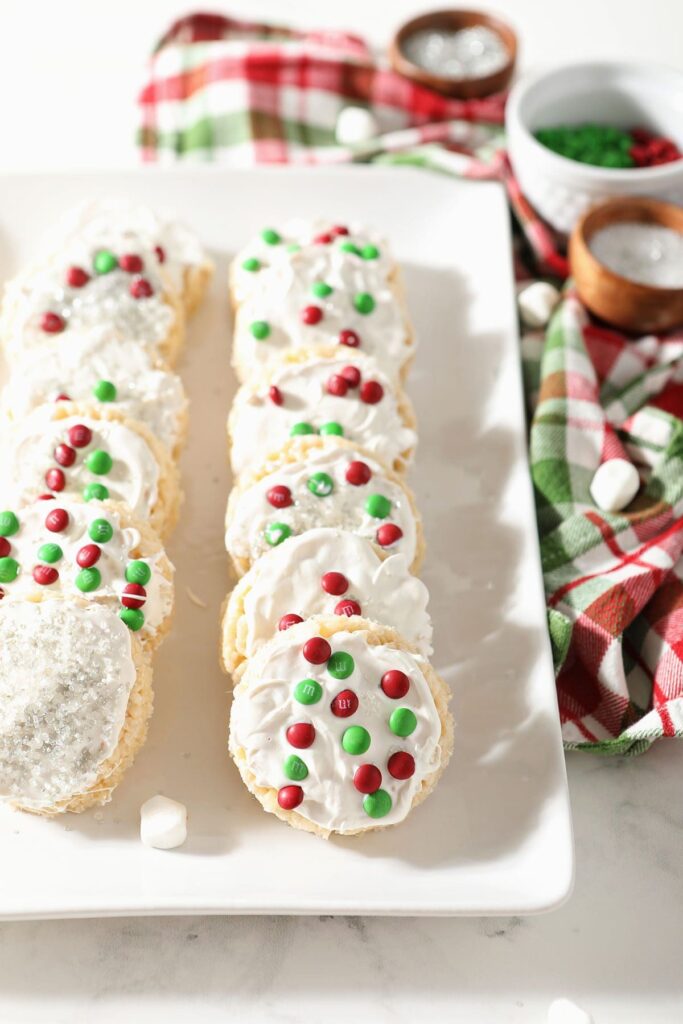
Christmas Rice Krispie Treats are the best no-bake dessert for the holidays, and they’re fun to add to a cookie tray, too! Made with just eight ingredients, these homemade rice krispie treats get Christmas flair and color from their toppings! Makes 12 circular treats, but the recipe can easily be doubled.
Following along with The Sweetest Season? So far, I’ve made Peppermint Chocolate Chip Cookies, Christmas Funfetti Cookies and these!
It was a travesty that I had no Rice Krispie Treat recipes on my site before this year.
I’m adding another one to our recipe box before we close out 2021 because, well, these are good and fun and PERFECT for this time of year.
Christmas Rice Krispies are an easy, fun dessert to make and share this holiday season, and the decoration is completely up to you (and your kitchen helpers, whoever they may be.)
I’ve seen these beauties shaped as a Christmas tree, and they’re super fun!
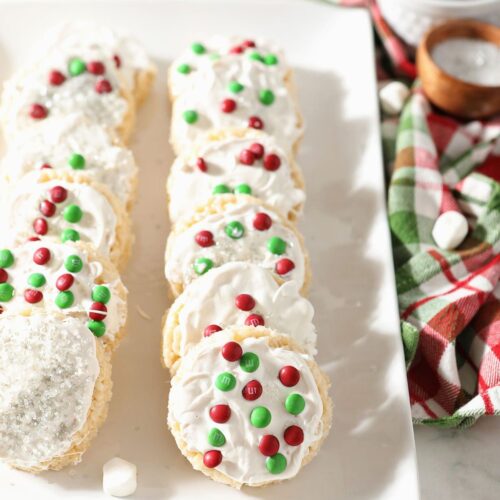
However, I wanted to do a little something different, which is why we made these into little “ornaments.”
Why I love this recipe
Rice Krispie Treats are the perfect, easy treat to make for almost any occasion. So obviously, I wanted to share a Christmas-themed rendition this December.
This recipe is particularly easy to follow and make, then you can decorate them as you see fit. It’s incredibly simple.
To be honest, I feel a little weird throwing this no-bake dessert into The Sweetest Season this year… except… well… who doesn’t love a quick and easy treat?
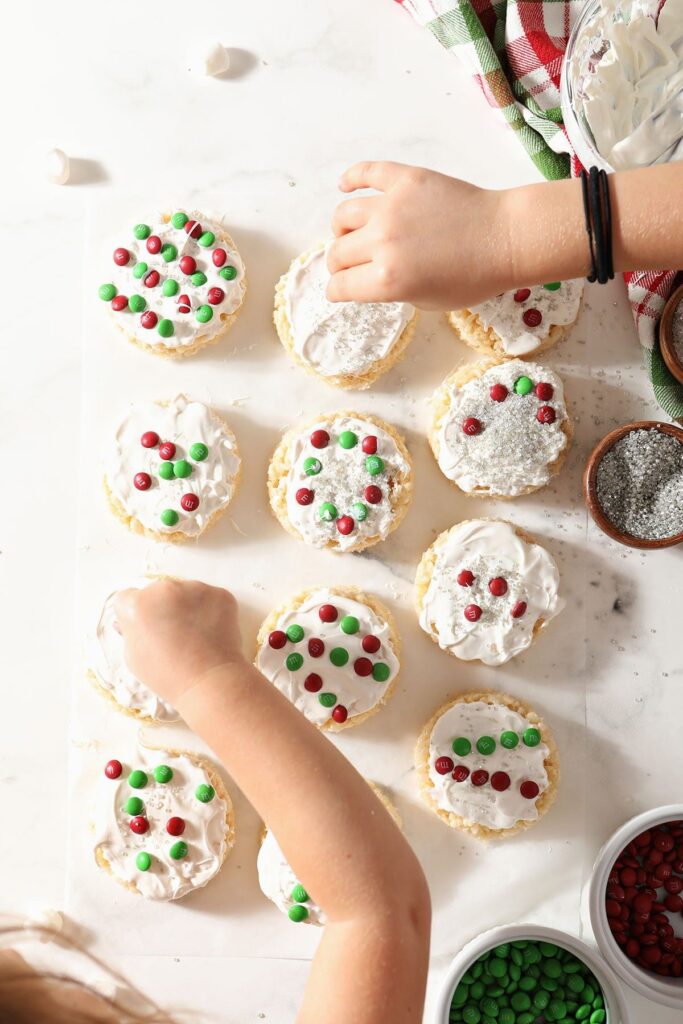
My girls and I used a round biscuit cutter to cut the treats into circles, then decorated them as if they were ornaments.
We used chocolate-coated candy and sprinkles, but you could easily use other toppings, too, like candy cane pieces or even gumdrops.
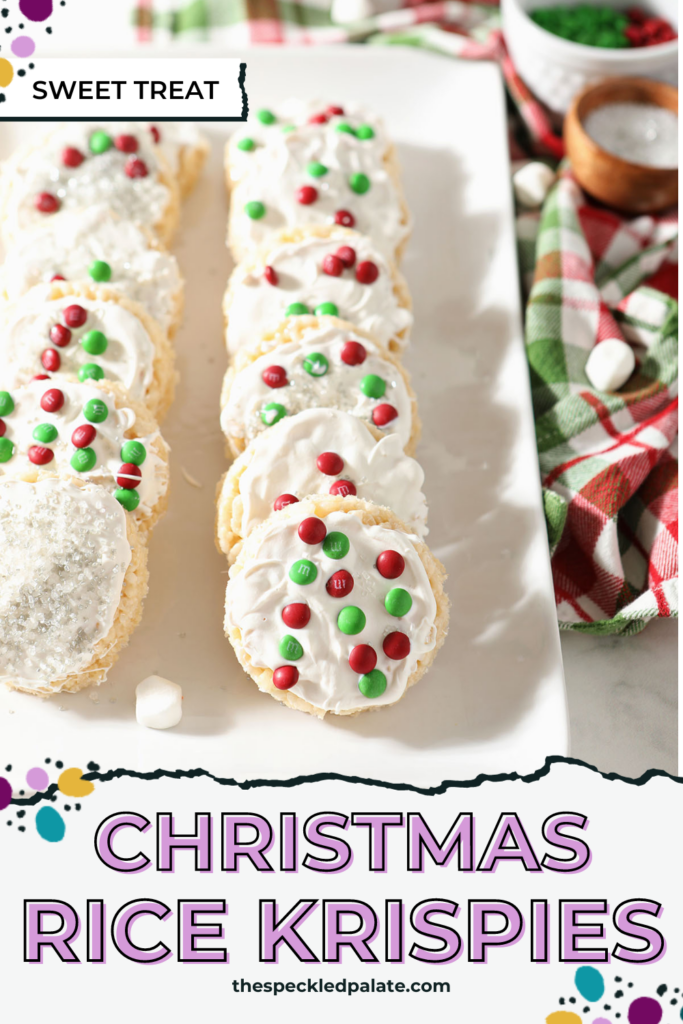
I can see these flying off a cookie plate or a dessert table at a holiday party. Also, they are absolutely perfect for a cookie exchange.
You could use different colors of candy melts to add more brightness to these holiday rice krispie treats.
Basically — this recipe is a template for you to use and then make these treats your own! You’ll be happy you did.
Other easy treats to make with your kids this holiday season: Dark Chocolate Peanut Butter Blossom Cookies | Dessert Nachos | Saltine Cracker Toffee | Cheesecake Dip | Cinnamon Sugar Pretzels | Peanut Butter Pretzel Bites | Chocolate Covered Ritz Cracker Cookies | Chocolate Dipped Pretzels | Oreo Peppermint Christmas Bark | Reindeer Chow (White Chocolate Christmas Puppy Chow)
Got sweet teeth? Check out my Dessert Recipe Index for inspiration.

Let’s talk about The Sweetest Season and Cookies for Kids Cancer!
The Sweetest Season is my annual holiday cookie week.
Ten years ago, I decided it would be fun to share my favorite Christmas cookie recipes… then I invited other bloggers to join me, and the celebration grew… then we changed the name to make it more inclusive (because that matters!)… and the rest is history.
This year, we’re raising money in support of Cookies for Kids’ Cancer. We’d love if you could join us in supporting a worthy cause this holiday season. Here is our fundraising page.
Cookies for Kids’ Cancer is a recognized 501(c)3 non-profit organization dedicated to funding research for new, innovative and less-toxic treatments for childhood cancer.
Since 2008, Cookies for Kids’ Cancer has granted $18 million to pediatric cancer research in the form of 100+ research grants to leading pediatric cancer centers across the country. From these grants have stemmed 35+ treatments available to kids battling cancer today.
And since it’s the season of giving and giving back, I’m thrilled to be supporting an organization that’s actively funding treatments for kids and their families going through the unthinkable.
Again, here is our fundraising page if you’d like to join us in raising some money for this worthwhile organization.

What you need to make this recipe
The Speckled Palate participates in affiliate programs. As an Amazon Associate, I earn a commission from qualifying purchases. Please refer to my disclosure page for more information about these affiliate programs.
- Nonstick cooking spray
- Wax paper or parchment paper
- A large pot (like a 6-7 qt. Dutch oven or an extra large saucepan)
- 9”x13” baking dish or a similarly sized jelly roll pan, as shown in these photos
- A large mixing bowl
- Rubber spatula
- Metal spatula
- Round cookie cutter
- Offset spatula
Let’s talk ingredients!
In addition to the tools above, you’re going to need some ingredients to make this recipe, too! Chances are, you might already have some of them in your fridge or pantry. Scroll down to the recipe card for the full measurements and instructions.
Here’s what you’ll need to grab at the grocery store:
- Crispy rice cereal — use your favorite brand! I’ve been known to make these with the whole wheat variety for my kids, but honestly, any variation is good. Holiday-colored Rice Krispie cereal is available nationwide at grocery stores and online, too.
- Butter — you can use salted or unsalted butter. If using salted butter, don’t sprinkle in additional salt. If using unsalted butter, you need a little extra sprinkle of salt. I have more details about this below so you know how much to use.
- Vanilla extract — this adds just a little more flavor, in my opinion, and the combination of vanilla with marshmallow and butter is simply divine.
- Marshmallows — mini marshmallows melt best and easiest! Make sure they’re fresh, too.
- White candy melts — these serve as the frosting for our treats. They melt and spread easily! You could swap this for chocolate or white chocolate if you’d rather, but I appreciate the ease of use with the candy melts. You could also use a sugar cookie icing recipe and dye it colors, if you want to go that direction.
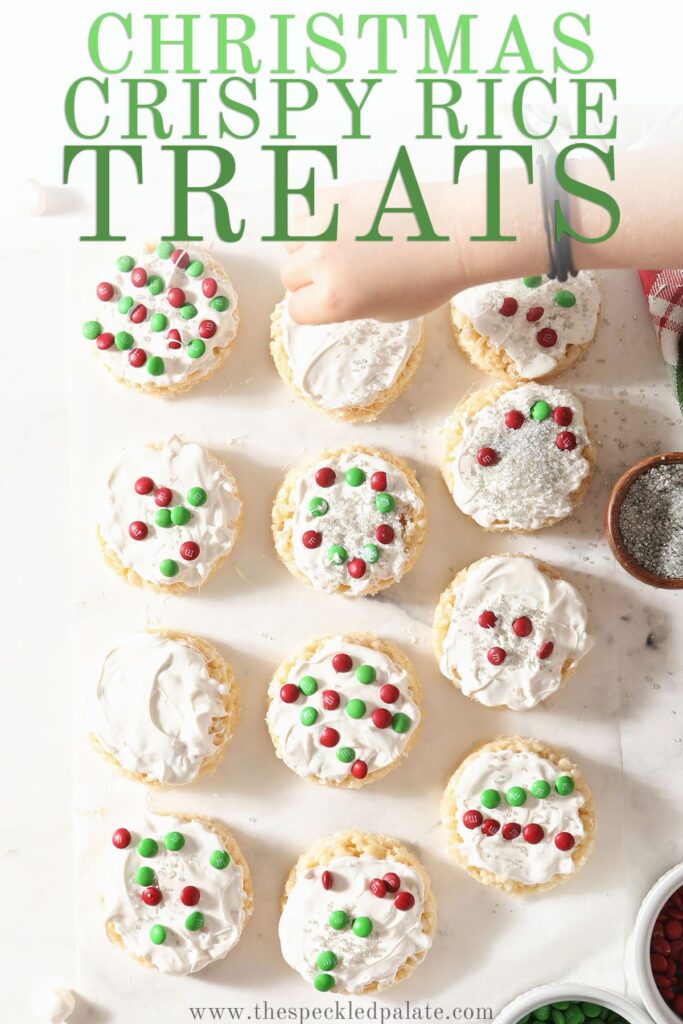
- Sprinkles and chocolate-coated candies — these are our decorations. I placed a little bowl next to our work area, and the girls used their creativity to decorate and create our little ornaments. You can do the same with your people—there’s no wrong way to decorate these!
Rice Krispy Treats variations
- Halloween Oreo Rice Krispie Treats
- July 4 Rice Krispie Treats
- Halloween Rice Krispie Treats
- Easter Rice Krispie Treats with Peeps
- Oreo Rice Krispie Treats
How to make Rice Krispie Treats
Prepare the pan. I use a 9”x13” baking dish and line it with wax paper.
This will make removing the treats easy. You can also give the paper a spritz with nonstick cooking spray. Set aside.
Measure out the cereal into a large bowl, and set aside. We won’t be mixing these in the bowl, but having this measured out before our marshmallow-butter mixture is ready to go is important.
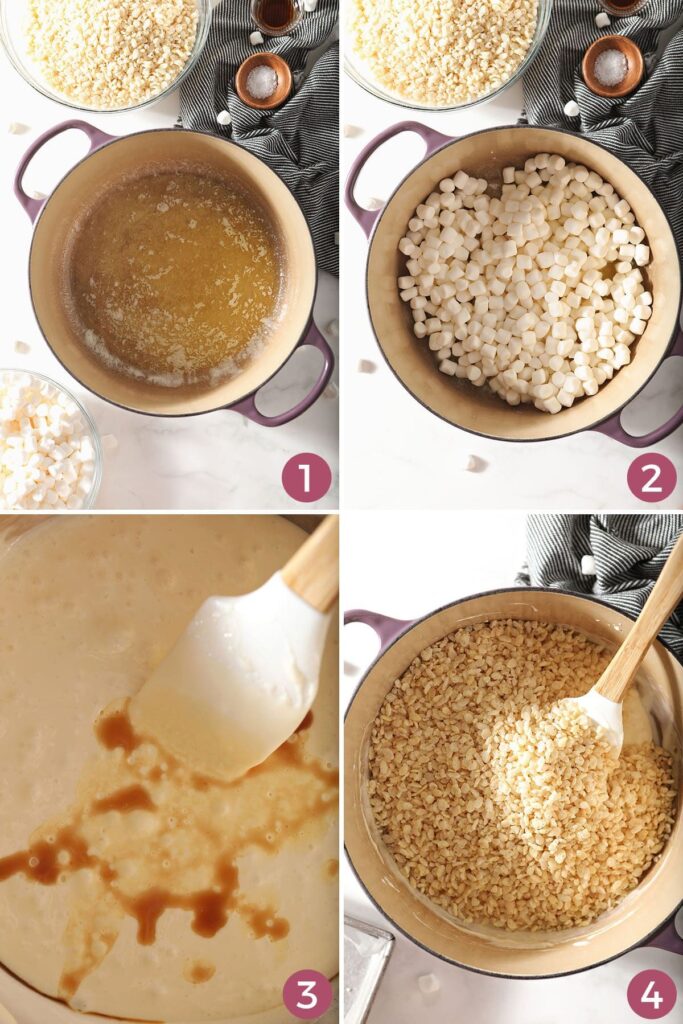
Make the krispie treat base. Melt the butter over low heat with the salt in a large pot.
Add the marshmallows to the melted butter and stir. Continually stir until they both completely melt.
Stir in the vanilla, too.
Mix the treats. Remove from heat, and pour the cereal into the pot with the marshmallow mixture. Stir quickly until the cereal is completely coated.
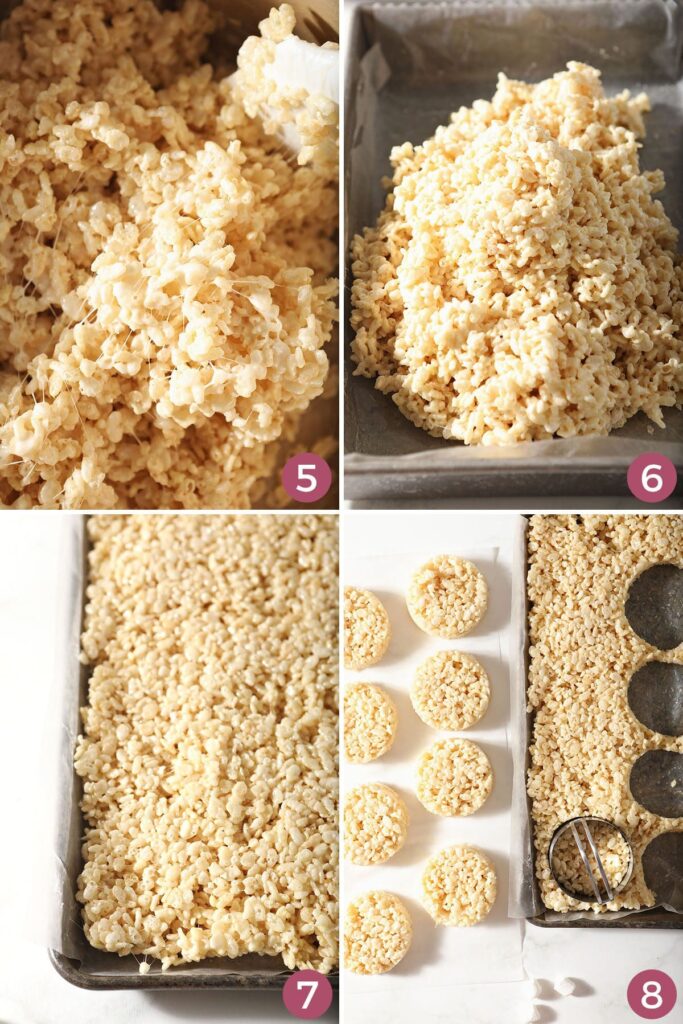
Make the bars. Pour the mixture into the prepared baking pan. Gently spread it into an even layer with a rubber spatula. If your spatula begins sticking, spritz with the nonstick cooking spray.
Pro tip!
Do not press down hard on the treats because they will become more compact — and it doesn’t taste as good to me as the treats that have a bit of air in them.
How to decorate Christmas Rice Krispie Treats
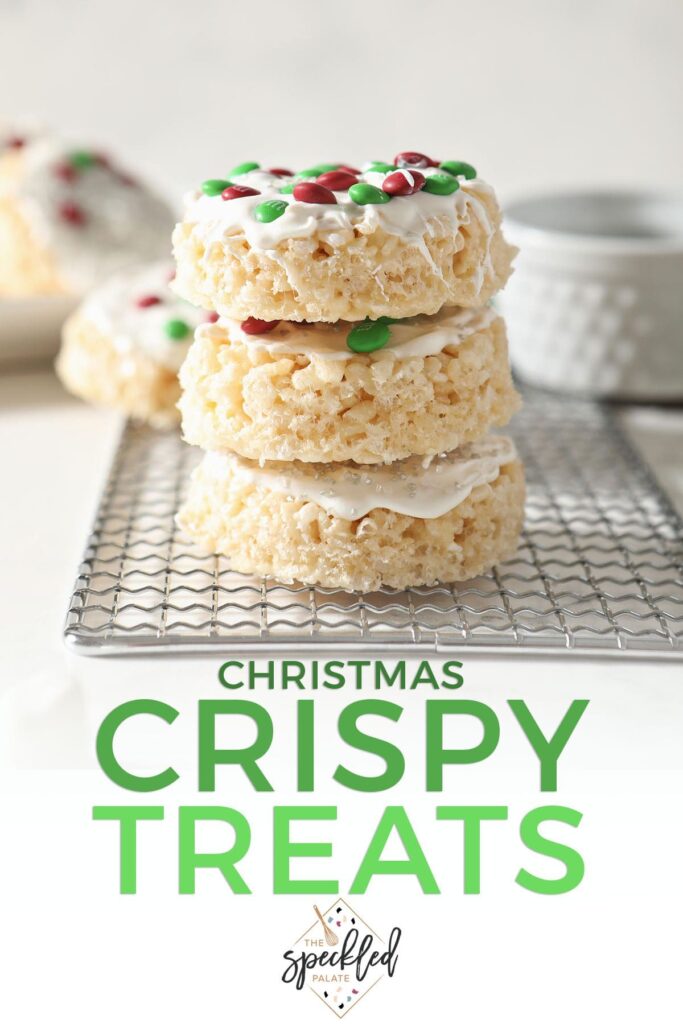
Let the homemade rice krispie treats cool for about an hour, or until they’re not hot to touch.
Cut into circles with a cookie or biscuit cutter. You may use other cookie cutters and make any shapes you desire! We liked the idea of ornaments, but you could do snowmen, stars, gingerbread men, reindeer, etc.
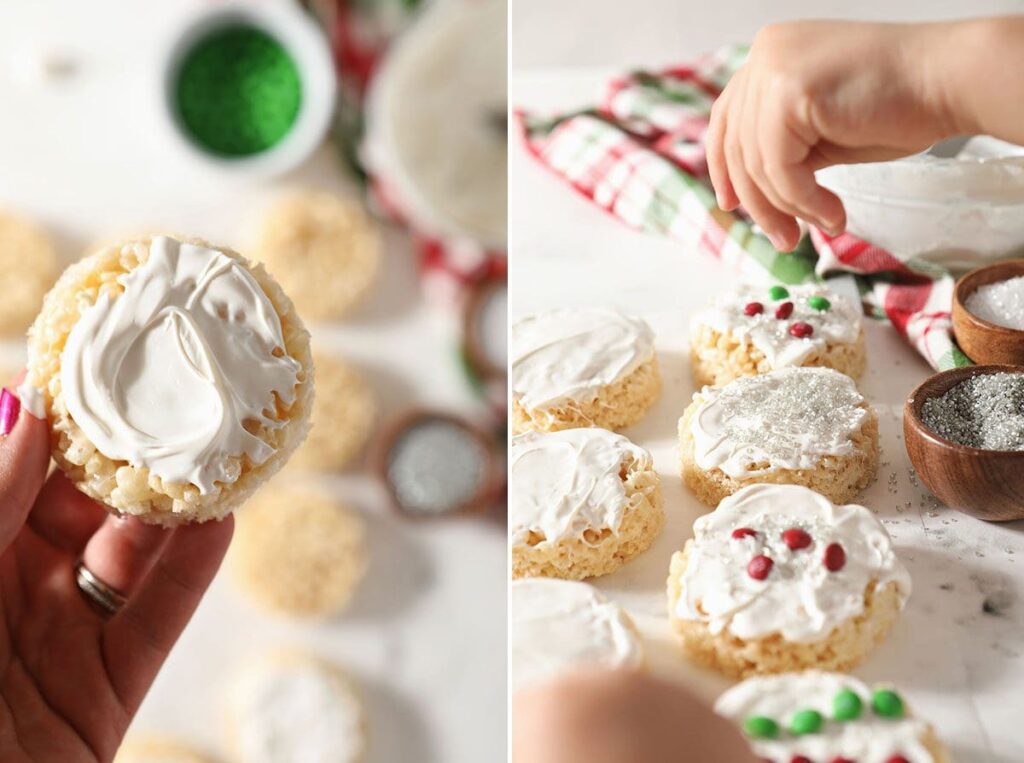
Decorate. Melt the white candy melts in a microwave-safe bowl. Use an offset spatula, large spoon or butter knife to spread the candy melts on top of the round cookies.
Decorate with chocolate-covered candies, sprinkles or any decorations you see fit, and enjoy!
Frequently Asked Questions
Marshmallows are an integral part of krispie treats, so I do not recommend finding a substitute for them.
The treats harden as they cool, so it’ll take at least 30 minutes after they’ve been in the pan. They’ll still be gooey at this point, so I recommend letting them sit for a full hour before touching.
I’ve read that too much butter will lead to soggy krispie treats.
No. As marshmallows sit, they lose moisture, and their texture changes. They will have a harder time melting, and when they do, they will become a gelatinous blob.
They also run the risk of overcooking and making tougher krispie treats because you’ll need to cook them for longer.
Quick Tips and Tricks for the best crispy rice treats
- Use fresh marshmallows. They melt more easily and will provide a better texture for your treats. (How do I know this? I’ve attempted this recipe with older marshmallows, and they didn’t turn out quite right.)
- Store in an airtight container at room temperature for 2-3 days after the candy melts cool and set. The treats will begin to harden after this timeframe.
- Double the recipe… but make sure your pot is large enough. You don’t want it to be overflowing!
- Make them your own. There are so many rice krispie treat variations out there, so have fun with them! We made ours look like ornaments, but you could use different cookie cutters to shape them like snowmen, snowflakes, gingerbread men and more!
More rice crispy treat recipes:
- Classic Rice Krispie Treats
- Halloween Oreo Rice Krispie Treats
- Halloween Rice Krispie Treats
- Chocolate Rice Krispie Treats
- Easter Rice Krispie Treats with Peeps
- Oreo Rice Krispie Treats
Christmas Rice Krispie Treats
Ingredients
Rice Krispie Treats
- 6 tablespoons unsalted butter
- ¼ teaspoon kosher salt
- 10 oz. mini marshmallows about 6 cups
- 1 teaspoon pure vanilla extract
- 6 cups crispy rice cereal
Decorations
- 1 cup white candy melts
- ½ cup Christmas M&M Candies
- ¼ cup Christmas sprinkles
Equipment
As an Amazon Associate and member of other affiliate programs, I earn from qualifying purchases.
Instructions
- Line a 9”x13” baking dish with wax paper. This will make removing the crispy rice treats easy. Set aside.
- Pour the crispy rice cereal into the large bowl, and set aside.
- Melt the butter over low heat with the salt over low heat on the stovetop.
- Once the butter has melted, stir in the marshmallows. Continually stir until completely melted.
- Add the splash of vanilla, and stir.
- Pour the cereal into the marshmallow mixture, and stir quickly until the cereal is coated.
- Pour the cereal bar mixture to the prepared baking pan and gently spread the mixture into an even layer with a rubber spatula. (If the mixture begins sticking, spritz the spatula with the nonstick cooking spray.) Do not press down hard on the mixture, as your treats will be more compact.
- Let the treats cool completely, about 1 hour.
- Cut into squares with a round cookie cutter (or a cookie cutter of a different shape, if so desired.)
- Melt the candy melts in a microwave-safe bowl in the microwave in 30-second bursts until spreadable.
- Spread on the cut out krispie treats.
- Decorate with chocolate-coated candies, sprinkles and other festive treats of the season.
- Enjoy!
Notes
Nutrition

About the Author:
Erin Parker is a Southern gal living in Texas with her husband and two daughters. She started The Speckled Palate to share what she was cooking as a newlywed… and over the years, it’s evolved to capture her love for hosting. Specifically, the EASIEST, lowest key entertaining because everyone deserves to see their people and connect over good food. Learn more about her…
Before leaving a comment or rating, ask yourself: