
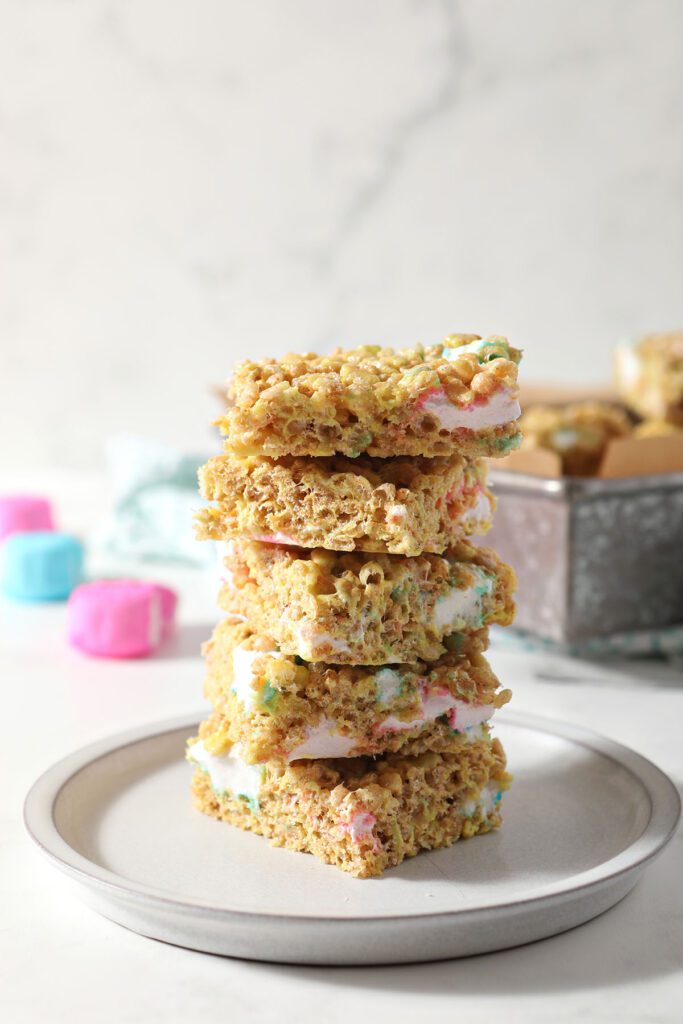
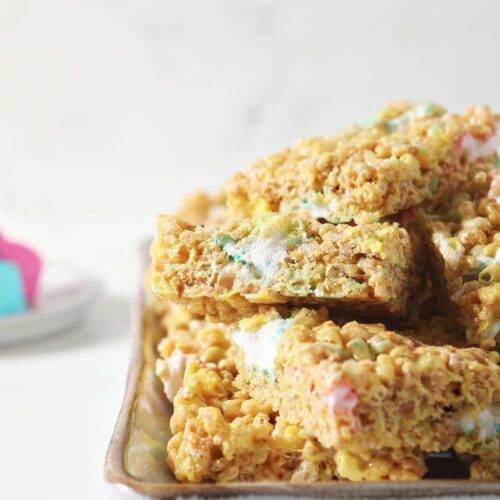
Easter Rice Krispie Treats with Peeps
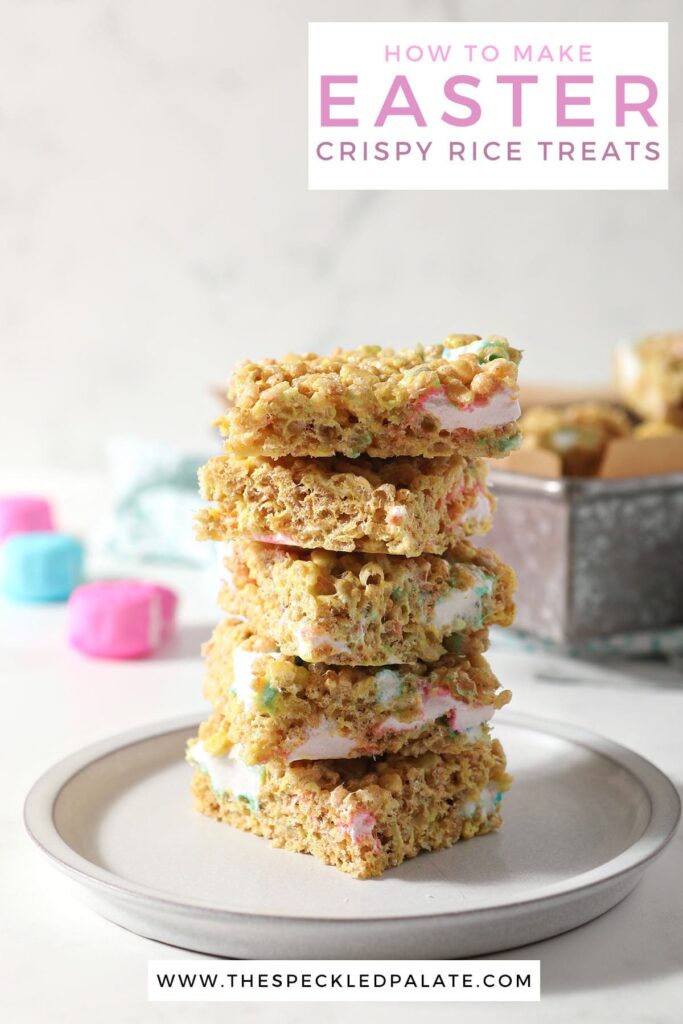
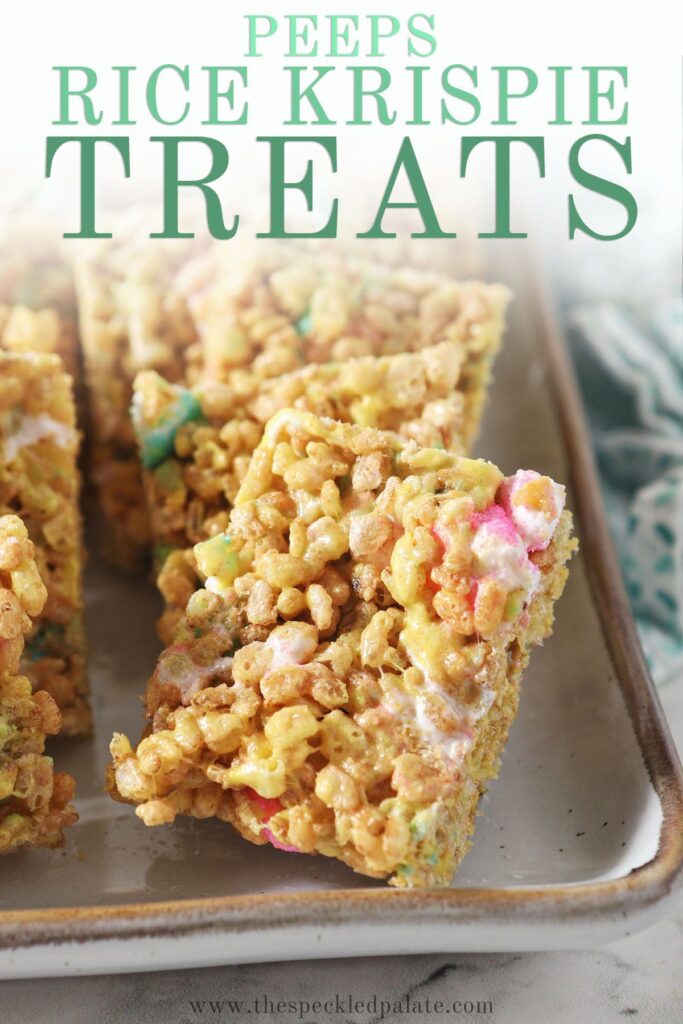
Peeps Rice Krispie Treats are the perfect Easter dessert! This fun twist on the classic no bake crispy rice treat recipe uses Peeps instead of traditional marshmallows. Learn how to make this Easter Rice Krispie Treats recipe, along with tips and tricks to make them perfectly every time. Makes 24 treats.
Love Easter treats? You’ve got to try Bunny Bait Easter Snack Mix, Carrot Cupcakes and Carrot Cake Dip with Cinnamon-Sugar Wontons.
Want to save this?
This post contains affiliate links.
It’s almost Easter, and I’d be remiss if I didn’t share this Easter Rice Krispie Treats recipe with y’all before it came and went this year.
Why? Because I found Peeps in my grocery store all the way back in January, and I’ve been tweaking and testing this recipe ever since.
And we’ve finally got it perfect… just in time.
While I’ve never been a fan of Peeps, this is my one exception… and it’s a GREAT recipe for sharing!
Why I love this recipe:
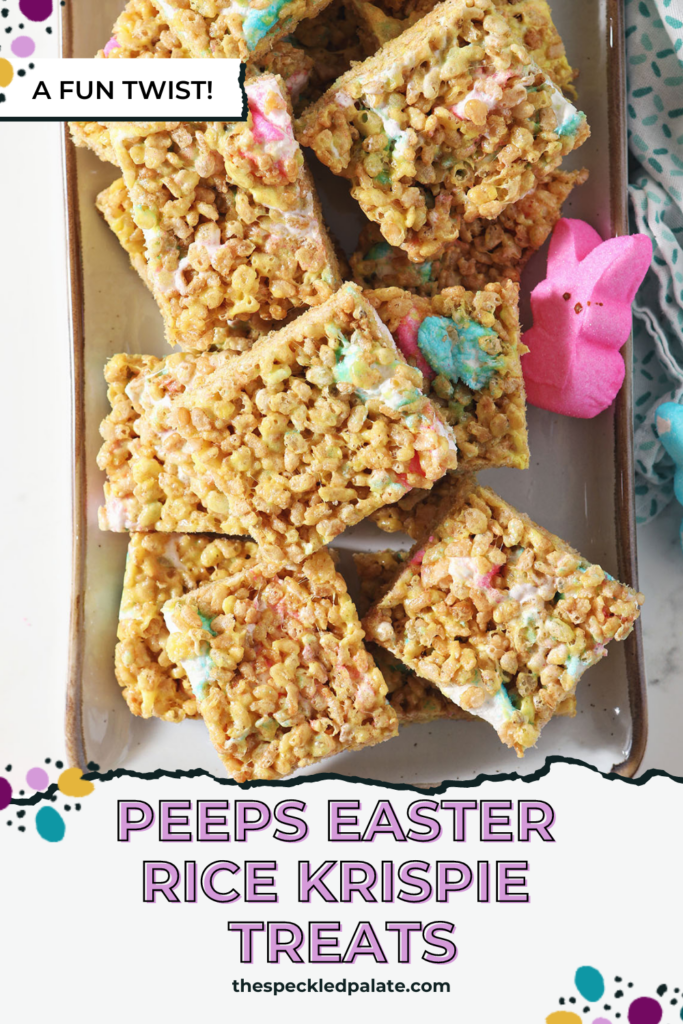
Simply put: These Peeps Rice Krispie Treats are super fun! They’re colorful, and you can choose your own colors, too, since Peeps are available in all the colors these days.
I went with the traditional yellow, but you do. 😉
Since we’re on a Rice Krispie Treat recipe binge this year, I’ve got to tell you that this one is a little different than the others.
Obviously, it looks different, but we’re also using a different cooking method — the microwave.
And because of this, these treats are an excellent recipe to make with your kids because we’re not even turning on the stovetop. (Please note that the Peeps get really hot and that you will need to use caution, but we’re not cooking ‘em on an open flame.)
More Easter recipes and treats to make: Carrot Cake Dip with Cinnamon-Sugar Wontons | Carrot Cupcakes | Chex Mix Puppy Chow | Cinnamon Sugar Pretzels | Cheesecake Dip | Oreo Rice Krispie Treats
Got sweet teeth? Check out my Dessert Recipe Index for inspiration.
What you need to make this recipe:
The Speckled Palate participates in affiliate programs. As an Amazon Associate, I earn a commission from qualifying purchases. Please refer to my disclosure page for more information about these affiliate programs.
- Nonstick cooking spray
- Wax paper or parchment paper
- 9”x13” inch pan or baking dish
- A large mixing bowl
- Rubber spatula
- Metal spatula
Let’s talk ingredients!
In addition to the tools above, you’re going to need some ingredients to make this recipe, too! Chances are, you might already have some of them in your fridge or pantry. Scroll down to the recipe card for the full measurements and instructions.
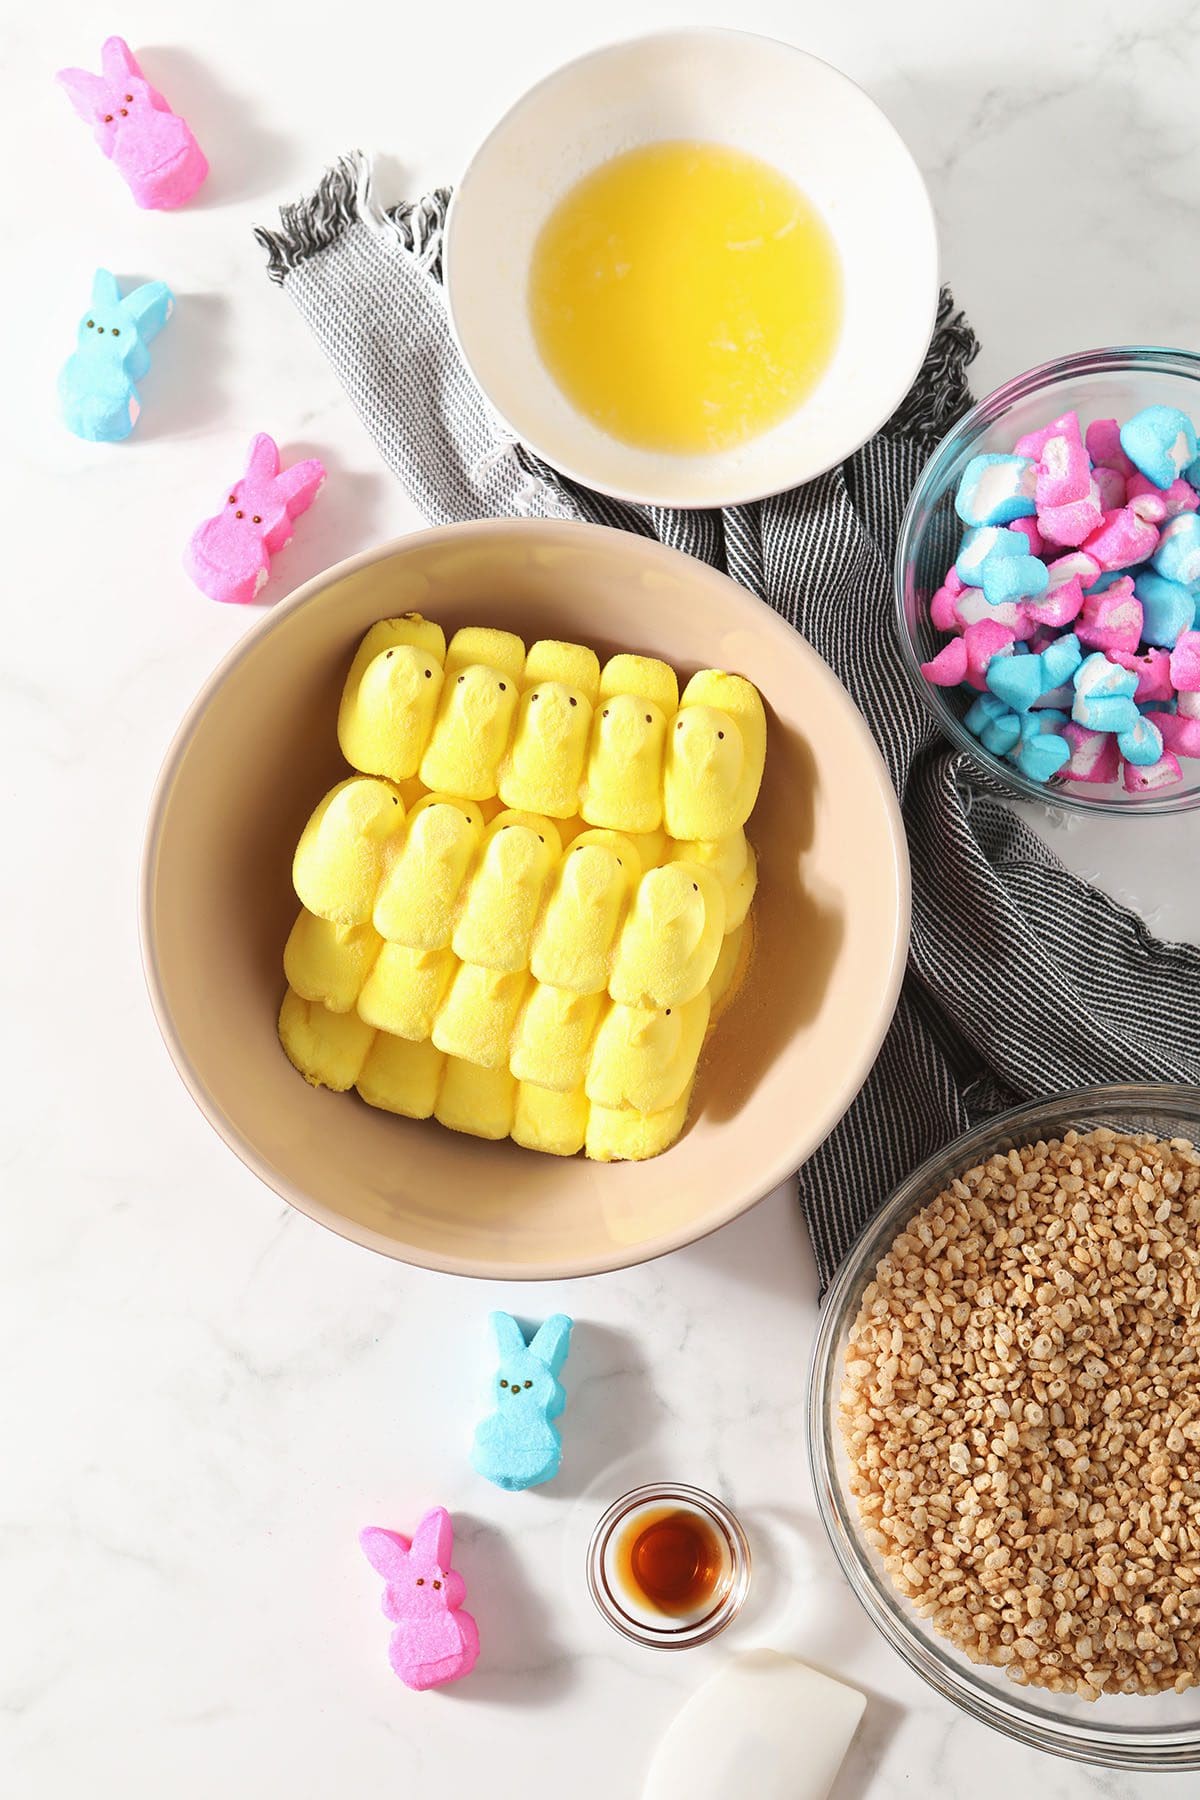
Here’s what you need to get from the store to make these colorful Easter treats:
- Crispy rice cereal — use your favorite brand! I’ve been known to make these with the whole wheat variety for my kids, but honestly, any variation is good. (Fun fact: Rice Krispies cereal isn’t gluten free, but there are lots of brands that are. This post about Gluten Free Rice Krispies Treats has all the details for ya.)
- Salted butter — it’s just so good! If you don’t have it, you may use unsalted butter and add a ¼ teaspoon of salt.
- Marshmallow Peeps — use whichever kind and color makes you happy. We’re going to use them as the base for the treats (as opposed to regular marshmallows), as well as chop a few to add pops of color and texture throughout. I recommend using one color for the base of this recipe, then using other colors as the chunks throughout. If we melt a bunch of colors together for the base, they’ll become murky. I used yellow peeps, but you can use pink Peeps, blue Peeps, purple Peeps, etc.
- Vanilla extract — this adds just a little more flavor, in my opinion, and the combination of vanilla with marshmallow and butter is simply divine.
How to make this Peeps Rice Krispie Treat recipe
Prepare the pan. I like using a 9”x13” baking dish for treats like this. Make sure to line it with wax paper. This will make removing the crispy rice treats easy.
You can also give the paper a spritz with nonstick cooking spray to ensure your treats will remove easily. Set aside.
Measure the cereal into a large bowl, and set aside. We won’t be mixing these in this bowl, but having this measured out before our Peeps-butter mixture is melty is important.
Chop the extra Peeps. We want these to be bite-sized, so they can be stirred into the treats and be scattered throughout. They are sticky, so work slowly. Set aside.
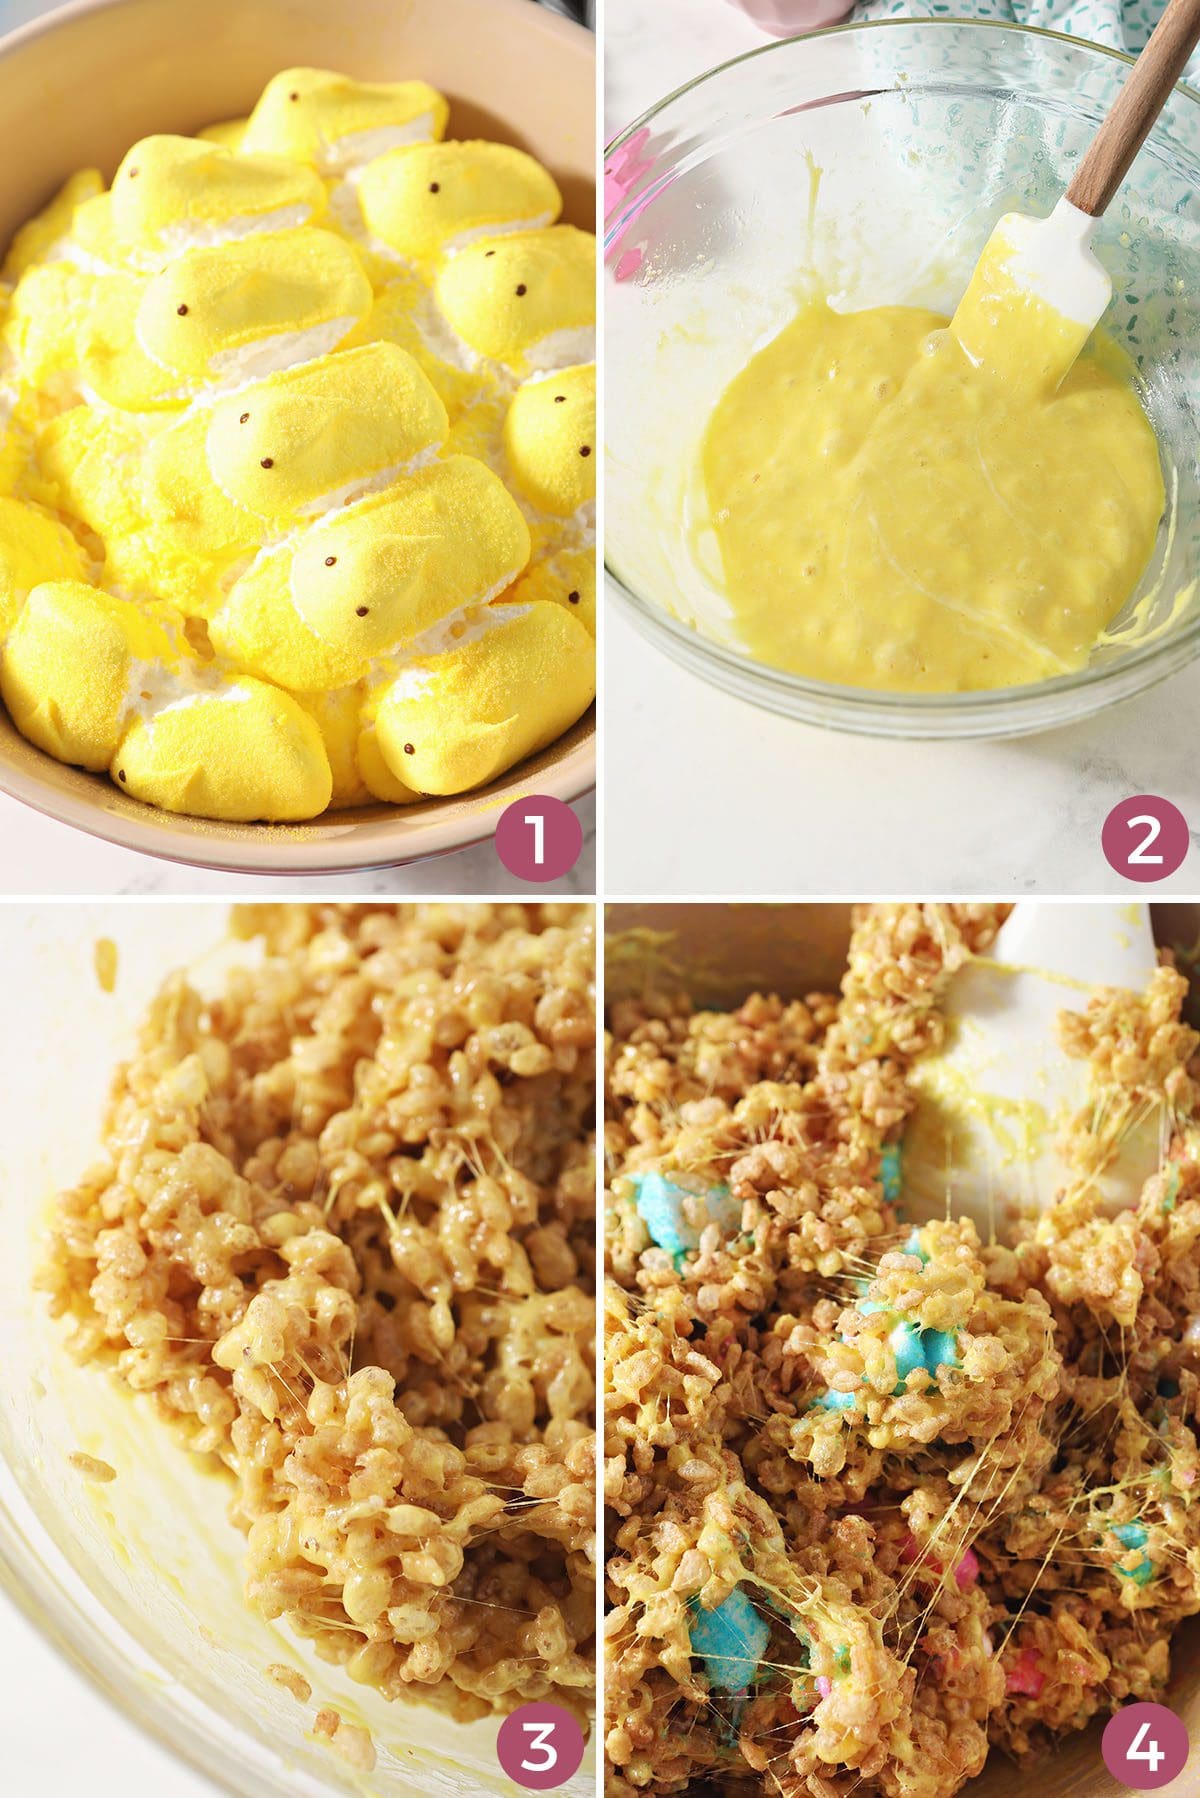
Make the krispie treat base. Melt butter in a saucepan or in a microwave-safe bowl… then add it to a large bowl with the Peeps.
Place the bowl in the microwave in 45-second increments until melted and delicious. (Mine took about 1.5 minutes total.) Please use extreme caution — these get really hot!
Stir vigorously once completely melted, then add the splash of vanilla.
DID YOU KNOW?
We melt the Peeps and butter in the microwave because this will help them retain their brilliant color. If we do this on the stovetop, even over low heat, their colors will become a little more muted because the sugar on the exterior of the Peeps will cook.
Mix the treats. Pour the cereal into the large bowl with the butter and marshmallow mixture.
Stir quickly until the cereal is completely coated, then stir in the additional Peeps until combined.
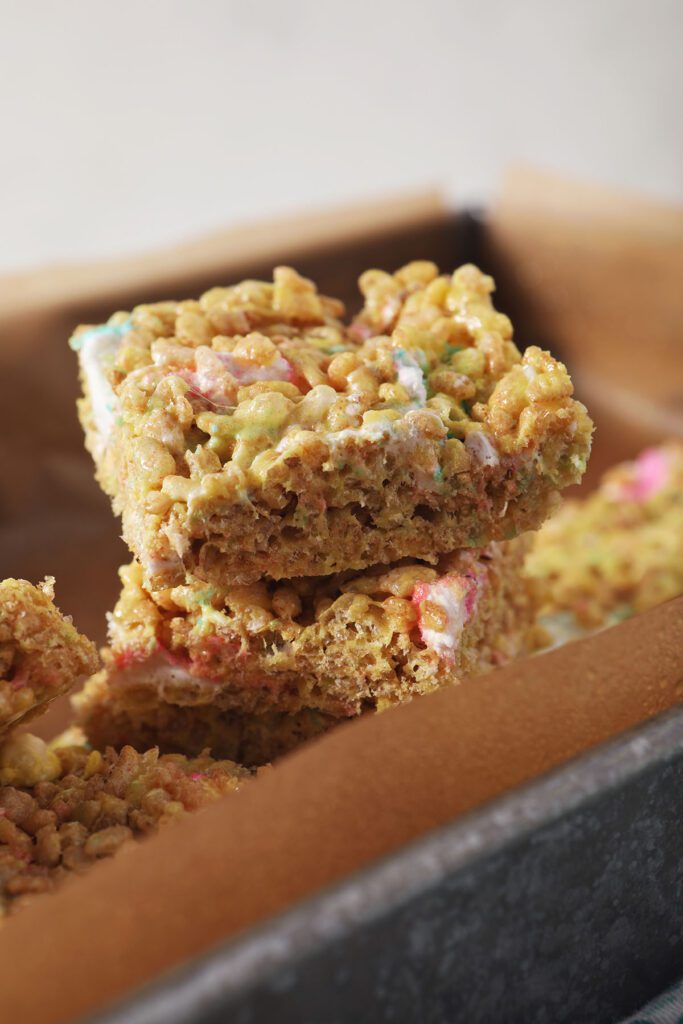
Make the bars. Pour the mixture into the prepared baking pan. Gently press mixture into an even layer with a rubber spatula or an offset spatula.
If your spatula begins sticking, spritz with the nonstick cooking spray.
Pro tip!
Do not be tempted to press down hard on the mixture because this will make your treats more compact.
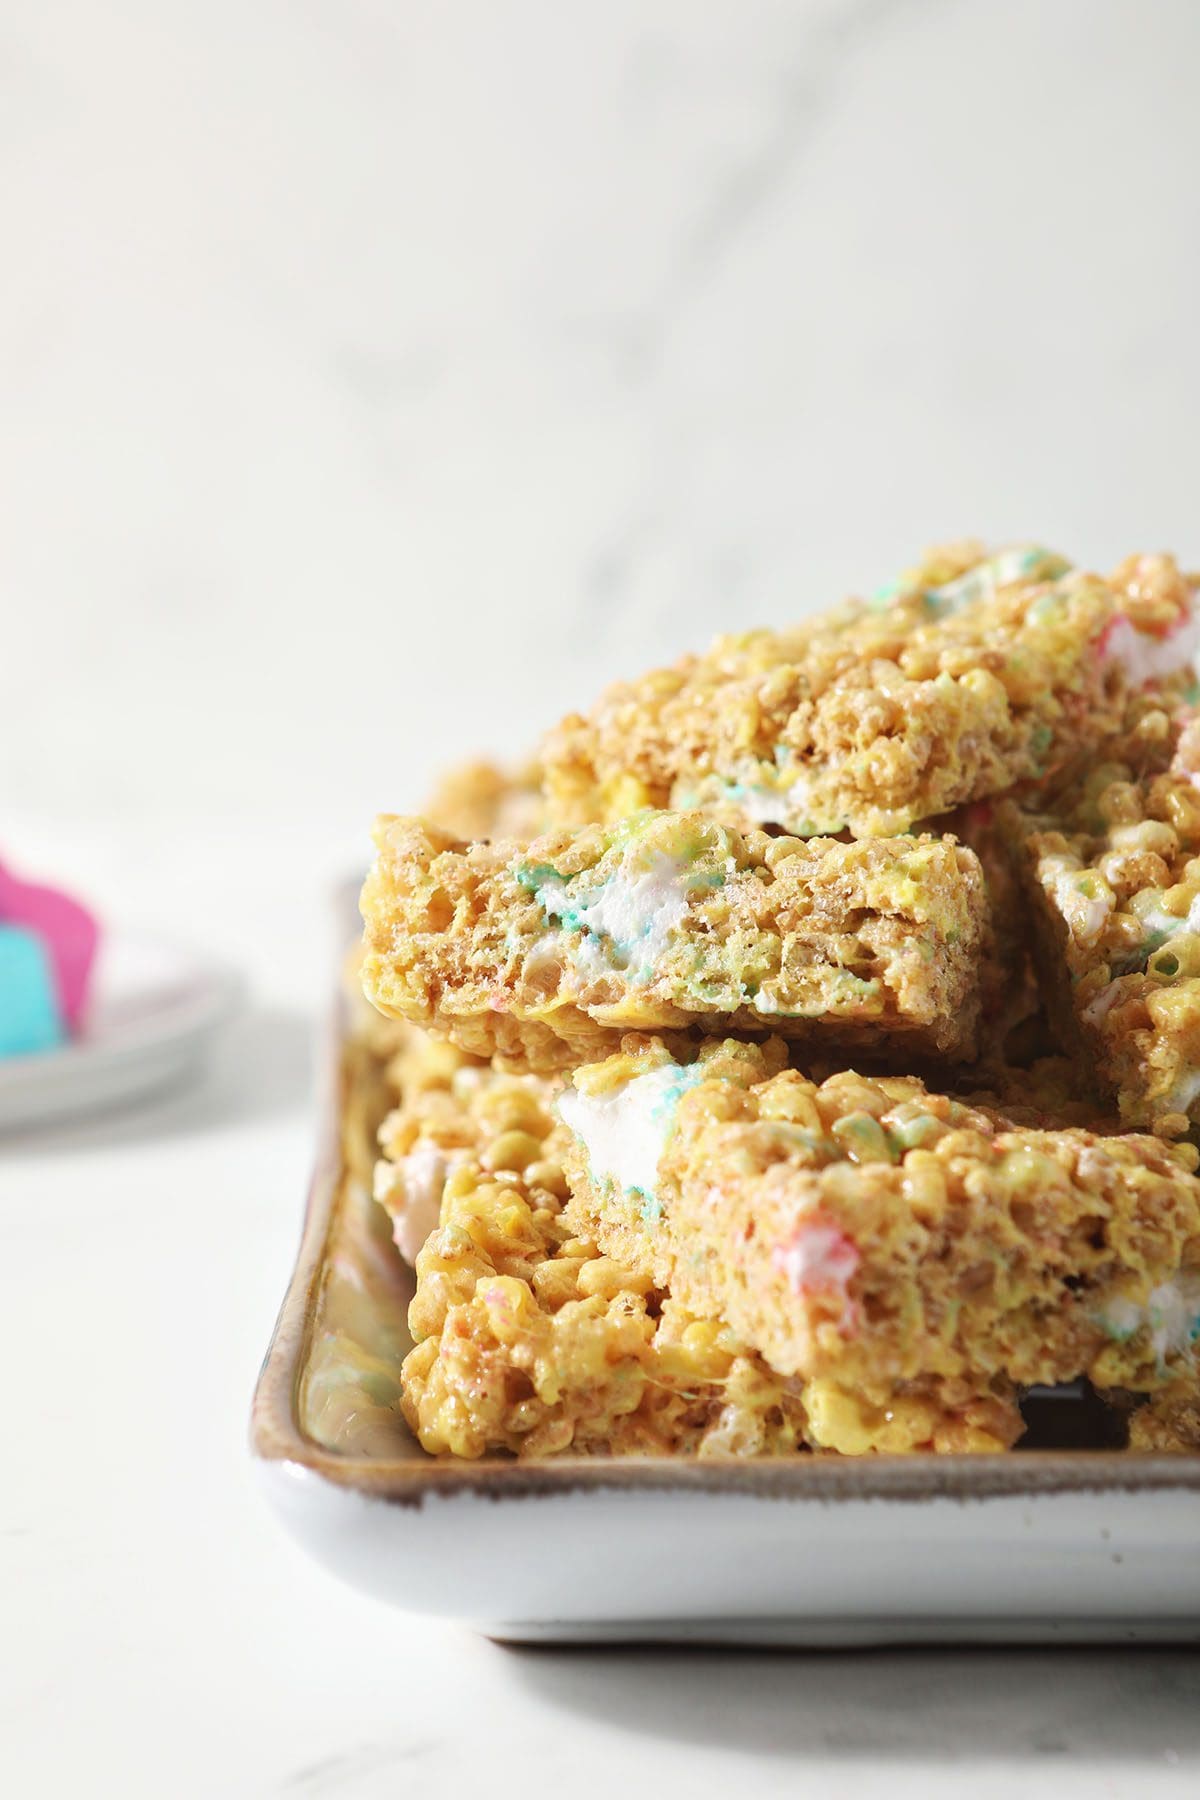
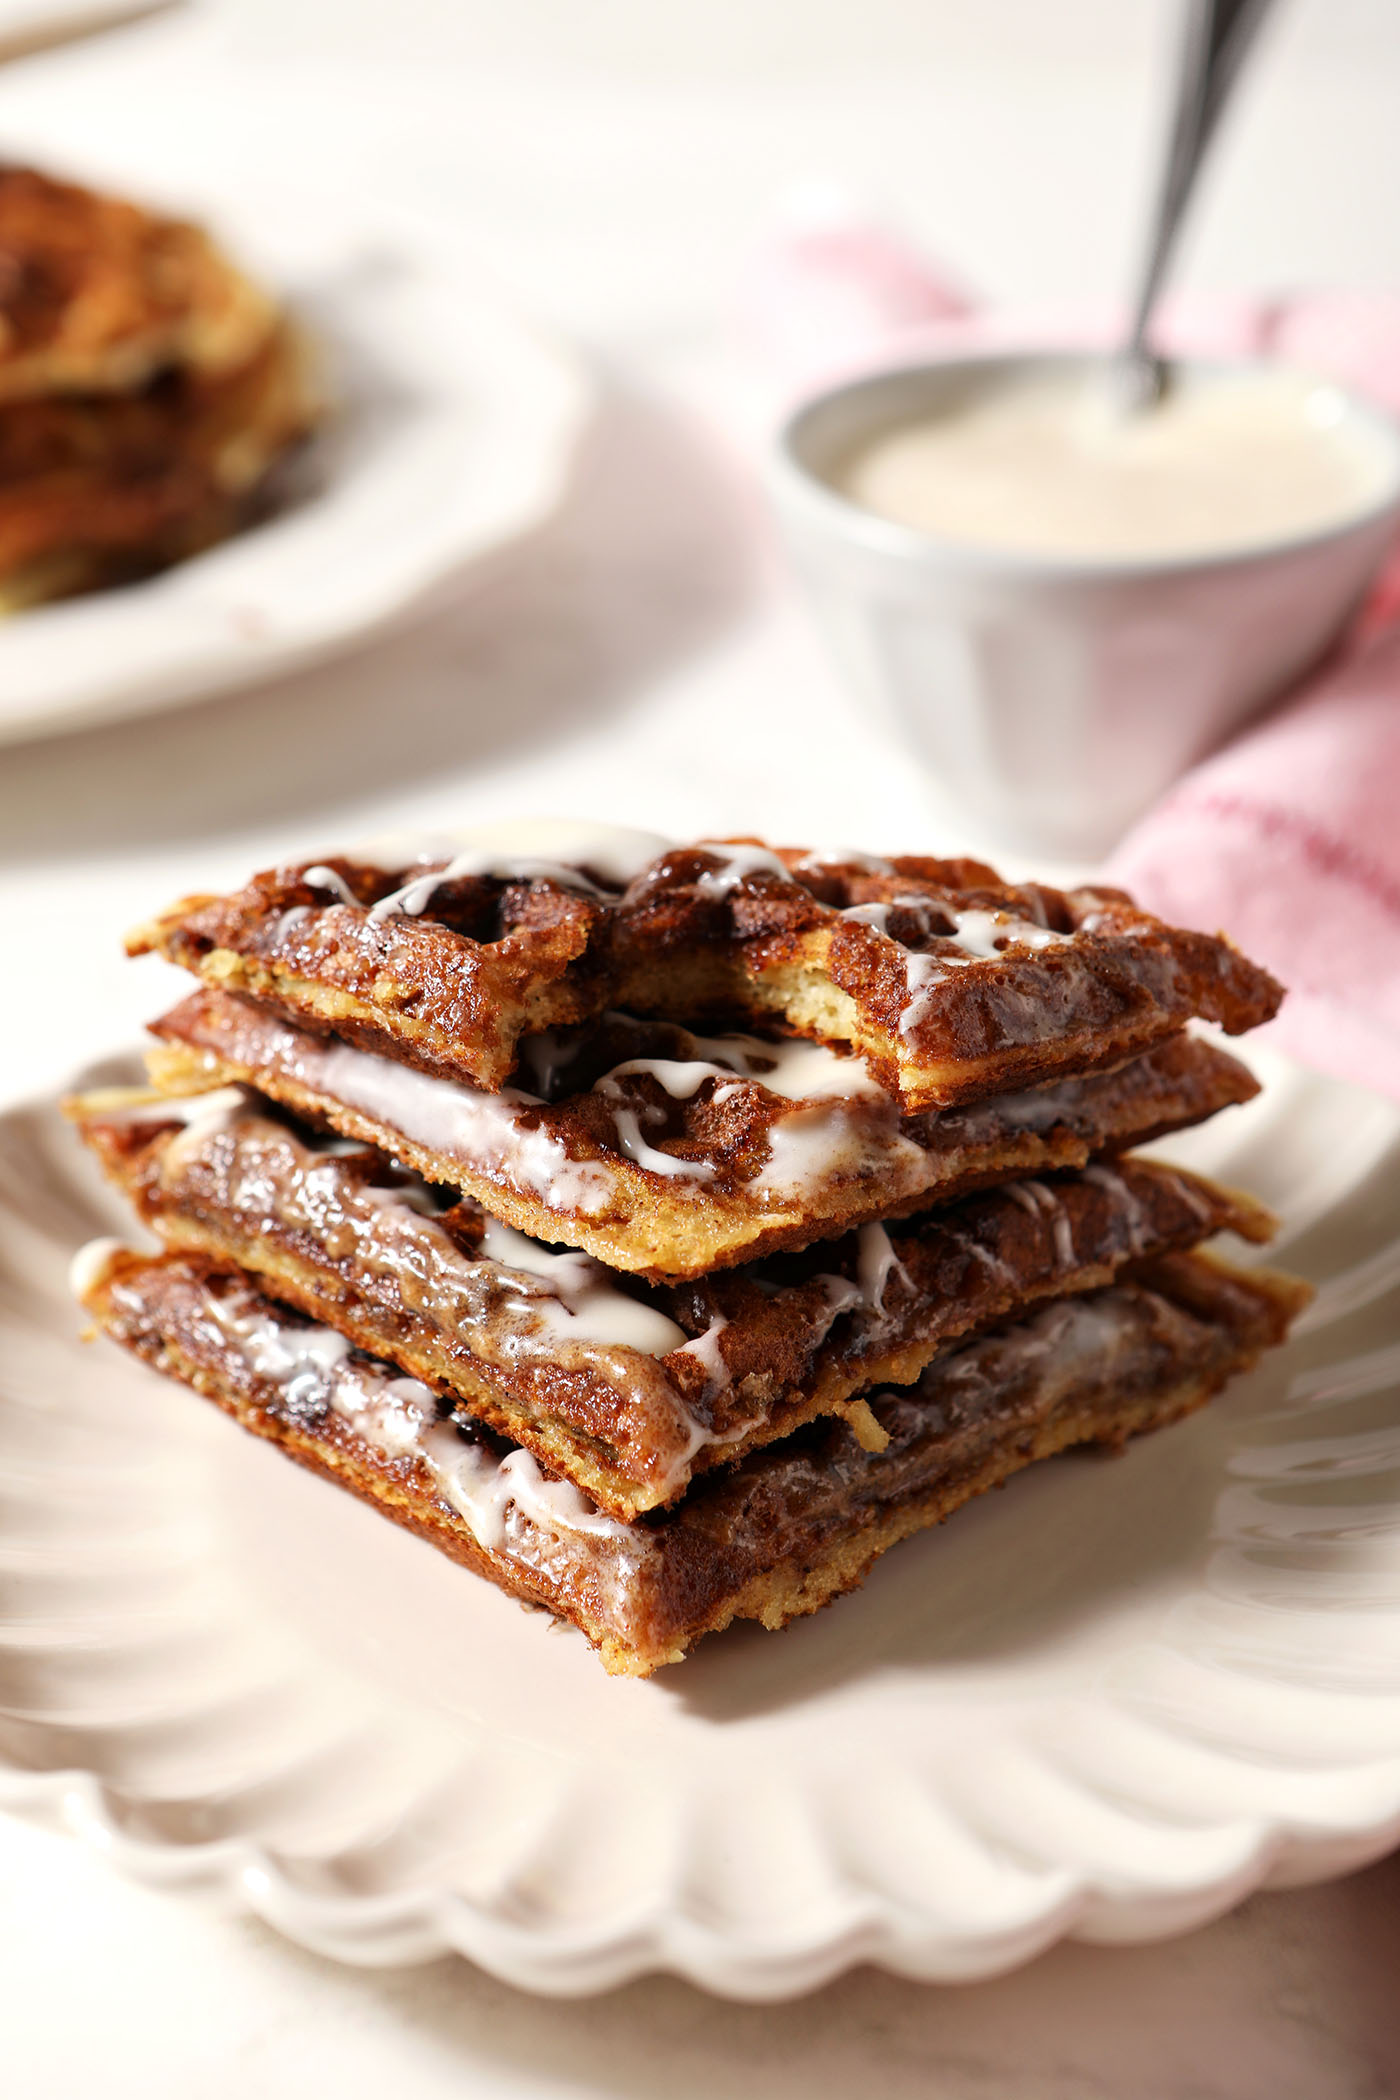
Let the treats cool for about 20-30 minutes, then cut into rectangles with a sharp knife or use cookie cutters to cut them into cute shapes.
Frequently Asked Questions
The treats harden as they cool, so it’ll take at least 30 minutes after they’ve been in the pan.
I’ve read that too much butter will lead to soggy krispie treats.
Peeps are a fun and festive way to switch up your favorite crispy rice treats. They are still marshmallows, but they’re not the classic ones.
Simply put, no. A marshmallow’s texture changes and it loses moisture as it sits. You will have a harder time getting your marshmallows to melt. They also run the risk of overcooking and making tougher treats since you’d need to cook them for longer.
Quick Tips and Tricks for the best crispy rice treats
- Use fresh Peeps. They melt more easily and will provide a better texture for your treats. (How do I know this? I’ve attempted this recipe with older marshmallows, and they didn’t turn out quite right.)
- Don’t use the stovetop or a large saucepan. We want the Peeps to retain their color as they melt, and if we put them under a flame, they run the risk of becoming more muted.
- Similarly, use a singular color of Peeps for the base of the treats. When we stir the Peeps, their colors will run and become murky. I like to use a single color for the base of the treats, then I mix in other colors for additional pop!
- Store in an airtight container at room temperature for 2-3 days. After this point, the treats will begin to harden.
- Add some more color by adding festive Easter sprinkles into the treats and on top.
Other Rice Krispie Treat recipes to try:
My entire family is obsessed with our Homemade Rice Krispie Treats recipe. The girls are also VERY into Chocolate Rice Krispie Treats… and for good reason.
We love seasonal variations of these classic treats, too! Check out Christmas Rice Krispie Treats, July 4 Rice Krispie Treats, Halloween Oreo Rice Krispie Treats and Halloween Rice Krispie Treats.
I cannot wait to try these decadent Salted Brown Butter Bourbon Rice Krispie Treats, if you’re in the market for a more unique twist on this classic.
Here’s how you make these…
Easter Rice Krispie Treats
EQUIPMENT
As an Amazon Associate and member of other affiliate programs, I earn from qualifying purchases.
Ingredients
- 4.5 oz. multi-colored Peeps marshmallows cut into bite-sized pieces
- 5 cups crispy rice cereal
- 6 tablespoons salted butter
- 9 oz. Peeps marshmallows 2-4.5 oz. packages of a single color
- 1 teaspoon pure vanilla extract
Want to save this?
Instructions
- Line a 9”x13” baking dish with wax or parchment paper. Spritz with nonstick cooking spray. Set aside.
- Chop the multi-colored Peeps into bite-sized pieces. Set aside.
- Pour the crispy rice cereal into the large bowl, and set aside.
- In a very large, microwave-safe bowl, melt the butter in the microwave for 30-seconds, covered.
- Once the butter has melted, add the whole Peeps.
- Melt in 45-second increments until the Peeps have melted completely. They will expand in the microwave as they melt, so keep an eye on them. (Mine took around 1.5 minutes-2 minutes.)
- Stir vigorously, then add the vanilla extract, and stir a little more.
- Pour the cereal into the marshmallow mixture, and stir quickly until the cereal is coated.
- Add the chopped Peeps, and stir until mixed in.
- Pour the cereal bar mixture to the prepared baking pan and gently spread the mixture into an even layer with a rubber spatula. (If the mixture begins sticking, spritz the spatula with the nonstick cooking spray.) Do not press down hard on the mixture, as your treats will be more compact.
- Let the treats cool completely, about 20-30 minutes.
- Cut into squares with a sharp knife, and enjoy within 2-3 days.
Video
Notes
Nutrition

About the Author:
Erin Parker is a Southern gal living in Texas with her husband and two daughters. She started The Speckled Palate to share what she was cooking as a newlywed… and over the years, it’s evolved to capture her love for hosting. Specifically, the EASIEST, lowest key entertaining because everyone deserves to see their people and connect over good food. Learn more about her…

This is a wonderful way to use up peeps. I didn’t add the chopped up extras but the recipe still worked out fine. Delicious and fun!
SO happy to hear this recipe worked for you, Carolyn! And I agree: these treats are totally delicious AND fun! And we probably need to use our remaining Easter Peeps to make a batch soon…