
Halloween Rice Krispie Treats
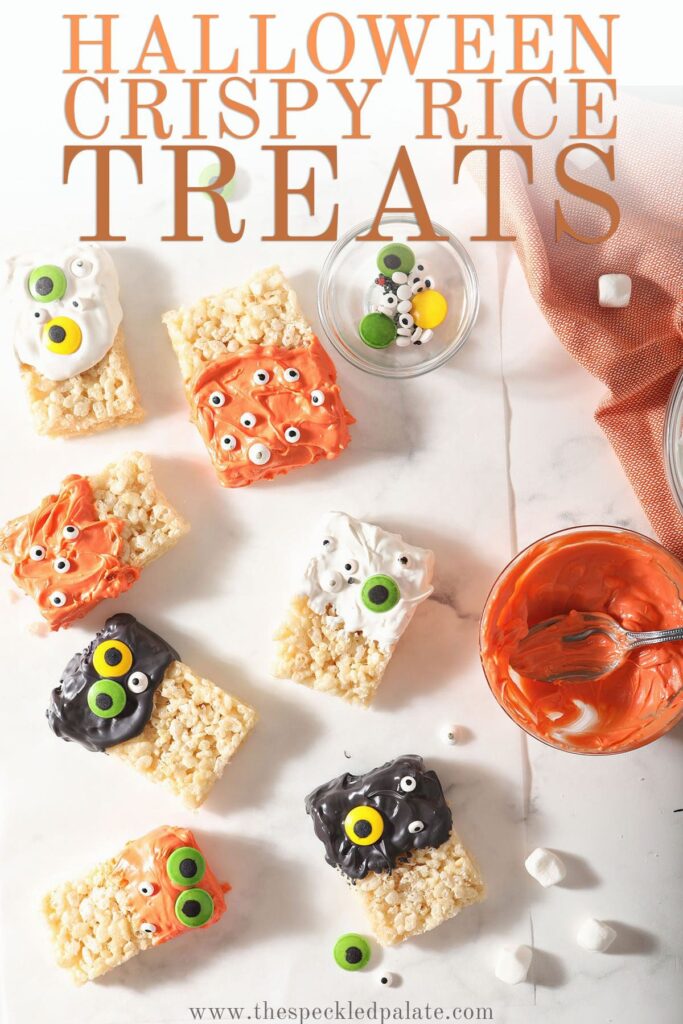


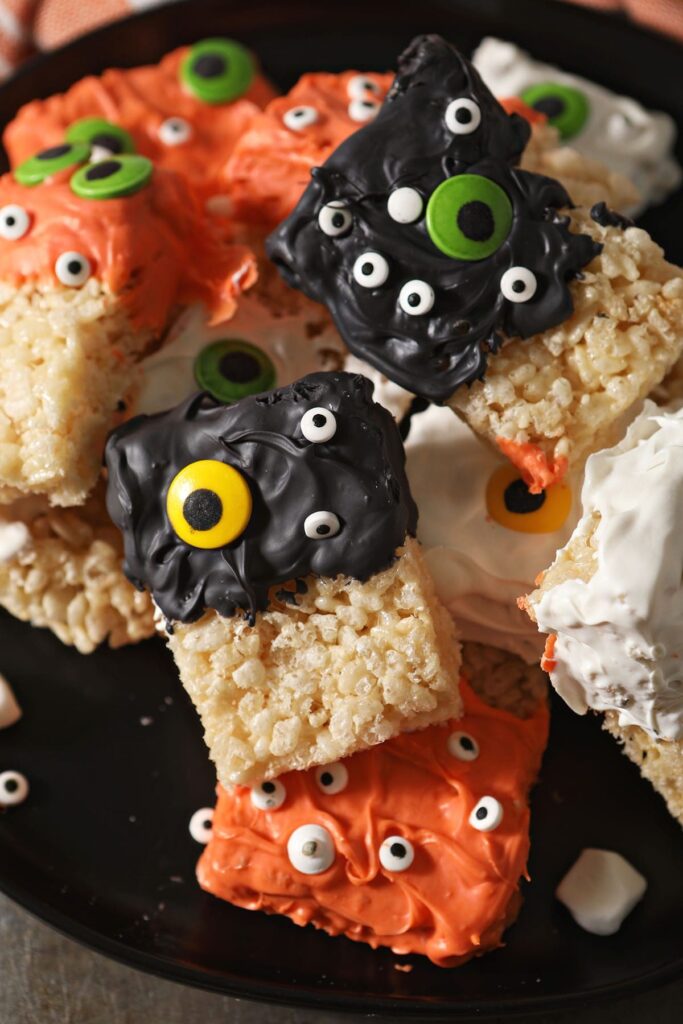
Halloween Rice Krispie Treats are a fun, spooky no-bake dessert for the whole family to enjoy! Make ‘em from scratch before slicing into rectangles and turning them into monsters, complete with edible eyes. This Halloween dessert recipe is ready in less than an hour but requires a little cooling time. Makes 12 krispie treats.
Love Halloween recipes? Try out Halloween Popcorn Snack Mix, Fizzy Potion Halloween Punch and Halloween Funfetti Cookies!
Want to save this?
I got a wild hair last week.
As someone who loves making recipes with her kids, I realized that I didn’t have some classic desserts. And obviously, I needed to introduce my girls to them.
This led us to making three batches of Rice Krispie Treats in the span of two hours.
It also led us down a decoration rabbit hole that was wonderfully fun, messy and perfect for a day off.
Why I love this recipe:
It’s hard not to love a crispy rice treat, right? They taste like childhood, and there’s something beautiful about the balance of flavors.
My biggest thing is that this Halloween Rice Krispies Treats recipe, even with the candy coating and eyeballs, isn’t too sweet.
They’re super cute, yes, but they also taste really good.
They’re also really fun to make with your kids. Keep in mind that kids have different skill levels. Do what works best for you and yours.
Also, make sure to grab the specialty ingredients to make this recipe. They really do make a difference in elevating the humble Rice Krispie Treat into a spooky-cute halloween treat.
Other easy desserts to make with your kids: No Bake Scotcheroo Cookies | Funfetti Dip | Speculoos No-Bake Cookies | Chocolate Cheesecake Dip | Halloween Oreo Rice Krispie Treats | Christmas Rice Krispie Treats | Halloween Bark | Pumpkin Pie Spice Rice Krispie Treats
Got sweet teeth? Check out my Dessert Recipe Index for inspiration.
What you need to make this recipe:
The Speckled Palate participates in affiliate programs. As an Amazon Associate, I earn a commission from qualifying purchases. Please refer to my disclosure page for more information about these affiliate programs.
- Nonstick cooking spray
- Wax paper or parchment paper
- A large pot (like a 6-7 qt. Dutch oven large)
- 9”x13” baking dish
- A large mixing bowl
- Rubber spatula
- Metal spatula
Let’s talk ingredients!
In addition to the tools above, you’re going to need some ingredients to make this recipe, too! Chances are, you might already have some of them in your fridge or pantry. Scroll down to the recipe card for the full measurements and instructions.
Here’s what you’ll need to grab from your local grocery store:
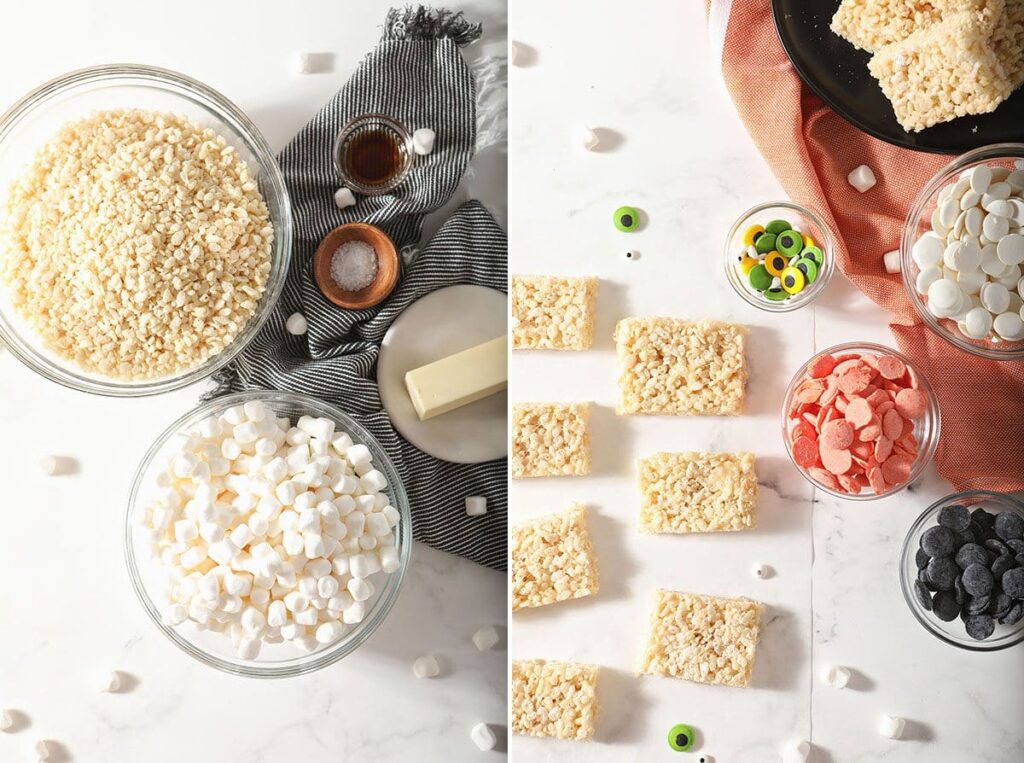
- Crispy rice cereal — use your favorite brand! I’ve made these with a whole wheat variety, too. Just be sure they’re fresh!
- Butter — you can use salted or unsalted butter. If using salted butter, don’t add the extra salt. If using unsalted butter, you need a little extra sprinkle of salt. I have more details about this below so you know how much to add.
- Vanilla extract — this lets the flavors sing. Also, the combination of vanilla with marshmallow and butter is divine.
- Marshmallows — mini marshmallows melt best and easiest! Make sure they’re fresh.
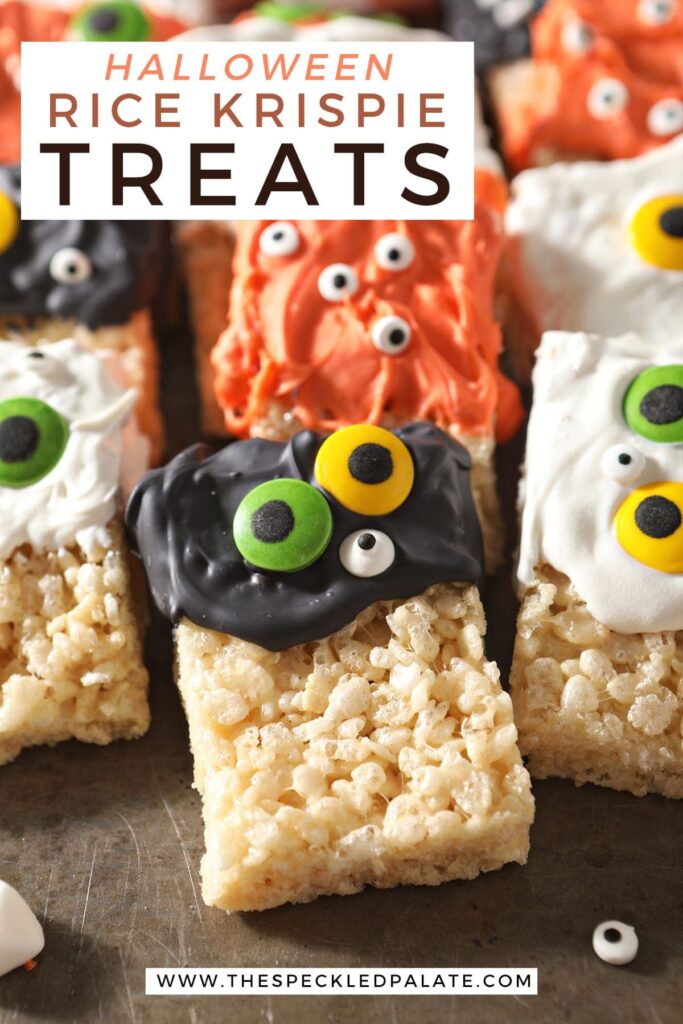
- Candy melts — I used white candy melts, black candy melts and orange candy melts to create these monster krispie treats, but you could honestly use whatever colors you like! Melt them for about a minute in the microwave, until gooey, and then dip your treats immediately and spread the melts with a knife. You could also use melted chocolate or white chocolate if you’d prefer those flavors instead.
- Candy eyes — in order to get the whole monster effect, you’ve GOT to invest in candy eyeball sprinkles! These are pretty readily available at grocery stores and craft stores, so grab ‘em where you find ‘em and use as many as you want to decorate your monsters. I find the ones with multiple eyes wonderfully (and creepily) cute.
Did you know that classic Rice Krispies cereal isn’t gluten free? If you want to make yours GF, check out this post from my friend Meg to learn about her favorite gluten free brand of crispy rice cereal.
How to make Rice Krispie Treats
Prepare the pan. I use a 9”x13” baking dish lined with wax paper. This will make removing the treats easy.
You can spritz the pan with nonstick cooking, too. Set aside.
Measure out the cereal into a large bowl, and set aside. We won’t be mixing these in the bowl itself, but having this measured out before our marshmallow-butter mixture is melty is important.
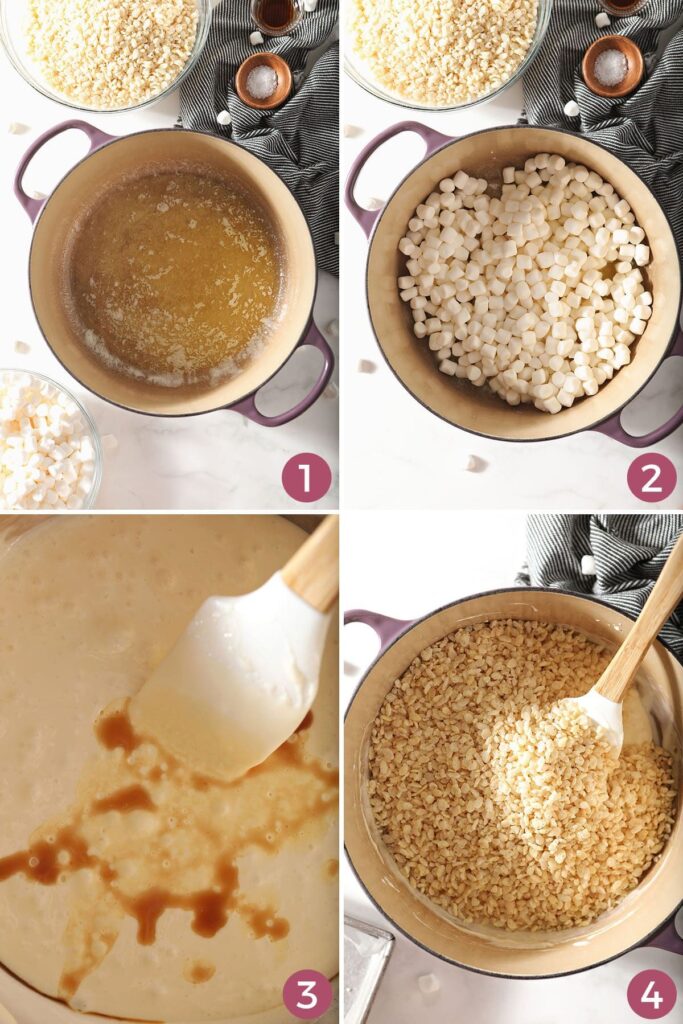
Make the krispie treat base. In a large pot, melt butter over medium heat with the salt, then add marshmallows and stir. Continually stir until completely melted, then splash in the vanilla and stir.
Mix the treats. Remove from heat, and pour the cereal into the pot with the marshmallow mixture. Stir quickly until the cereal is completely coated.
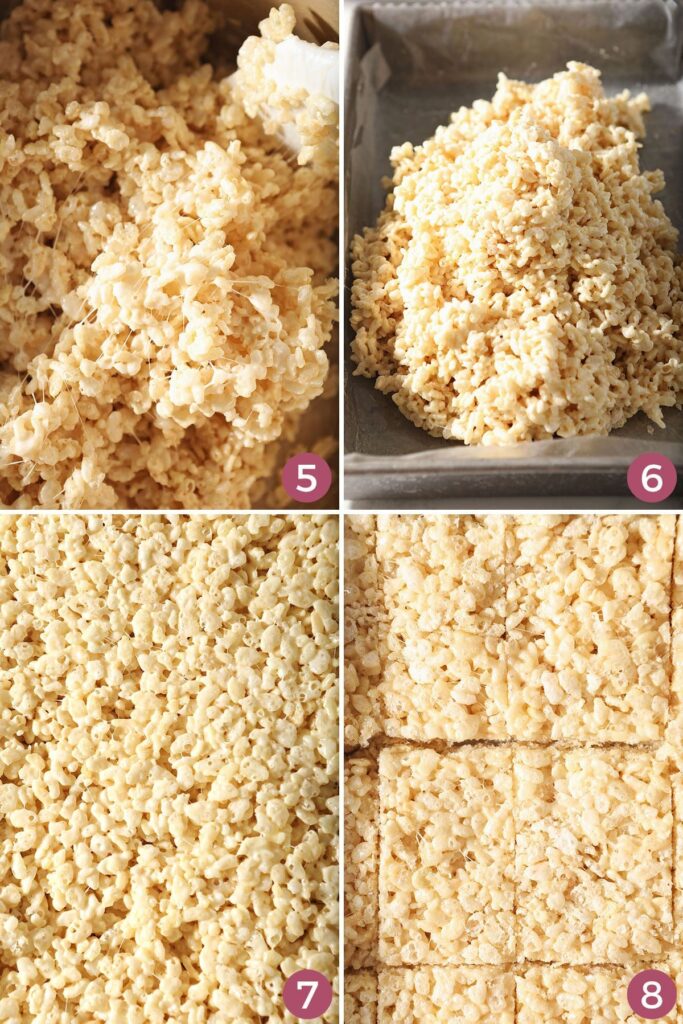
Make the bars. Pour the mixture into the prepared baking pan. Gently spread it into an even layer with a rubber spatula. If your spatula begins sticking, spritz with the nonstick cooking spray.
Pro tip!
Do not press down hard on the mixture. This will make your treats more compact and less crunchy.
Let the treats cool for about an hour, then cut into rectangles with a sharp knife.
How to turn Halloween Crispy Rice Treats into monsters
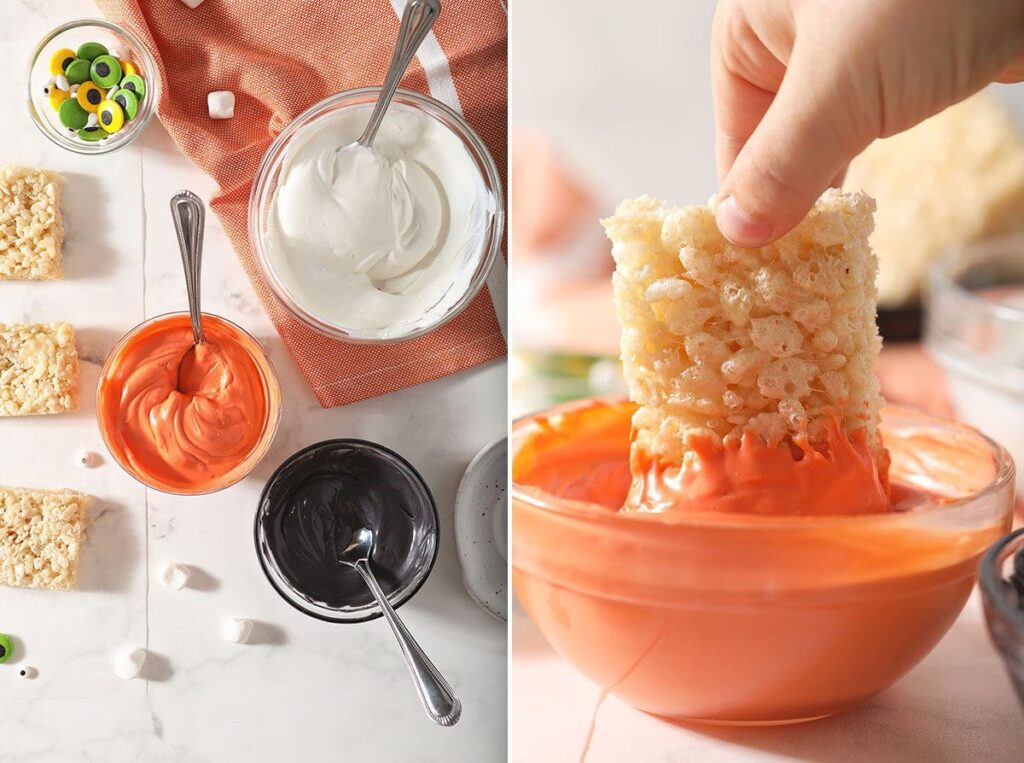
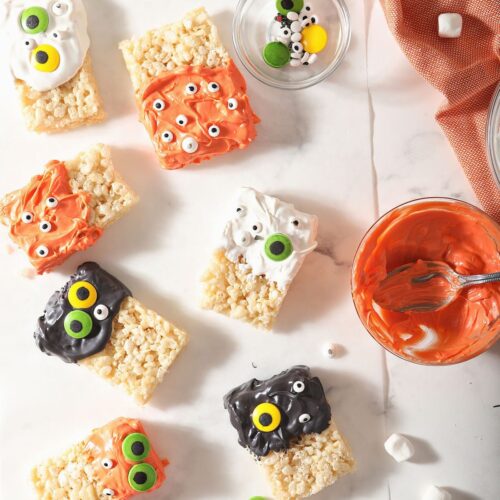
Melt the candy melts in separate microwave safe bowls for about a minute. Stir until smooth.
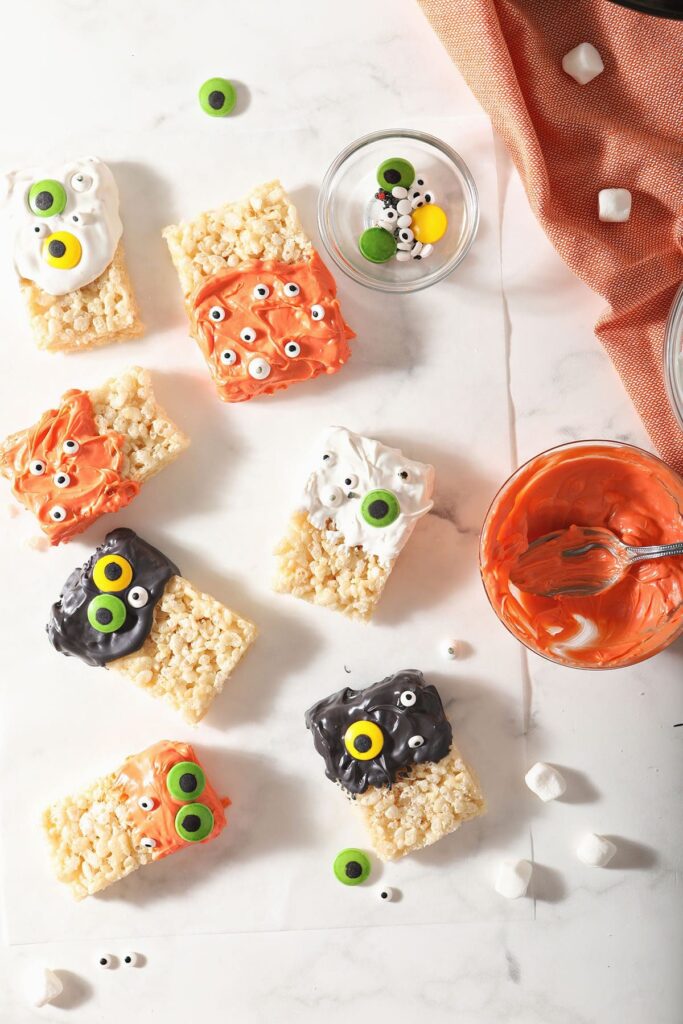
When the melts are at the desired temperature, dip the krispie treats about halfway into the melted candy. Use a knife or spoon to spread it into an even-ish layer and add candy eyeballs.
You can create a little texture with a spoon or knife after you’ve spread the melted candy. Do this before you add the eyeball sprinkles to give your monsters some texture.
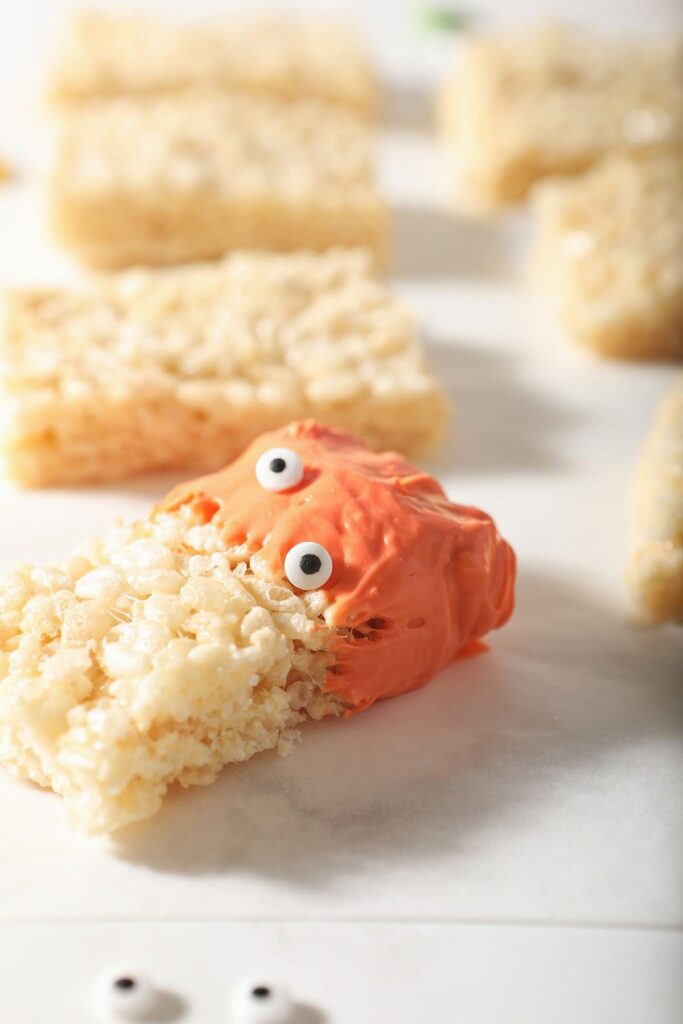
Let sit for another 30-45 minutes, or until the candy is set. Then enjoy the festive Halloween rice krispie treats!
Erin’s Easy Entertaining Tips
These Rice Krispie Halloween Treats would make the cutest no-bake Halloween party dessert for some serious Halloween fun.
They’re perfect for kids and adults, and they’re super fun to decorate, too, so what’s not to love.
If you want to share these at a party or another event, here are some ideas:
- Make the treats the day before. When they’re cool, cover with plastic wrap, and keep at room temperature.
- Double or triple the recipe. This one makes 12 treats, depending on the size. If you think your guests will want or need more, definitely plan ahead and make more.
- Alternately, use store-bought krispie treats. If you don’t have time to make them on your own, purchase the pre-packaged ones and decorate!
- Decorate the monsters with enough time to set them on a platter. Have fun with ‘em and use all kinds of colors and candy eyeballs. While I used white, black and orange candy melts, green and purple would be awesome options for more, too.
- Let your guests decorate the monsters. Wouldn’t it be fun to get guests in on the decorating? If hosting kids and adults, let the adults handle the candy melts, and let the kids spread the melts and decorate.
Frequently Asked Questions
Marshmallows are an integral part of krispie treats, so I do not recommend finding a substitute for them.
The treats harden as they cool. It’ll take at least 30 minutes.
Too much butter will lead to soggy krispie treats.
No. As marshmallows sit in the pantry, they lose moisture, which changes their texture. They have a harder time melting, and when they do, they run the risk of overcooking and making your treats tough.
Quick Tips and Tricks for the best crispy rice treats
- Use fresh marshmallows. They melt more easily and will provide a better texture for your treats. (How do I know this? I’ve attempted this recipe with older marshmallows, and they didn’t turn out quite right.)
- Store in an airtight container at room temperature for 2-3 days. After this point, the treats will begin to harden.
- Add your favorite Halloween candy. Make them candy monsters after dipping the classic rice krispie treats into the candy melts. Add candy corn, chocolate chips, etc.
- Make them your own. While I made these monsters, you could turn Halloween Rice Crispy Treats into ghosts or mummies, too! Have fun with it.
More fun Halloween treats:
- Halloween Peanut Butter Chocolate White Chocolate Chip Cookies
- Halloween Brownies
- Dessert Nachos
- Easy Halloween Rum Balls
Halloween Rice Krispie Treats
EQUIPMENT
As an Amazon Associate and member of other affiliate programs, I earn from qualifying purchases.
Ingredients
Krispie Treats
- 6 tablespoons unsalted butter
- ¼ teaspoon kosher salt
- 10 oz. mini marshmallows about 6 cups
- 1 teaspoon pure vanilla extract
- 6 cups crispy rice cereal
Decorations
Want to save this?
Instructions
Make the Rice Krispie Treats
- Line a 9”x13” baking dish with wax paper. This will make removing the crispy rice treats easy. Set aside.
- Pour the rice cereal into the large bowl, and set aside.
- In a large pot, melt the butter over low heat with the salt.
- Once the butter has melted, stir in the marshmallows. Continually stir until completely melted.
- Add the splash of vanilla, and stir.
- Pour the cereal into the marshmallow mixture, and stir quickly until the cereal is coated.
- Pour the cereal bar mixture to the prepared baking pan and gently spread the mixture into an even layer with a rubber spatula. (If the mixture begins sticking, spritz the spatula with the nonstick cooking spray.) Do not press down hard on the mixture, as your treats will be more compact.
- Let the treats cool completely, about 1 hour.
- Cut into rectangles with a sharp knife, and enjoy within 2-3 days.
How to decorate Halloween rice krispies treats
- Heat the candy melts in separate bowls for about a minute each, or until the candy has completely melted and is smooth.
- Dip the krispie treats into the candy melts, and remove. Spread the candy melt with a spoon or an offset spatula into an even layer, and add a little texture by using pressure on the spoon/spatula to create divots.
- Carefully place candy eyeball sprinkles onto the candy melts with your fingers. (Be mindful, as the candy melts can still be pretty hot at this point.)
- Let the krispie treats cool for 30-45 minutes, or until the candy is set, then enjoy!
Notes
Nutrition

About the Author:
Erin Parker is a Southern gal living in Texas with her husband and two daughters. She started The Speckled Palate to share what she was cooking as a newlywed… and over the years, it’s evolved to capture her love for hosting. Specifically, the EASIEST, lowest key entertaining because everyone deserves to see their people and connect over good food. Learn more about her…


Before leaving a comment or rating, ask yourself: