Chocolate Ooey Gooey Bars
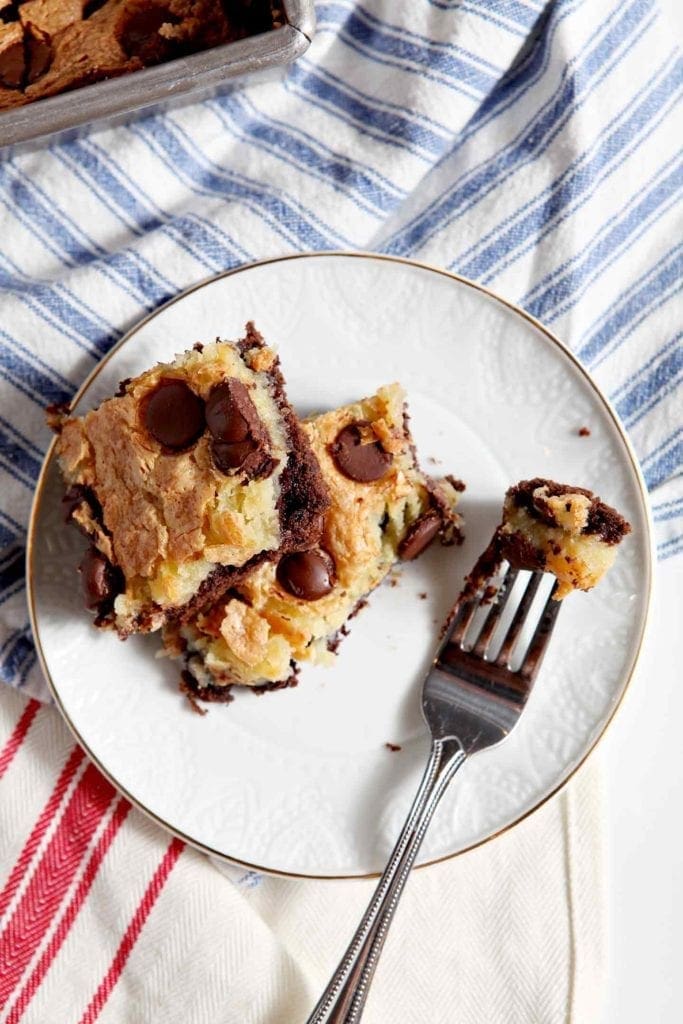
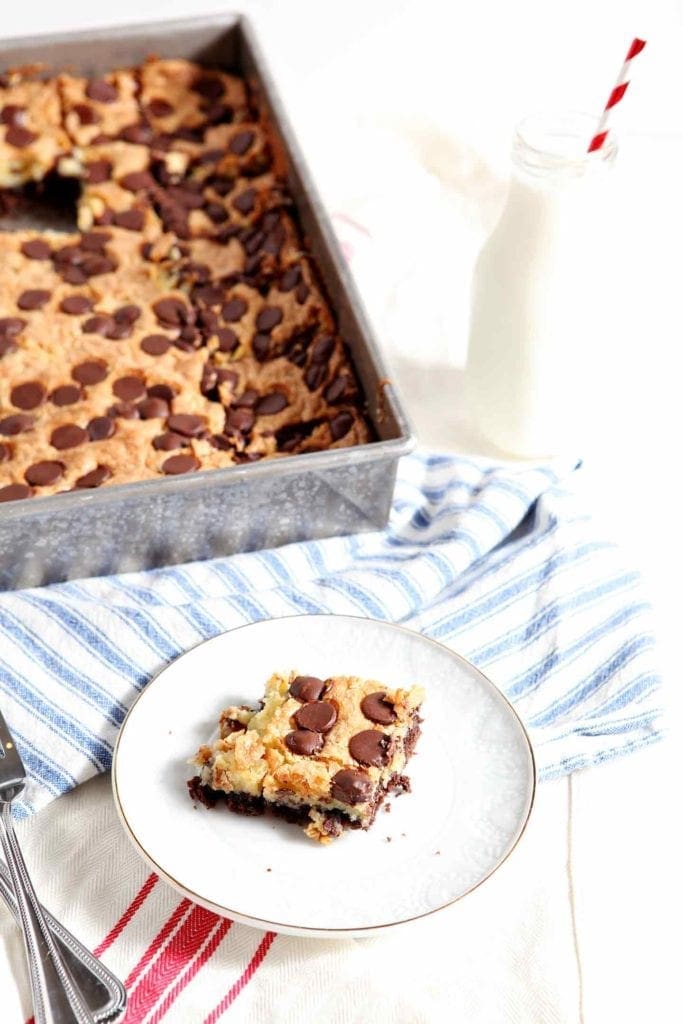
Chocolate Ooey Gooey Bars are chocolate cheesecake dessert perfection. These brownie cheesecake bars make an amazing treat and are excellent for sharing. Baked to ooey gooey perfection, these decadent cheesecake brownies are ready to enjoy in less than an hour. Makes 24 bars.
Love a good bar dessert? Don’t miss Easy Lemon Bars and Funfetti Sugar Cookie Bars!
The photos and recipe for these Ooey Gooey Bars was originally published on October 13, 2011. This post was updated in May 2021.
This Cheesecake Brownie recipe is utterly, decadently delicious. They’re also a little bit addictive in the sense that once you try one, you’ll want another… and another… and another.
As a 21st birthday present, my mother collected 21 eclectic recipes to share with me — some from family members, others from cookbooks or family friends.
These Ooey Gooey Bars were from a family friend, and they were a hit from the get go.
Why I love this recipe:
Over the years, I’ve adapted these Chocolate Cheesecake Bars.
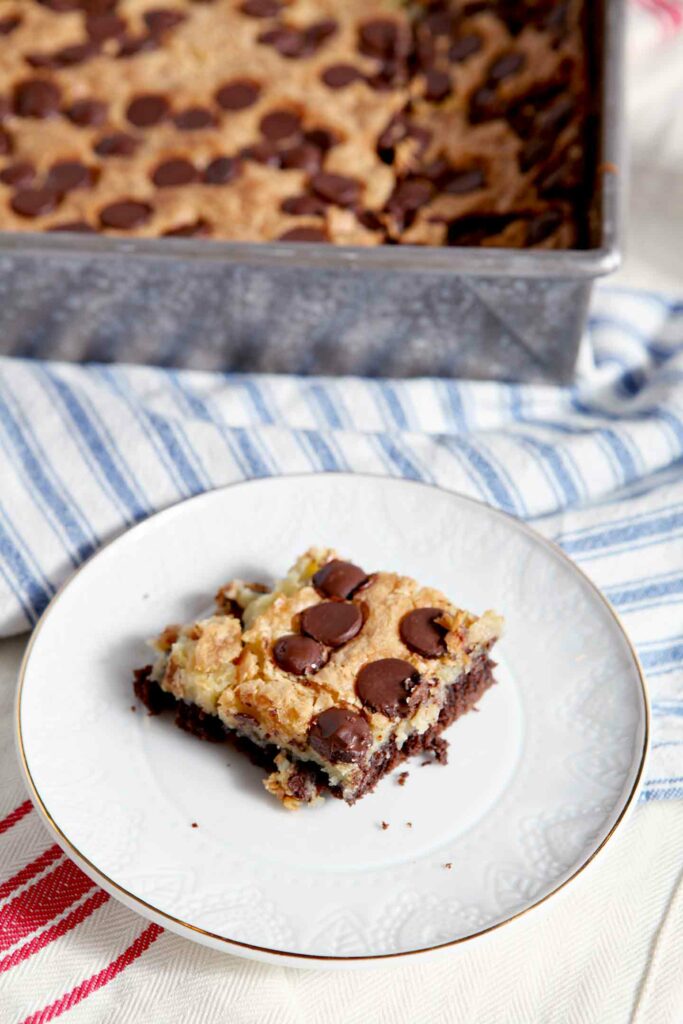
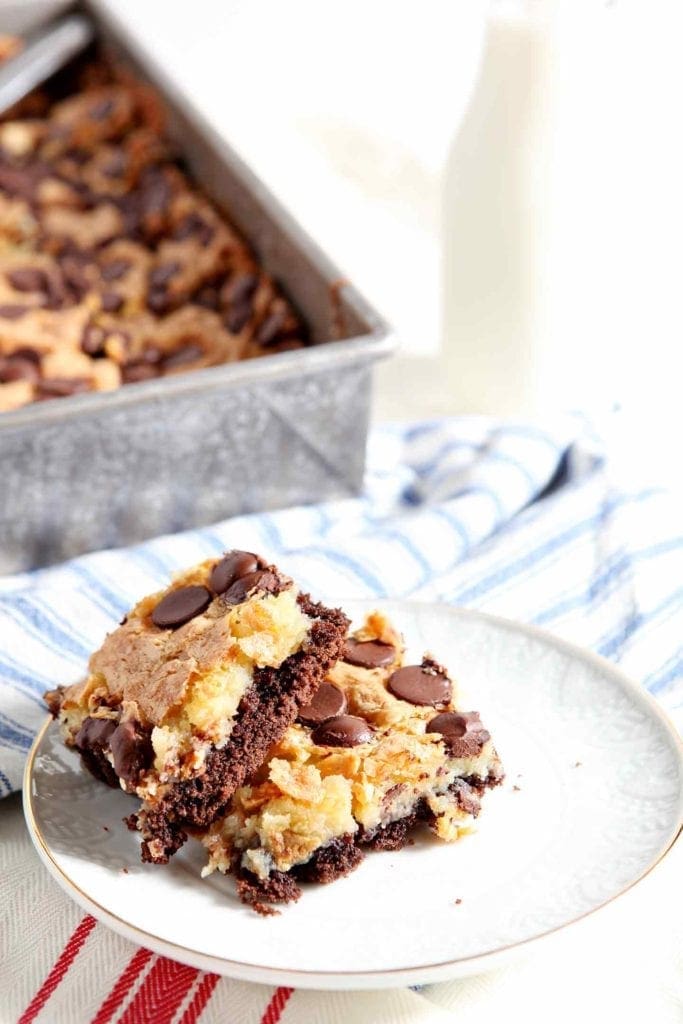
They’ve got a chewy chocolate brownie layer on the bottom as a crust. That is topped with a creamy cheesecake, which is studded with dark chocolate chips.
This is one of those desserts that I bring with me whenever we’re invited to a gathering with new people or a crowd because it’s a crowd-pleaser.
As if we could dislike a dessert that has a gooey cheesecake top, a brownie bottom and extra chocolate chips, right?
Other delicious dessert recipes for sharing: Chocolate Chip Cookie Bars | Chocolate Cheesecake Dip | Strawberry Chocolate Cake | M&M Sugar Cookies | Boozy Bacon Pretzel Peanut Butter Bars
What you need to make this recipe:
The Speckled Palate participates in affiliate programs. As an Amazon Associate, I earn a commission from qualifying purchases. Please refer to my disclosure page for more information about these affiliate programs.
Let’s talk ingredients!
In addition to the tools above, you’re going to need some ingredients to make this recipe, too! Chances are, you might already have some of them in your fridge or pantry. Scroll down to the recipe card for the full measurements and instructions.
In addition to these tools, you’ll need some ingredients, too:
- Chocolate cake mix — whatever kind of chocolate cake mix you grab is A-OK. Just ensure it’s a box that’s a 15.25 oz. box
- Unsalted butter — we use this in both the brownie layer and the cheesecake layer. One needs to be melted and slightly cooled while the other will be softened.
- Eggs — these work as the binder to hold both layers together!
- Cream cheese — this is an essential ingredient for the cheesecake layer. You can use reduced fat cream cheese, but I do not recommend using nonfat cream cheese. You need an 8 oz. package of this.
- Unsweetened applesauce — if you can’t find this, feel free to replace it with the same amount of softened butter. I like the texture and light sweetness the applesauce adds to the mixture, though.
- Vanilla extract — the real deal, please and thank you.
- Powdered sugar — also known as confectioner’s sugar. There is no substitute for this.
- Bittersweet chocolate chips — if you like semisweet or milk chocolate chips, feel free to use them, but use just ½ cup because otherwise, this cheesecake brownie recipe will become too sweet.
A note on Brownie Cheesecake Bar substitutions:
- Swap the chocolate cake mix for a yellow cake mix to make these a Blondie Cheesecake situation!
- Use a different type of chocolate chip. If using semisweet or milk chocolate chips, use ½ cup so that the cheesecake layer doesn’t become too sweet.
- If you don’t want to use applesauce or don’t have it, use the same amount of softened unsalted butter.
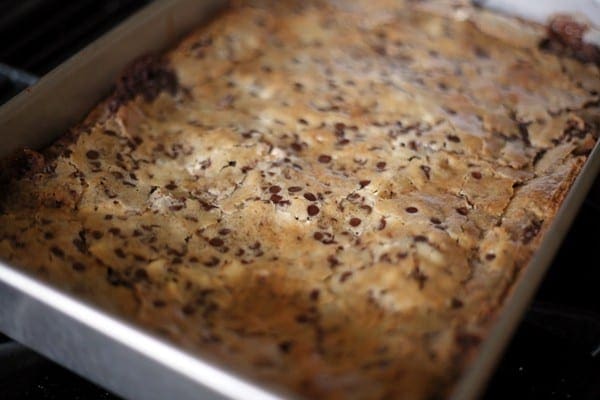
How to make this Cheesecake Brownie recipe
Preheat oven to 350°F, and spray a 9″x13″ baking dish with nonstick cooking spray. You can also line it with parchment paper, if desired. Set it aside.
Make the brownie layer. Melt the butter in the microwave or on the stovetop in a saucepan.
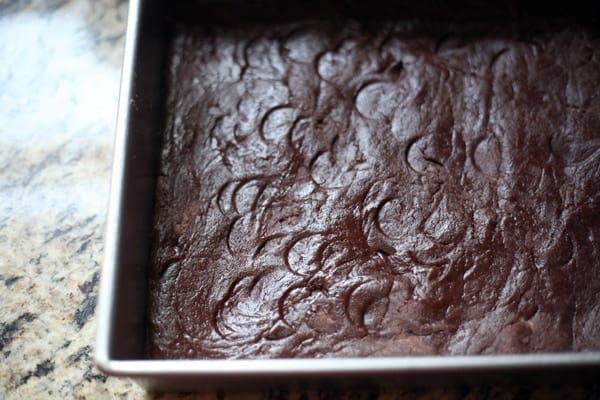
Mix the chocolate cake mix, the melted butter and one egg together to create the bottom layer of the bar.
Pour the mixture into the prepared pan and flatten with your hands. This should take a little while since the mixture is THICK and not very liquid-y.
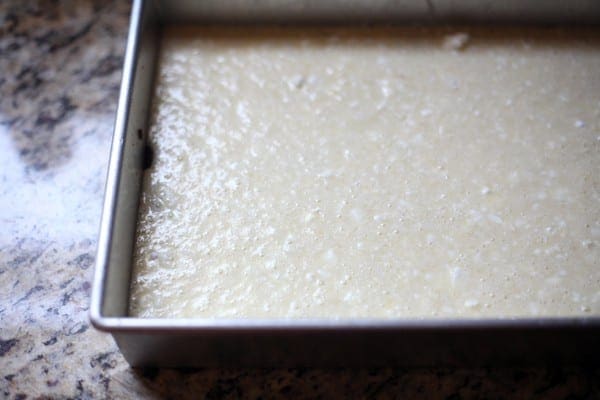
Make the cheesecake layer. Blend the brick of cream cheese, 2 eggs, softened butter, applesauce and vanilla extract in another bowl until smooth with a hand mixer or your favorite electric mixer.
Pour in the powdered sugar gradually, stirring until the wet ingredients are completed combined into a creamy batter.
Pour on top of bottom layer in the pan. Sprinkle the chocolate chips on top of the cheesecake.
Bake. Bake in the preheated oven for 40 to 45 minutes, or until top is golden brown.
Let cool for 30 minutes in the baking pan, then slice into individual bars and enjoy!
How to store:
Store in an airtight container in the refrigerator for 3-4 days.
Erin’s Easy Entertaining Tips
These Ooey Gooey Bars are one of my all-time favorite entertaining desserts because they are well-loved by everyone who’s ever tried them.
Whether you’re hosting a Backyard Barbecue, an at-home tailgate or any event in between, these cheesecake brownies are a winner.
Here are a few ideas of how to transform this delightful dessert into an entertaining centerpiece:
- Double the recipe and make two pans if you’re hosting a large group. While these are super decadent, you certainly don’t want to run out if your guests want more!
- Make the cheesecake brownies in advance. The beauty of this recipe is you can make it right before you serve it or you can bake it hours (or even 1-2 days) in advance to not have to fret about it. If you bake it in advance, store it in the fridge wrapped in plastic wrap and let it come to room temperature before slicing and serving. While they won’t be nearly as ooey or gooey as straight from the oven, they’ll be easier to serve and easier for your guests to enjoy, too.
- Bake them well in advance, and freeze until the day before the party. After baking, let them come to room temperature before slicing. Line a baking sheet with wax paper, and place the individual brownies onto it. Transfer to the freezer, and freeze for 4-6 hours, or frozen solid. Transfer the frozen bars into a plastic freezer-safe baggie, and keep frozen for up to a month. Let them defrost in the refrigerate 2 days before your gathering, and bring them to room temperature just before serving.
Frequently Asked Questions
Yes, we always refrigerate these bars!
Yes, you need to refrigerate these Ooey Gooey Bars.
Yes, you can freeze Ooey Gooey Bars. Let them come to room temperature before slicing. Line a baking sheet with wax paper, and place the individual slices of the bars onto it. Transfer to the freezer, and freeze for 4-6 hours, or frozen solid. Transfer the frozen bars into a plastic freezer-safe baggie, and keep frozen for up to a month.
No. This is not the same recipe for an Ooey Gooey Butter Cake. This recipe is like a hybrid of that with a brownie cheesecake bar.
Quick tips and tricks to the best Brownie Cheesecake Bars
- How to make in advance: These cheesecake brownies are an excellent dessert to make in advance. Simply bake them as the recipe states, then let them cool completely before covering with plastic wrap and storing in the fridge. Bring to room temperature before serving, then slice and serve.
- How to store: Keep them in their baking dish in the refrigerator, covered in plastic wrap. Since this dessert involves cream cheese, I always keep them in the fridge.
- To freeze Ooey Gooey Bars, let them come to room temperature before slicing. Line a baking sheet with wax paper, and place the individual slices of the bars onto it. Transfer to the freezer, and freeze for 4-6 hours, or frozen solid. Transfer the frozen bars into a plastic freezer-safe baggie, and keep frozen for up to a month.
- Make some swaps? Use yellow cake mix instead of chocolate to make this bar into a blondie cheesecake. Swap out your favorite chocolate chips—just be sure not to pour in too many semisweet or milk chocolate chips because this dessert will get overwhelmingly sweet. Leave out the applesauce, and use the same amount of unsalted butter instead.
Now who wants to make some Ooey Gooey Bars of their own?
I can promise you they’ll be a hit and you won’t have any leftovers!
Scroll down to learn how I make them…
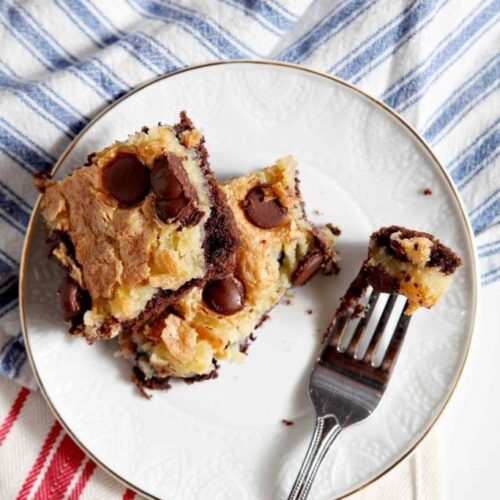
Ooey Gooey Bars
Ingredients
Brownie Layer
- 15.25 oz. chocolate cake mix 1 box
- 8 tablespoons unsalted butter melted and cooled slightly
- 1 egg
Cheesecake Layer
- 8 oz. cream cheese
- 2 eggs
- 4 tablespoons unsalted butter softened
- ¼ cup unsweetened applesauce
- 1 teaspoon pure vanilla extract
- 1 lb. powdered sugar
- ¾ cup bittersweet chocolate chips
Equipment
As an Amazon Associate and member of other affiliate programs, I earn from qualifying purchases.
Instructions
- Preheat oven to 350°F. Spray a baking 9"x13" baking dish with nonstick cooking spray, and set aside.
Make the brownie layer.
- Mix chocolate cake mix, the melted butter and one egg together to create the bottom layer of the bar.
- Pour the mixture into the prepared baking dish and flatten. This should take a little while since the mixture is THICK and not very liquid-y.
Make the cheesecake layer.
- Mix together the cream cheese, the other eggs, the softened butter, applesauce and vanilla extract until smooth with a hand mixer in a large bowl.
- Pour in the powdered sugar gradually, stirring until the wet ingredients are completed blended and combined.
- Pour on top of bottom layer in the pan.
- Sprinkle chocolate chips on top of the top layer.
- Bake for 40 to 45 minutes, or until top is golden brown.
- Let cool for 30 minutes, then slice into individual bars and enjoy!
Video
Notes
A note on substitutions:
- Swap the chocolate cake mix for a yellow cake mix to make these a Blondie Cheesecake situation!
- Use a different type of chocolate chip. If using semisweet or milk chocolate chips, use ½ cup so that the cheesecake layer doesn’t become too sweet.
- If you don’t want to use applesauce or don’t have it, use the same amount of softened unsalted butter.
Quick tips and tricks to the best Brownie Cheesecake Bars
- How to make in advance: These cheesecake brownies are an excellent dessert to make in advance. Simply bake them as the recipe states, then let them cool completely before covering with plastic wrap and storing in the fridge. Bring to room temperature before serving, then slice and serve.
- How to store: Keep them in their baking dish in the refrigerator, covered in plastic wrap. Since this dessert involves cream cheese, I always keep them in the fridge.
- To freeze Ooey Gooey Bars, let them come to room temperature before slicing. Line a baking sheet with wax paper, and place the individual slices of the bars onto it. Transfer to the freezer, and freeze for 4-6 hours, or frozen solid. Transfer the frozen bars into a plastic freezer-safe baggie, and keep frozen for up to a month.
Nutrition
…

About the Author:
Erin Parker is a Southern gal living in Texas with her husband and two daughters. She started The Speckled Palate to share what she was cooking as a newlywed… and over the years, it’s evolved to capture her love for hosting. Specifically, the EASIEST, lowest key entertaining because everyone deserves to see their people and connect over good food. Learn more about her…



Um, these look dangerous. But delicious. That is a winning combination for a dessert.
I’m the “official baker” of our tailgate and these look amazing…on the menu for the Auburn game for sure! Good to “meet” another baton rouge food blogger!
Holy sweet baby jesus. That looks and sounds amazing. Adding this to my list to try. Seriously, I want one right now.
I love the addition of applesauce! I must try these!
These look more than delicious. Cream cheese + chocolate + butter = deliciousness warning. Yum!
I made these shortly after finding the recipe and I did something wrong because they did not turn out gooey, but rather hard. I tried it a second time and they were perfect! I’m not sure what I left out, but I’m happy I decided to try it again! 🙂
I made these shortly after finding the recipe and I did something wrong because they did not turn out gooey, but rather hard. I tried it a second time and they were perfect! I’m not sure what I left out, but I’m happy I decided to try it again! 🙂
Dani, I’m glad you gave them a shot for the second time around! I wonder what went wrong… Maybe it was the cooking time? Either way, I’m happy you tried it again because these bars have been winners for YEARS. (My friends still ask about the “crack brownies” whenever I see them, haha!)
We use to buy a box kit at Sam’s and we were in love, then they suddenly discontinued them and we have been looking for 7 years now. This recipe looks like what I am looking for!
We use to buy a box kit at Sam’s and we were in love, then they suddenly discontinued them and we have been looking for 7 years now. This recipe looks like what I am looking for!
Oh wow, Shawna! I didn’t realize this was sold in a kit, and I really hope that it tastes as good, if not better, than the stuff you got from Sam’s! This is one of my all-time FAVORITE recipes to bring to parties and barbecues, so I hope it serves you well!
These look amazing, can’t wait to try them. I think I might play with a few different flavors of cake mix too!
Thanks so much, Karen! I’m excited to hear what you think of these little brownies and what you do with the cake mixes. I bet that could be interesting!
Whoa…this is going to be the hit of the potluck!
Yes, they absolutely will be! (Says the woman who brings them to potlucks all the time and never brings home leftovers…)
I can see why these have been called “crack brownies”
Oh yes. 🙂 It makes total sense, haha.
These look so amazing! I can imagine why they’re called crack brownies! They’d make a fab treat!
Thank you! 😉 And ha. I KNOW. Such a fab treat!
What a super fun title for such yummy looking bars. I love ooey gooey!!
Thanks, Sandi! I love ooey gooey, too!
Look fantastic! My kid would love these bars!
They are totally fantastic! And I hope your kids dig them as much as we love them over here!
They look super tempting! I doubt I could stop at just one!
And THAT is the problem. I can never stop at just one. 😉
You had me at ooey gooey! These looks delicious!
Woohoo! Thank you so much, Krista!
OMG. Do you deliver late at night? Because I need these SO much right now!
OF COURSE, friend. I’ll just bring some right over. Easy as that. 😉
I feel like I just found my new go-to. These look absolutely INCREDIBLE! But thinking about it, I better make a “test batch” just to try out myself before I let anyone else dig in… right? 😉
Delish! My new go-to! Thank you!
HOORAY! So happy that you love these ooey gooey bars!