
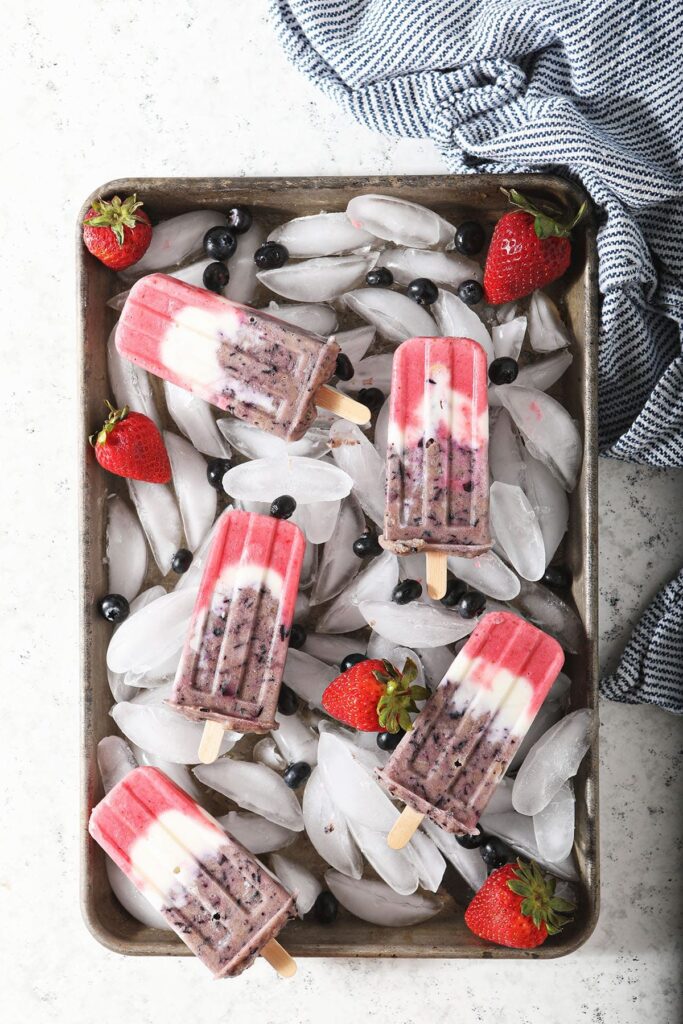
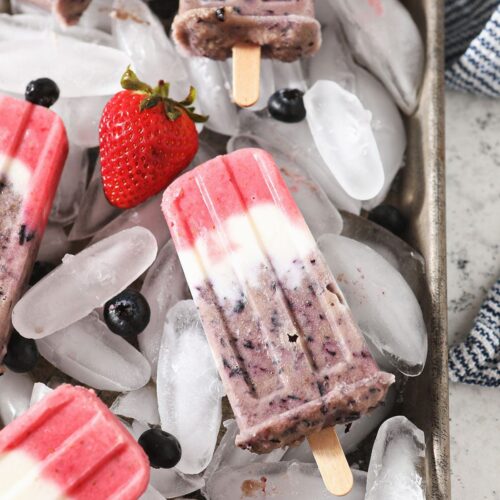
Red White and Blue Popsicles
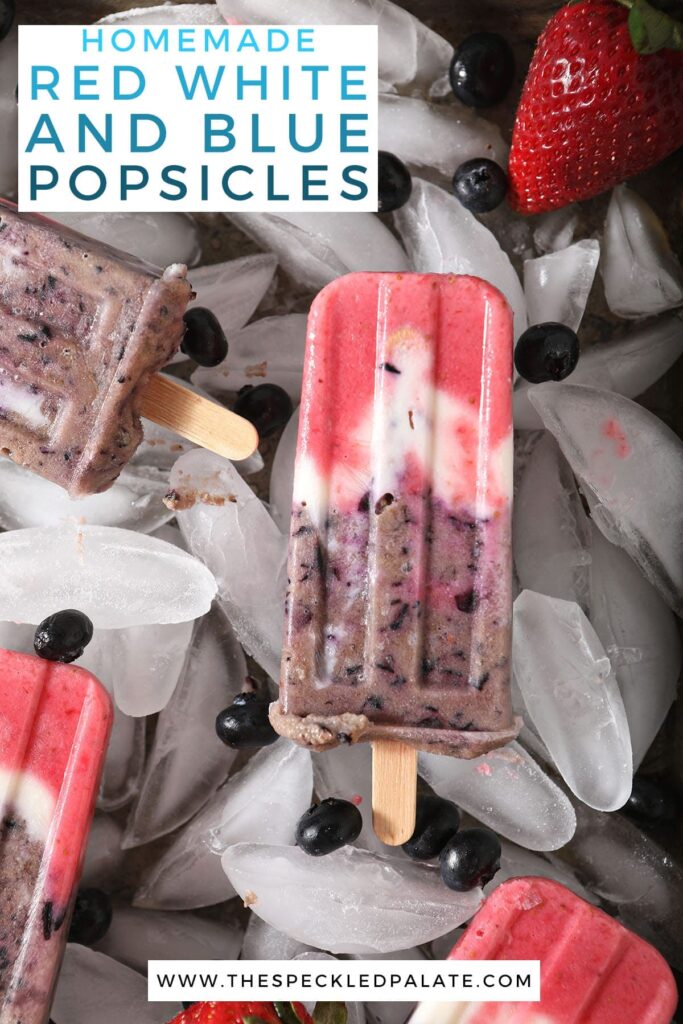
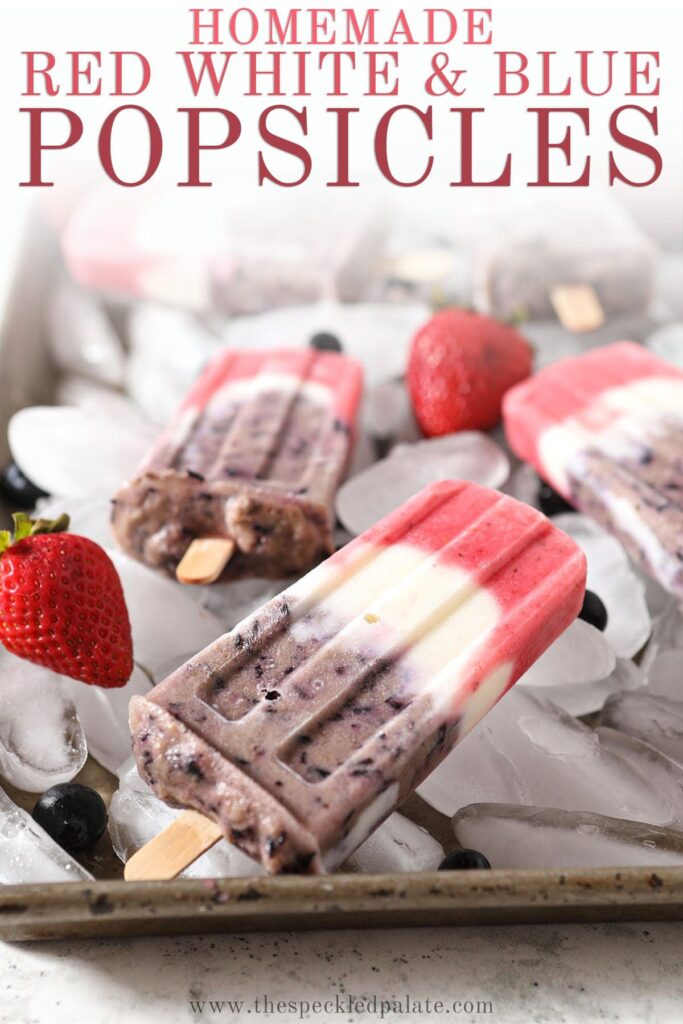
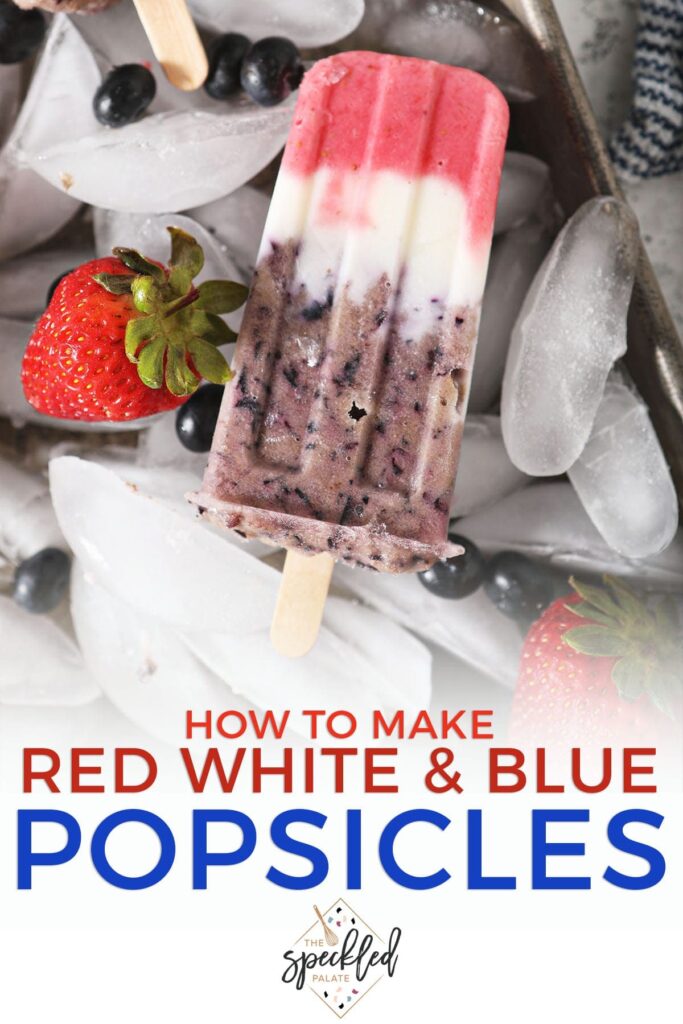
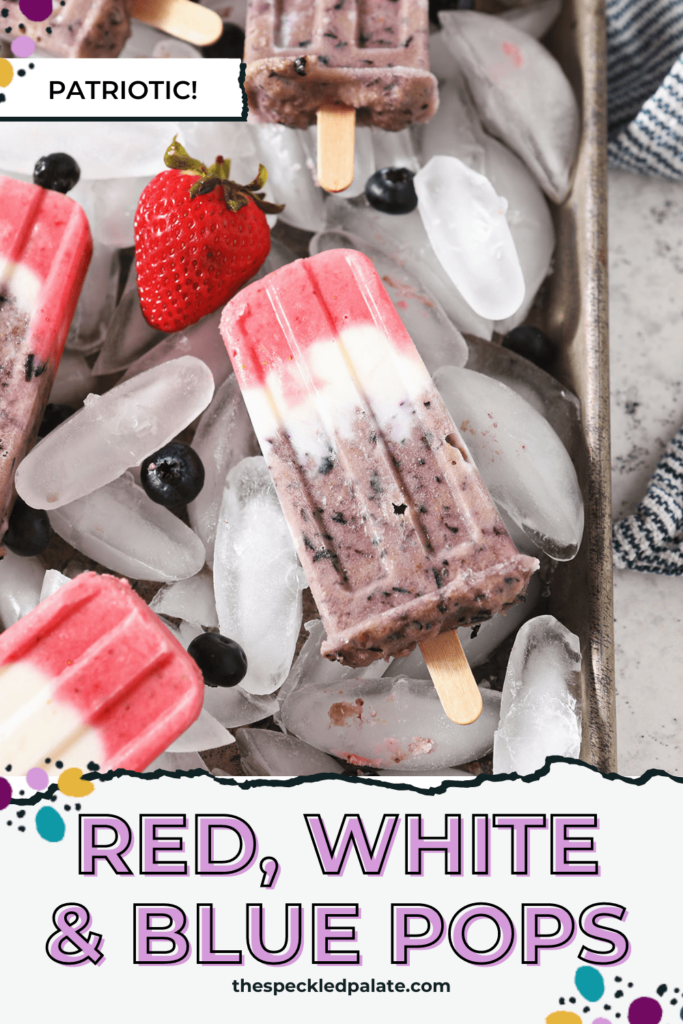
Red White and Blue Popsicles are a colorful, naturally sweet dessert to make for the hot months ahead. This healthy popsicle recipe is made with fresh fruit, Greek yogurt and sweetened with maple syrup. They’re a refreshing treat for any patriotic gathering or a backyard barbecue! Makes 10 popsicles.
Love homemade popsicles? Don’t miss Spiced Rum Horchata Pops and Roasted Strawberry Cheesecake Popsicles!
Want to save this?
This Red Blue and White Popsicle recipe was originally published on June 5, 2017. This post, its text, images and the recipe itself, were updated and republished in June 2021.
I kind of have a thing for popsicles because I was that kid who ate them, ice pops and ice cream all the time during the summers of my childhood.
It looks like Lady A is on the same trajectory because when I pulled out a Red White Blue Popsicle for this photoshoot, she demanded one of her own and was dismayed when I told her she had to wait until Mama was done photographing.
Recently, we’ve had lots of conversations about being polite and patient. When we told her she had to wait, do you know what she said? “I patient, Mama.”
That was completely unprompted. And my heart exploded because OMG TODDLERS CAN BE THE CUTEST THING EVERRRRRRR.
Why I love this recipe:
These popsicles are creamy without being heavy and sweet without using any added sugar.
They’re naturally colorful, thanks to fresh fruit. Nope, we’re nut adding red food coloring or blue food coloring.
Also, you can make ’em vegan by a simple swap. (Use vegan yogurt. That’s it.)
The natural sweetness of the berries paired with a little bit of maple syrup is all these popsicles need to sing.
If you ask me, they’re the perfect patriotic dessert for your Memorial Day, July 4th or Labor Day festivities.
They’re also fabulous all summer long because who doesn’t love a good popsicle?
If you love fruit-based popsicles, check out Blueberry Cheesecake Popsicles, Peaches and Cream Popsicles and Blackberry and Strawberry Yogurt Popsicles.
Need dessert inspiration? Head on over to my Dessert Recipe Index for more recipe ideas.
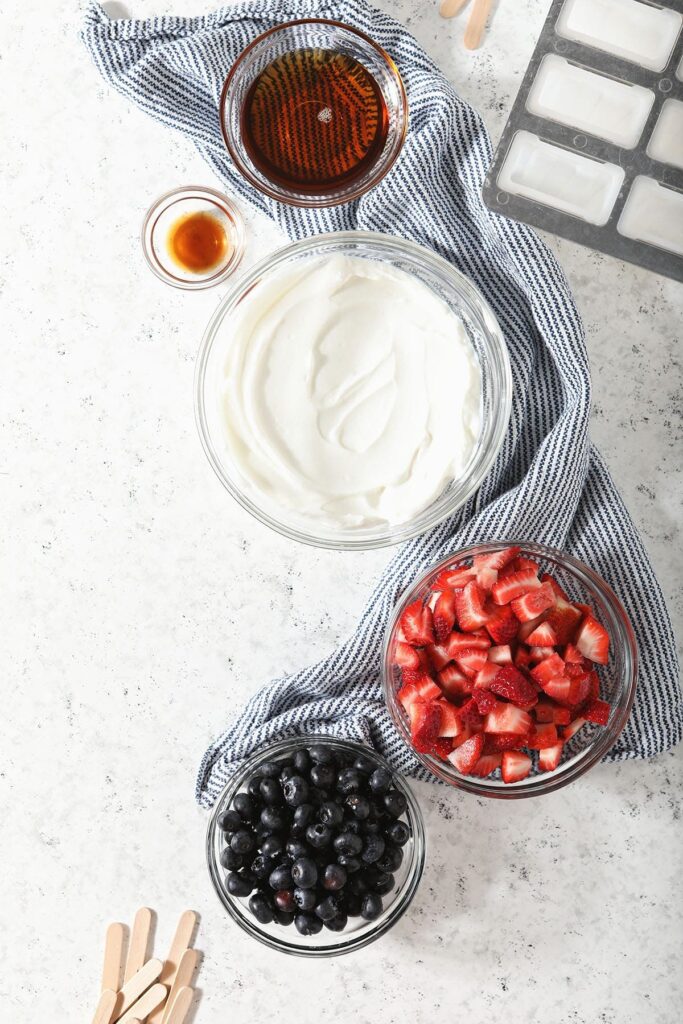
What you need to make healthy popsicles
The Speckled Palate participates in affiliate programs. As an Amazon Associate, I earn a commission from qualifying purchases. Please refer to my disclosure page for more information about these affiliate programs.
Let’s talk ingredients!
In addition to the tools above, you’re going to need some ingredients to make this recipe, too! Chances are, you might already have some of them in your fridge or pantry. Scroll down to the recipe card for the full measurements and instructions.
Here’s what you need:
- Plain Greek yogurt — this is going to serve as our base for all the layers, including the white layer. If you want to make these popsicles vegan, use your favorite plain vegan yogurt.
- Vanilla extract — to give a little vanilla flavor and depth to the yogurt layer and base
- Pure maple syrup — this is our sweetener. You won’t need much, assuming your fruit is nice and sweet. You could swap this with honey, if desired.
- Fresh strawberries — these add color and sweetness to our red layer
- Fresh blueberries — these add color and sweetness to the blue layer
Substitutions and variations:
You could swap fresh raspberries or red cherries for the strawberries, if those are readily available to you and more fresh than the strawberries.
How to make Red White and Blue Popsicles
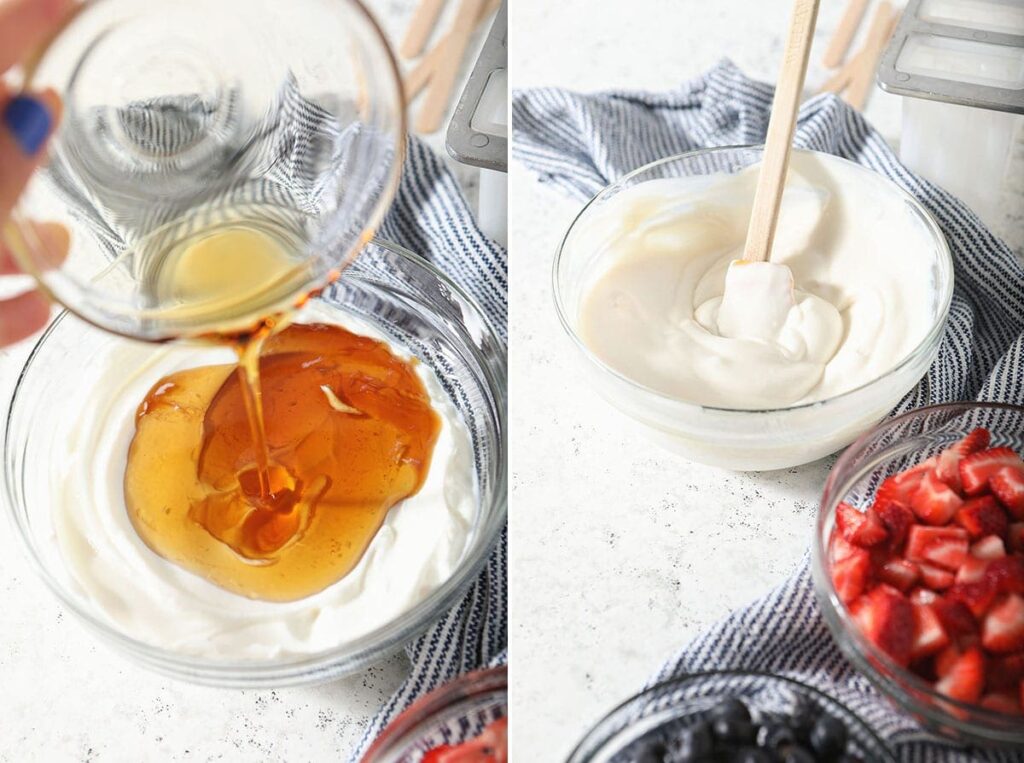
Make the Greek yogurt layer.
In a large bowl, combine the yogurt with vanilla extract and maple syrup. Mix with a hand mixer until light and fluffy. Transfer to the refrigerator.
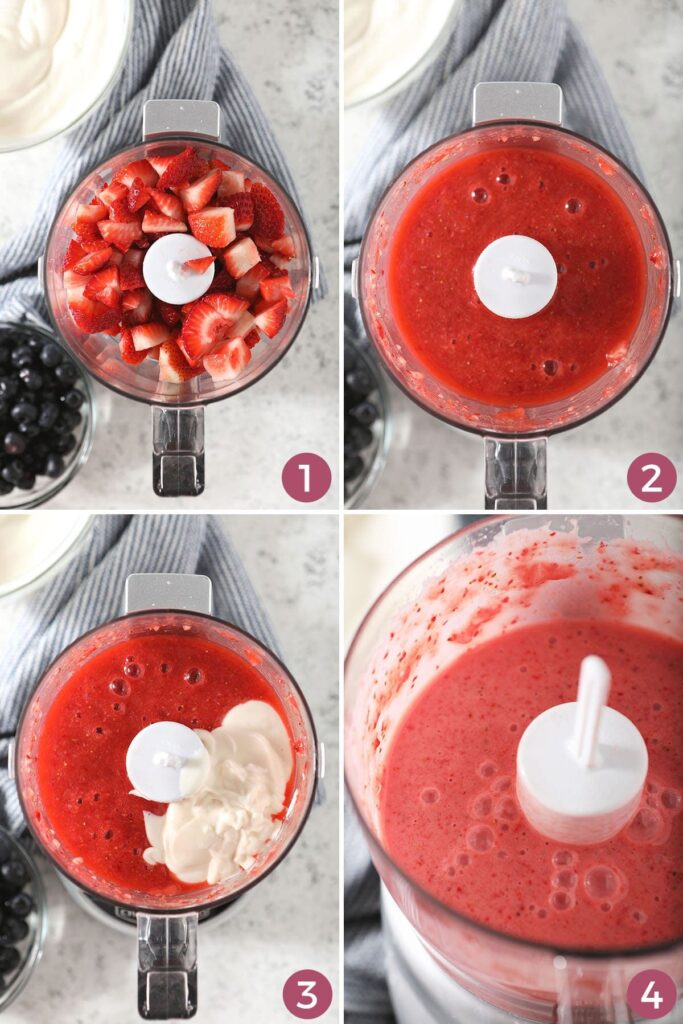
Make the red layer. In the base of a blender or food processor, measure out the strawberries and blend until pureed.
Transfer to a bowl and combine with some of the yogurt mixture, folding with a nonstick spatula until combined. Transfer to the fridge.
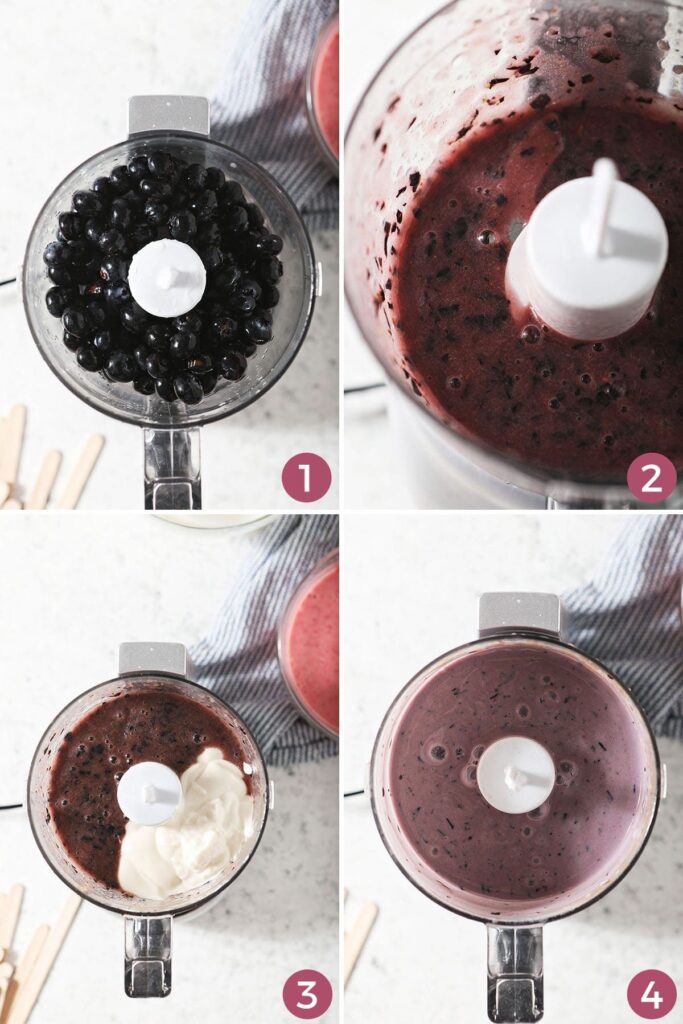
Make the blue layer. In the base of a blender or food processor, measure out the blueberries and pulse to puree.
Transfer to a bowl and combine with some of the yogurt mixture, folding with a nonstick spatula until combined. Transfer to the fridge.
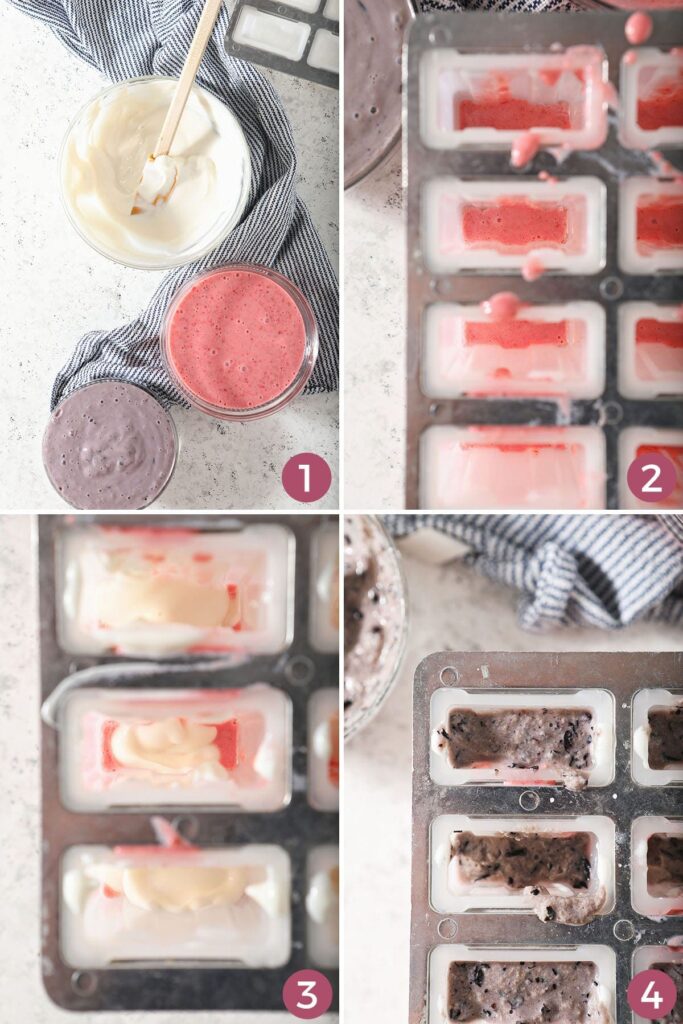
Layer the popsicles. Pour the strawberry layer into the popsicle mold first, doing your best to make every popsicle have about the same amount of the mixture.
Add in a layer of white, pouring slowly so that it doesn’t sink into the red layer. Drizzle on some of the blueberry layer.
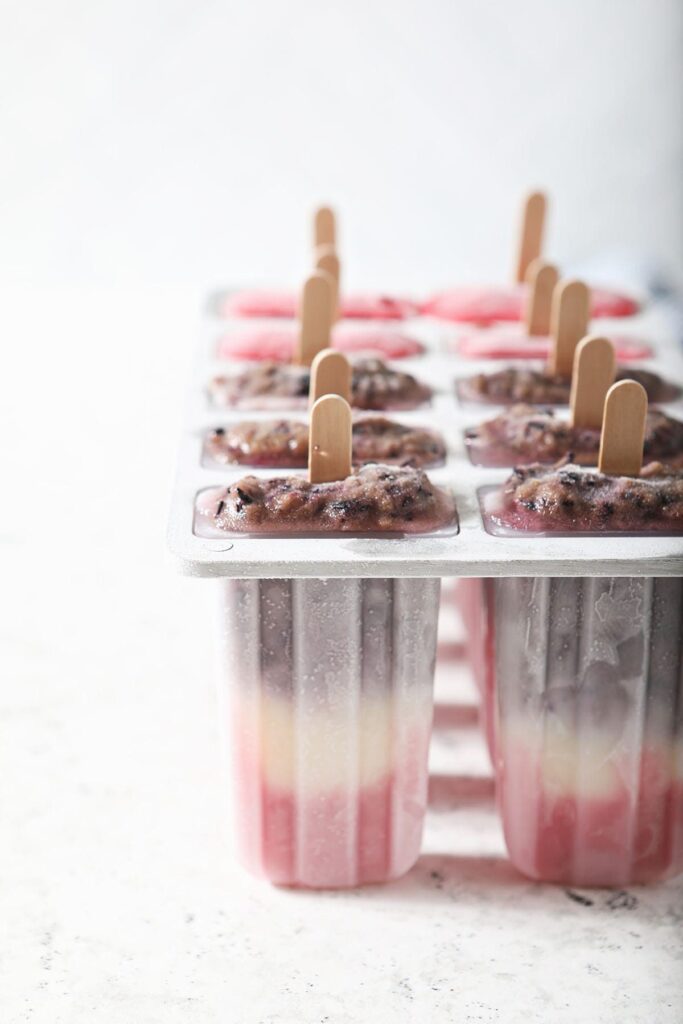
Freeze the popsicles. Add the popsicle sticks, then transfer to the freezer.
Check on the popsicles after 2 hours to ensure the sticks haven’t risen out of the popsicles. If they have, simply push them back in and freeze overnight.
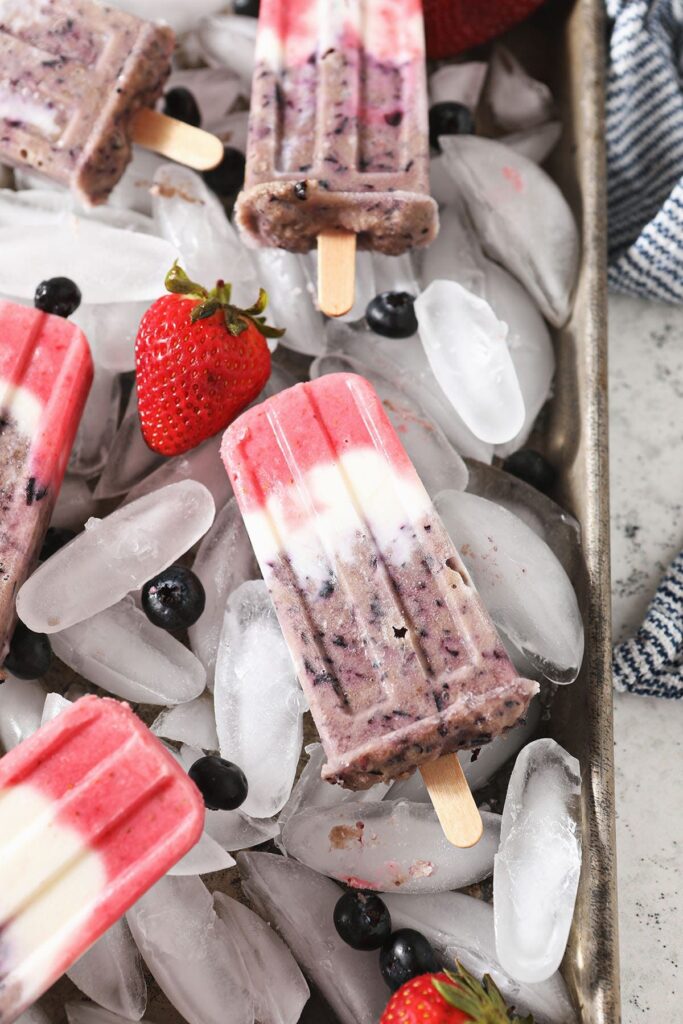
Remove from their popsicle mold and enjoy immediately!
Erin’s Easy Entertaining Tips
Whenever I think of summertime entertaining, I think of running around in the backyard in a bathing suit, chomping on a popsicle as my friends and I played.
I also think of No Bake Scotcheroo Cookies because those also went hand-in-hand with outdoor gatherings when I was a kid.)
If you’re hosting friends or family this summer for a backyard barbecue or something else, this homemade popsicle recipe should absolutely be a part of the gig.
Here are some tips and tricks I’ve learned over the years:
- Make them in advance. Yes, these healthy popsicles require you to make them a day in advance so they’re nice and frozen for your guests. Don’t try to make them the morning of and hope/pray they’ll be ready. Making these in advance will take some stress off of you, too, so do it!
- Make a double batch. This recipe makes 10 red white and blue popsicles, which is excellent for a gathering of two small(er) families. However, if you’ve got more people attending, you’ll need more popsicles. Double the recipe so that everyone can have one!
- Let the kids help. My girls love being in the kitchen with me, and this is a recipe that kids can take ownership of. Just be aware that the layers of these popsicles can and will run together if they’re not poured slowly. Of course, they don’t have to be perfect, so have fun with it.
Frequently Asked Questions
The store-bought kind are sometimes known as Bomb Pops and Firecrackers. We call these homemade ones simple the Red White and Blue Popsicles or Patriotic Popsicles.
That depends on your tastebuds! These creamy, fruity popsicles are delicious to me!
I can’t speak to the health of popsicles overall, but I can tell you that this popsicle recipe is sweetened with fresh fruit and maple syrup and is creamy, thanks to Greek yogurt.

Quick tips and tricks to the best healthy popsicles
- Make them in advance—or keep a batch in the freezer for when you think you’ll want a colorful popsicle! You can’t rush these homemade popsicles, so make it easier on yourself by planning ahead.
- Adjust the sweetness to your tastebuds. We like the tartness of the Greek yogurt paired with the sweetness of the berries, so the amount of maple in here is good for me. However, if you want a sweeter popsicle, consider adding 1-2 more tablespoons of the maple syrup to the yogurt mixture. Give it a taste before you do this and after to confirm it’s all OK.
- OPTIONAL: Let the layers set. We drizzle in the layers slowly, but they run together slightly because that’s how this works. If you want layers that are exact, you’re going to need to freeze the popsicles 30-45 minutes between each pour of the different layers to get straight lines. It takes more time, but the look is gorgeous!
Ready to make a batch of these beauties for yourself?
Here’s how you can make them:
Red White and Blue Popsicles
EQUIPMENT
As an Amazon Associate and member of other affiliate programs, I earn from qualifying purchases.
Ingredients
Greek Yogurt Layer
- 1 ½ cups plain Greek yogurt
- 1 teaspoon pure vanilla extract
- ¼ cup pure maple syrup
Red Layer
- 1 ½ cups sliced strawberries
- ¼ cup Greek yogurt layer recipe above
Blue Layer
- 1 ½ cups blueberries
- ½ cup Greek yogurt layer recipe above
Want to save this?
Instructions
Prepare the Greek Yogurt White Layer
- In a large glass bowl, measure out the Greek yogurt.
- Add the vanilla extract.
- Pour in the maple syrup.
- Using a hand mixer, whip the yogurt mixture until light and fluffy.
- Transfer to the refrigerator.
Prepare the Red Layer
- Measure out the strawberries into the base of a blender or a food processor.
- Pulse until pureed, then transfer to a glass bowl.
- Dollop the cold yogurt mixture into the strawberry mixture, and fold together using a nonstick spatula.
- Once combined, transfer to the refrigerator.
Prepare the Blue Layer
- Measure out the blueberries into the base of a blender or a food processor.
- Pulse until pureed, then transfer to a glass bowl.
- Dollop the cold yogurt mixture into the blueberry mixture, and fold together using a nonstick spatula.
- Once combined, transfer to the refrigerator.
Make the Popsicles
- Carefully pour the red layer into the popsicle mold first, doing your best to make every popsicle have about the same amount of the mixture.
- Next, measure in the white layer. Pour slowly, as the layers have the potential to sink into one another and mix.
- Then add the blue layer on top.
- Add the popsicle sticks, then transfer to the freezer.
- Check on the popsicles after 2 hours, making sure the popsicle sticks haven’t risen out of the popsicles. If they have, push them back in, then freeze overnight.
- Once frozen solid, remove from the popsicle molds and enjoy immediately.
Notes
Nutrition

About the Author:
Erin Parker is a Southern gal living in Texas with her husband and two daughters. She started The Speckled Palate to share what she was cooking as a newlywed… and over the years, it’s evolved to capture her love for hosting. Specifically, the EASIEST, lowest key entertaining because everyone deserves to see their people and connect over good food. Learn more about her…
Yay for Lady A being a clean eater! That’s basically the cutest story ever! I can’t wait to try these gorgeous popsicles – so pretty…. and yummy!
LOVE the sound of these! And I’ll bet they’re marvelous with the coconut cream and maple syrup, yum!
These are so beautiful and I love the use of the coconut cream!
Oh my goodness! These look wonderful! I am loving the color!
These look absolutely delicious and I love the ingredient list!
p.s. It’s been a long time since I had a toddler around. I sure do miss it!
I love making my own popsicles. So much healthier, tastier and economical. These look superb!
The prettiest popsicles ever! And I would totally gobble them down without making a mess too….just sayin’ 😉
Perfect dessert for the Fourth! I love making homemade popsicles!