
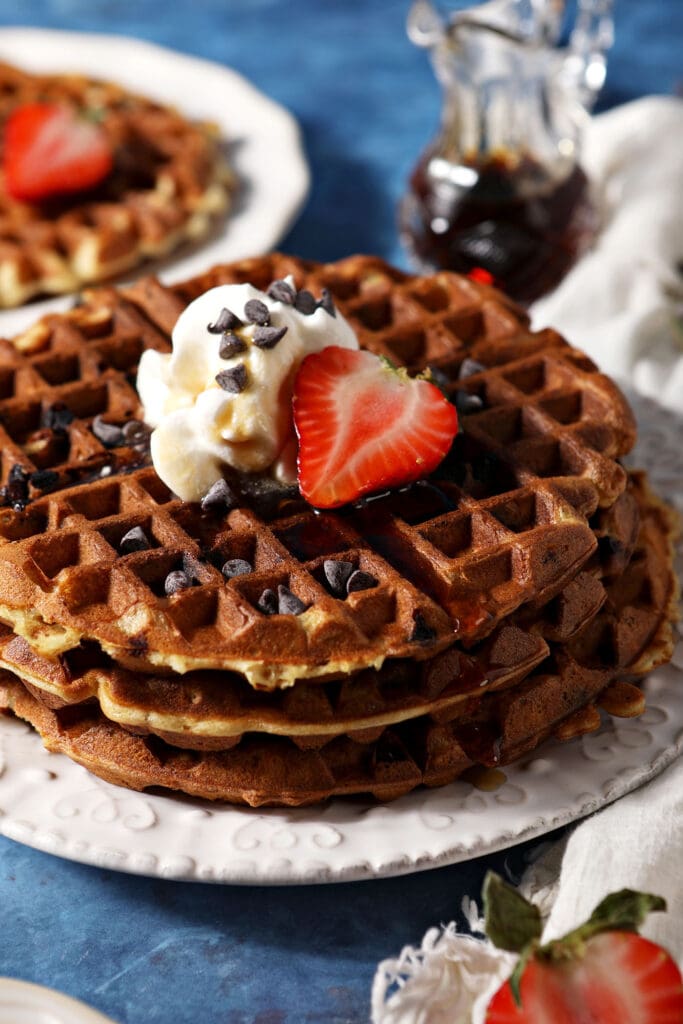
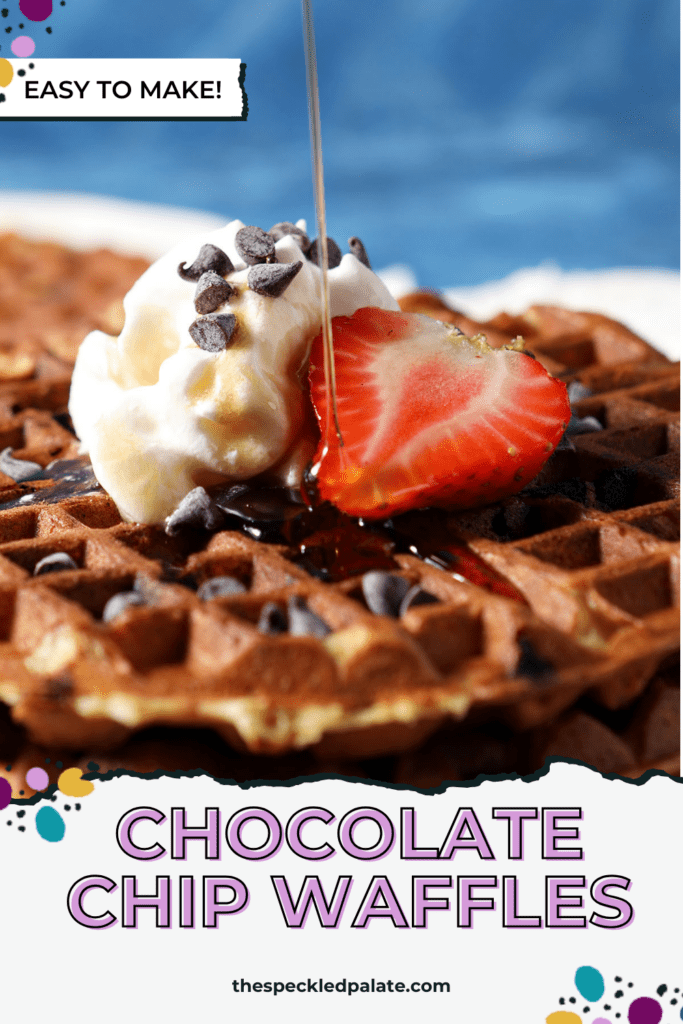
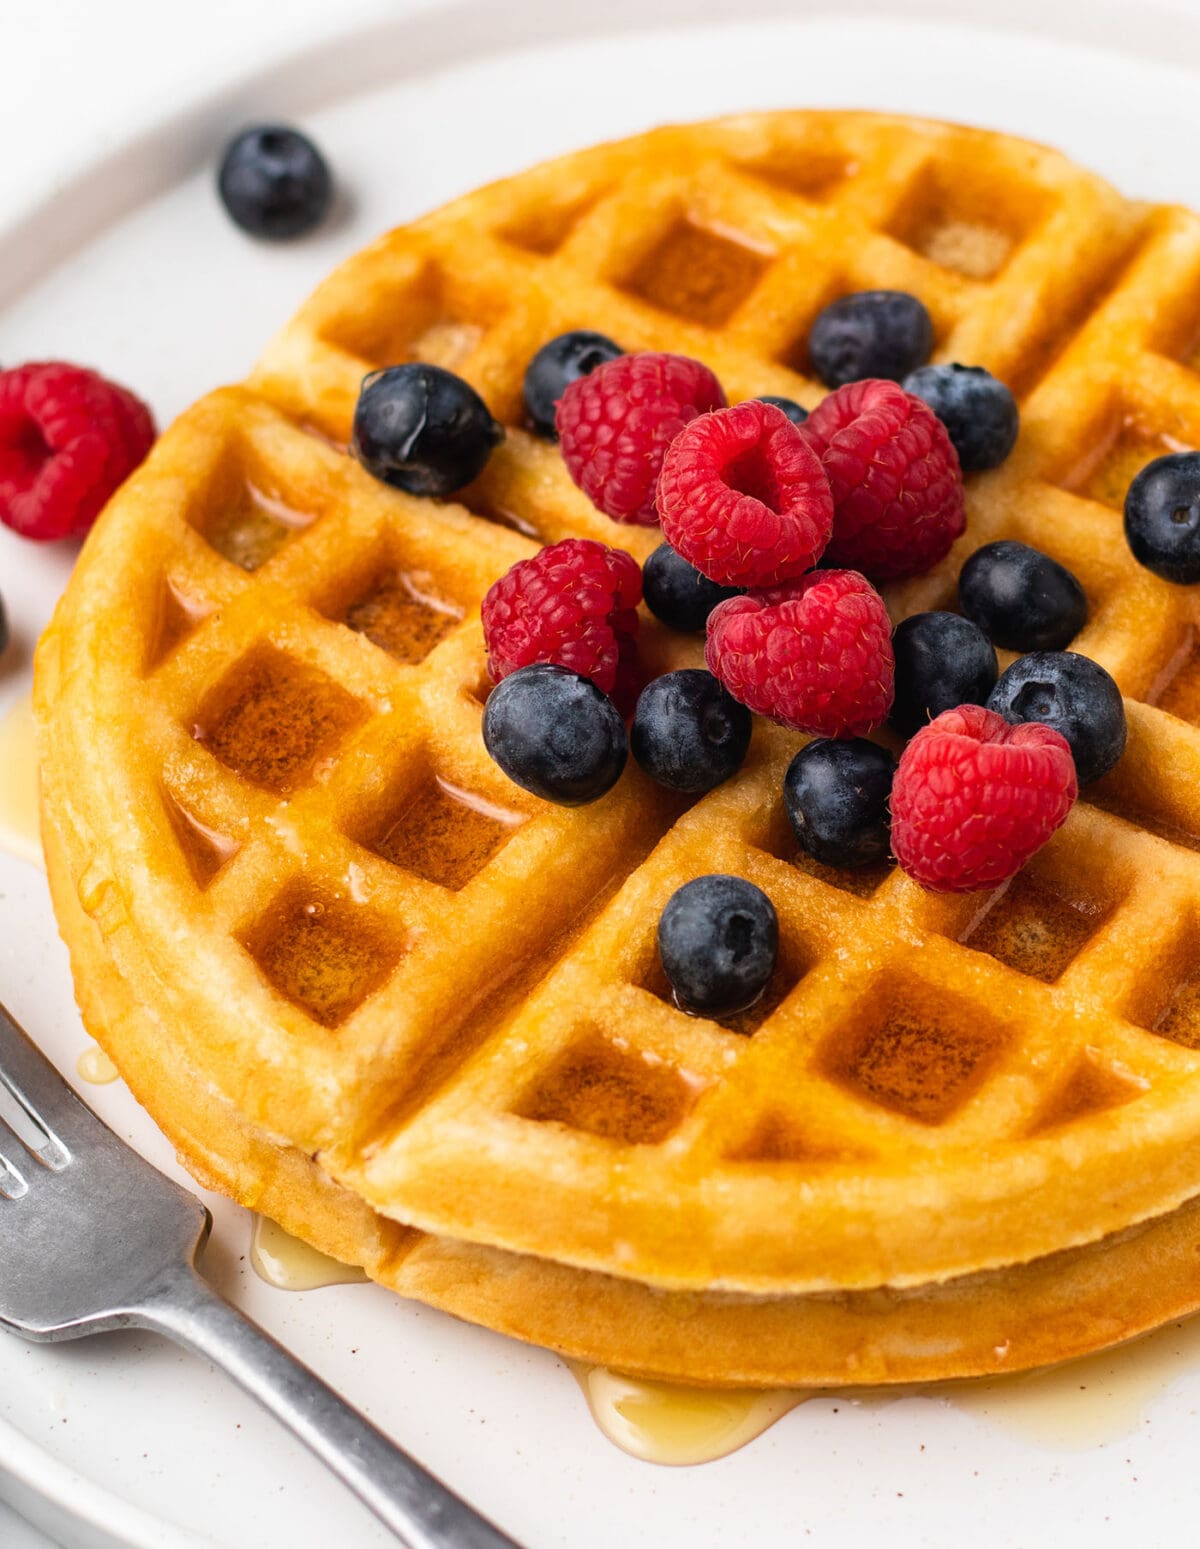
Chocolate Chip Waffles
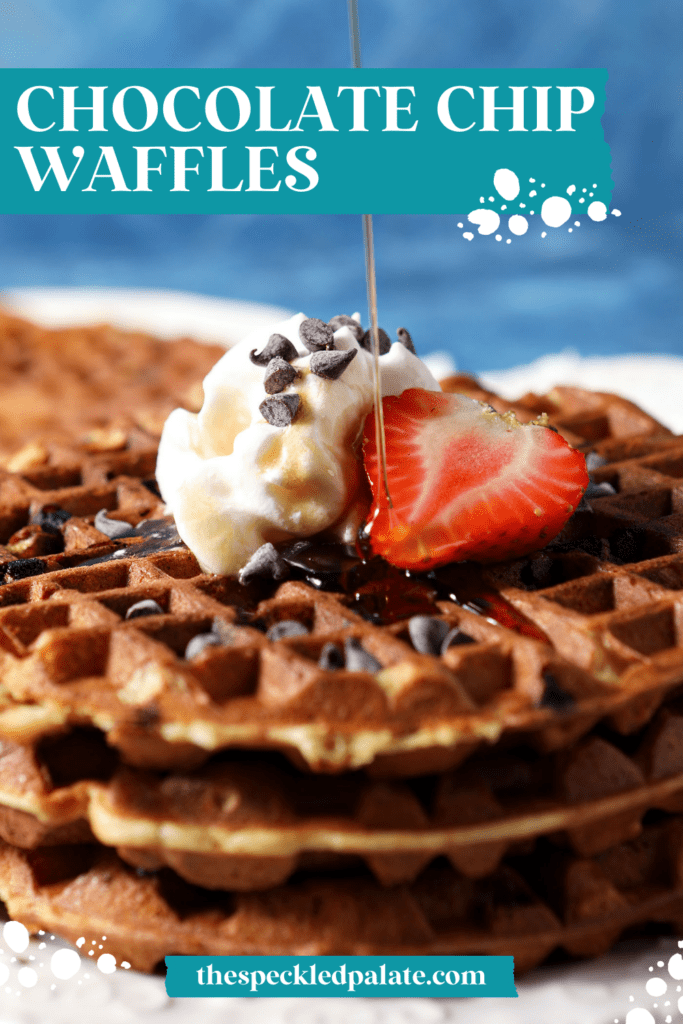
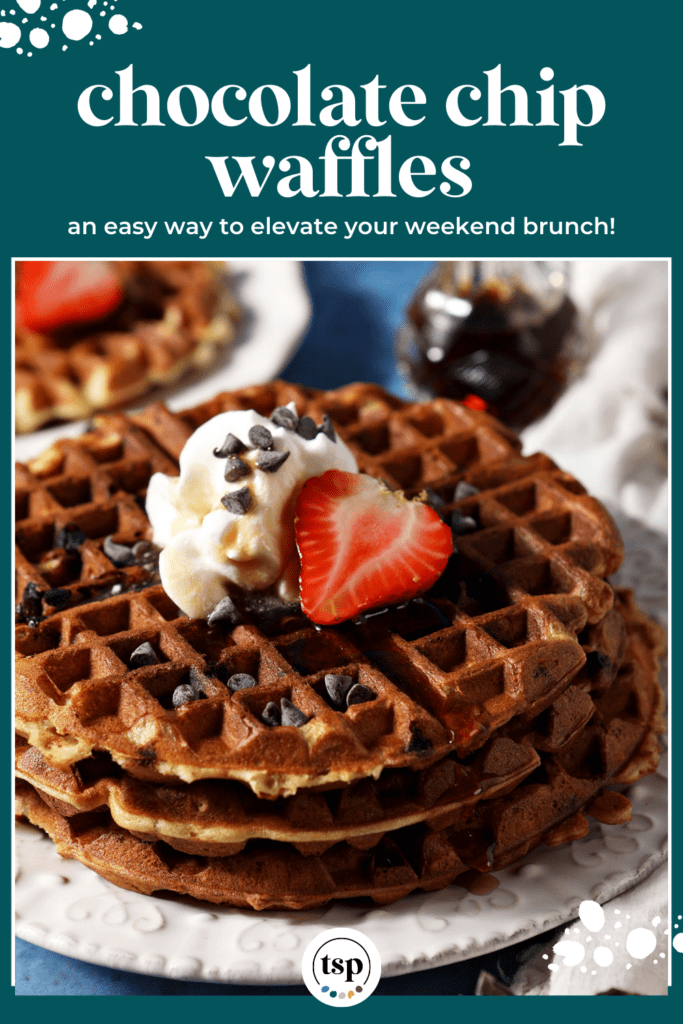
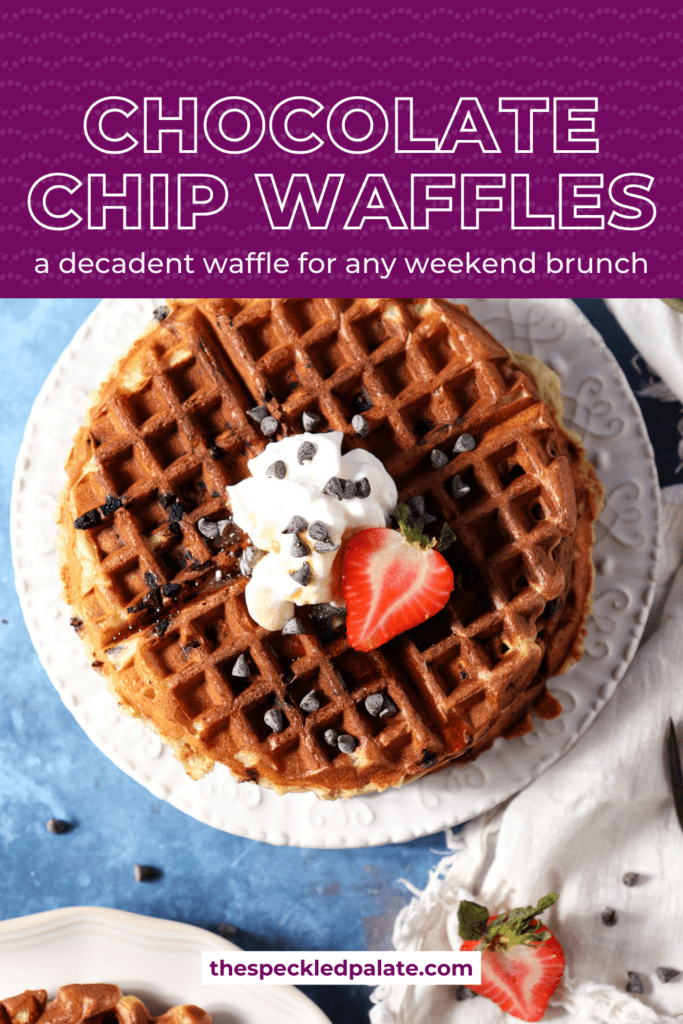
Elevate classic homemade waffles by adding chocolate chips! These Chocolate Chip Waffles are the perfect weekend breakfast or brunch and they’re incredibly simple to make. This waffle recipe has a buttermilk base and is great for any occasion. Makes 8 waffles.
Want to save this?
Hey-o! It’s March, and the Year of the Waffle continues today with a new family favorite.
Specifically, we’re all into chocolate chips, and this waffle recipe is no exception.
Why I love this recipe:
This Chocolate Chip Waffle recipe is a departure from our classic waffle recipe because they call for buttermilk. (Yes, yes. They’re a departure from our classic Buttermilk Waffles recipe and a total delight.)
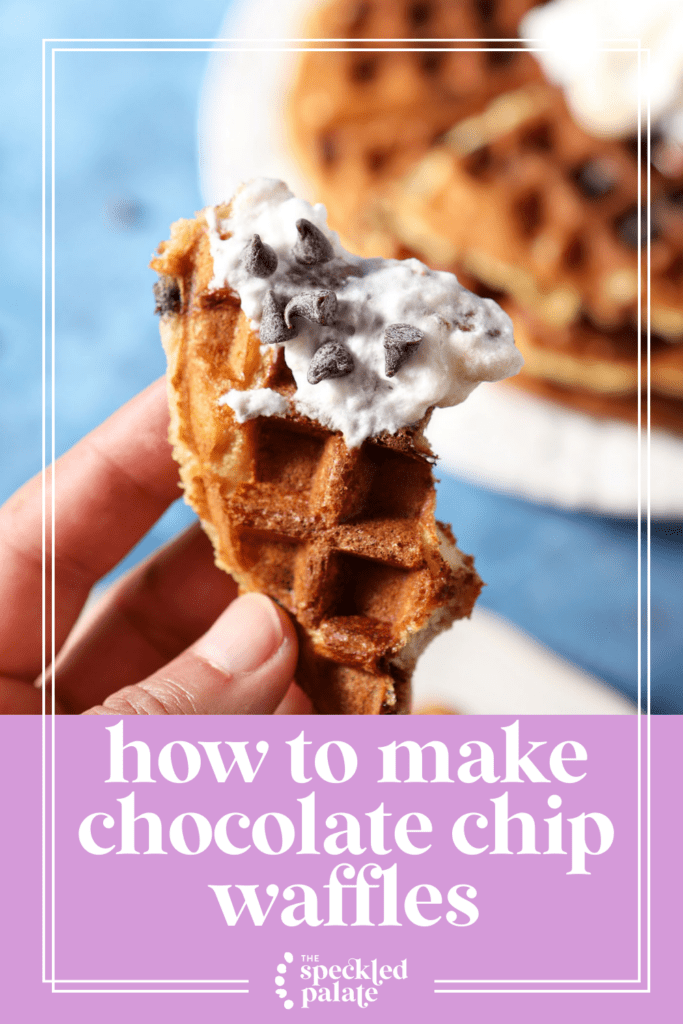
Similar to that of Chocolate Chip Pancakes, these waffles are the perfect combination of sweet with the best texture. The exterior of the waffles is crispy and the slightly sweet interior is moist and fluffy. You get hints of the vanilla in the waffle batter, and the chocolate chips add a sweet crunch to the overall ambiance.
Similar to my other waffle recipes, this one relies heavily on pantry ingredients that you might already have. However, we need buttermilk. (But you don’t have to go to the fuss of whipping egg whites into stiff peaks to make beautiful crispy waffles that remain fluffy on the inside.)
Make a batch of these with kids. Yes, it might get a little messy with the measuring, stirring and mixing, but everyone in our household loves to help. Please note that older kids might be able to man the waffle iron (with supervision, of course, depending on their own skill level.)
After all, any time is the perfect time to make a batch of the BEST Chocolate Chip Waffles!
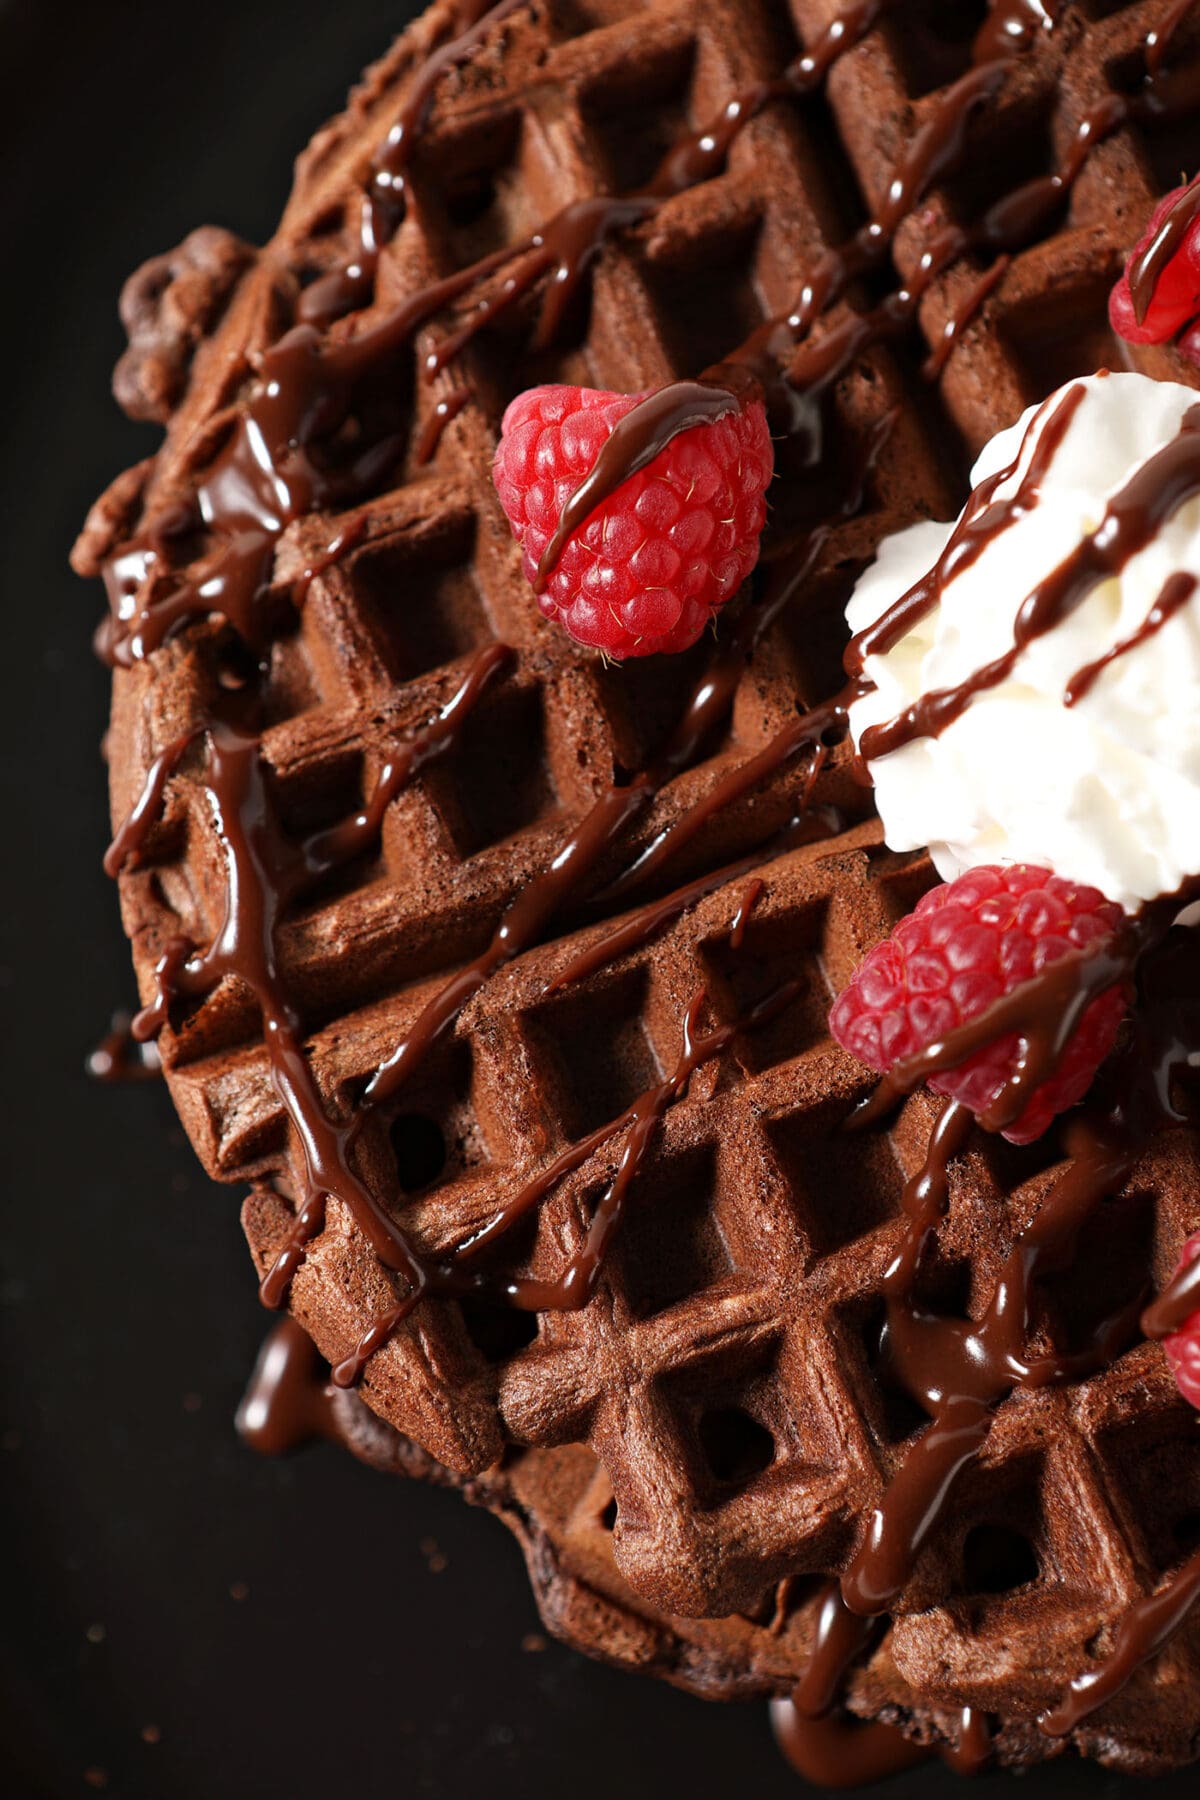
Other waffle recipes you might enjoy: Chocolate Waffles | The Best Waffles | Strawberry Waffles | Pumpkin Waffles with Cinnamon Maple Syrup | Banana Waffles | Peanut Butter Waffles | Red Velvet Waffles
Need breakfast inspiration, but don’t know where to start? Head on over to my Breakfast and Brunch Recipe Index.
What you need to make this recipe:
The Speckled Palate participates in affiliate programs. As an Amazon Associate, I earn a commission from qualifying purchases. Please refer to my disclosure page for more information about these affiliate programs.
- Large bowl
- Small mixing bowl or liquid measuring cup
- Whisk
- Rubber spatula
- ½ cup measuring cup
- Waffle iron
- Silicone pastry brush or nonstick cooking spray
Let’s talk ingredients!
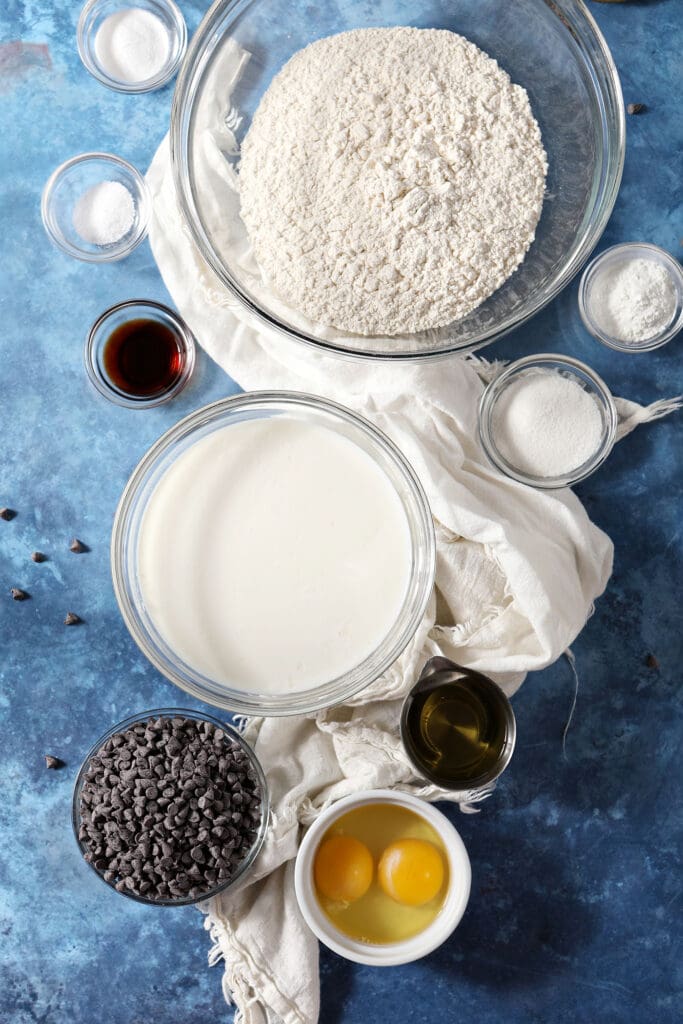
In addition to the tools above, you’re going to need some ingredients to make this recipe, too! Chances are, you might already have some of them in your fridge or pantry. Scroll down to the recipe card for the full measurements and instructions.
In addition to these tools, you’ll need a few ingredients from the grocery store or your pantry:
- All-purpose flour — we always have unbleached at our house, but the regular kind works perfectly, too!
- Granulated sugar — also known as white sugar, this adds sweetness to the waffle batter.
- Leaveners — we’re using a combination of baking powder and baking soda. Make sure yours are fresh.
- Kosher salt — medium grain kosher salt is my go-to. Diamond Crystal is my favorite brand. You may use a similarly sized sea salt. Keep in mind that table salt is saltier than kosher.
- Buttermilk — this makes an impact on the texture of these waffles. If you don’t have buttermilk at your house, you can make a buttermilk substitute easily!
- Eggs — large eggs or extra large eggs are what I use in all baked good recipes.
- Flavorless oil — avocado vegetable or canola oil are perfect here! You can also use unsalted butter if that’s your jam, too.
- Vanilla extract — the real deal pure vanilla extract is where it’s at. This adds amazing flavor.
- Mini chocolate chips — these add the sweet chocolate flavor to the batter. You can use regular sized chocolate chips, if desired, and any type of chocolate. Milk chocolate, bittersweet chocolate, dark chocolate and semi-sweet chocolate chips all work here.
How to make Buttermilk Chocolate Chip Waffles
First, we’re going to make our waffle batter for these Homemade Chocolate Chip Waffles.
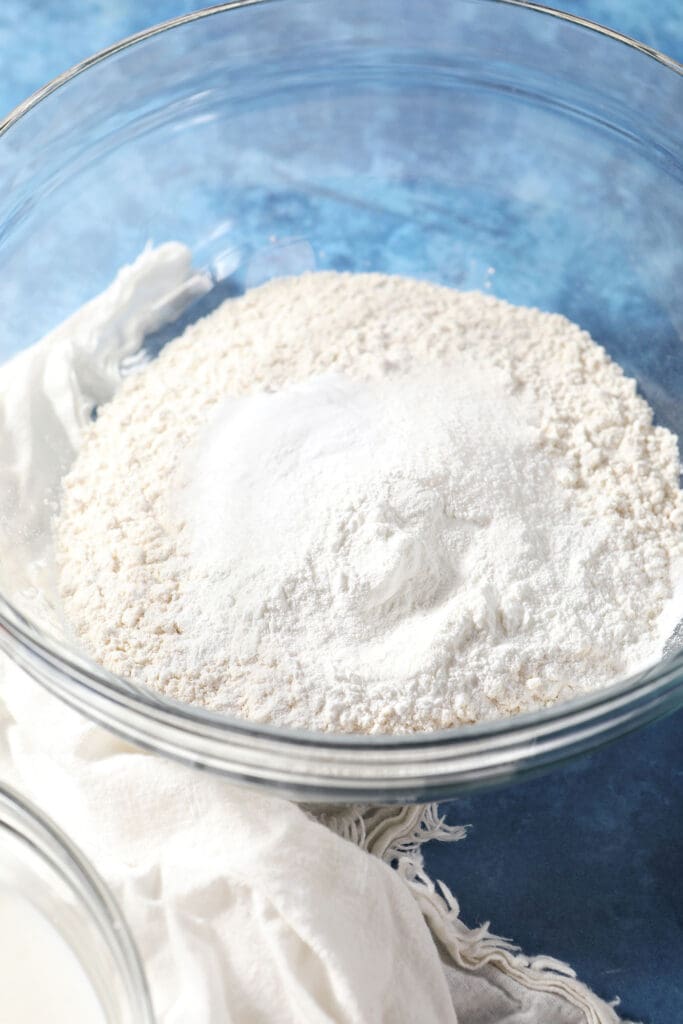
Measure the flour, sugar, baking powder, baking soda and salt in a large mixing bowl. Whisk them together until combined and set aside.
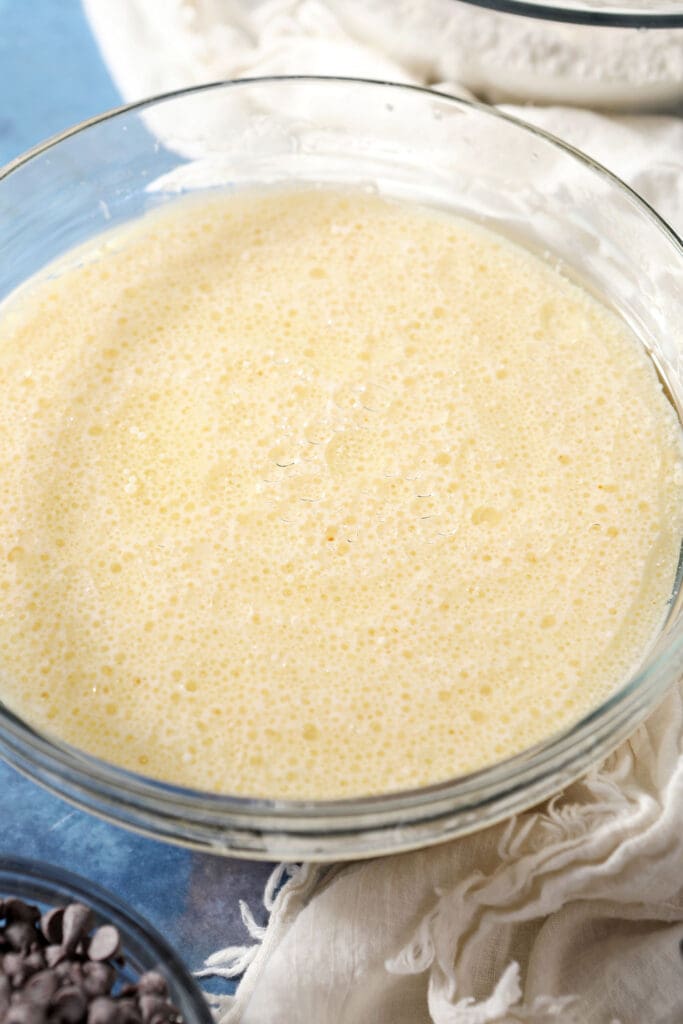
Pour the buttermilk into a liquid measuring cup or a smaller mixing bowl. Add the oil, vanilla and eggs. Whisk them or stir them with a fork until everything is combined.
DID YOU KNOW?
We mix vigorously because if you don’t give them a good mix, there will be random ribbons of egg in your waffles, and that’s gross. (Please take this advice from me—I’ve made this mistake, and I want your waffles to be delicious.)

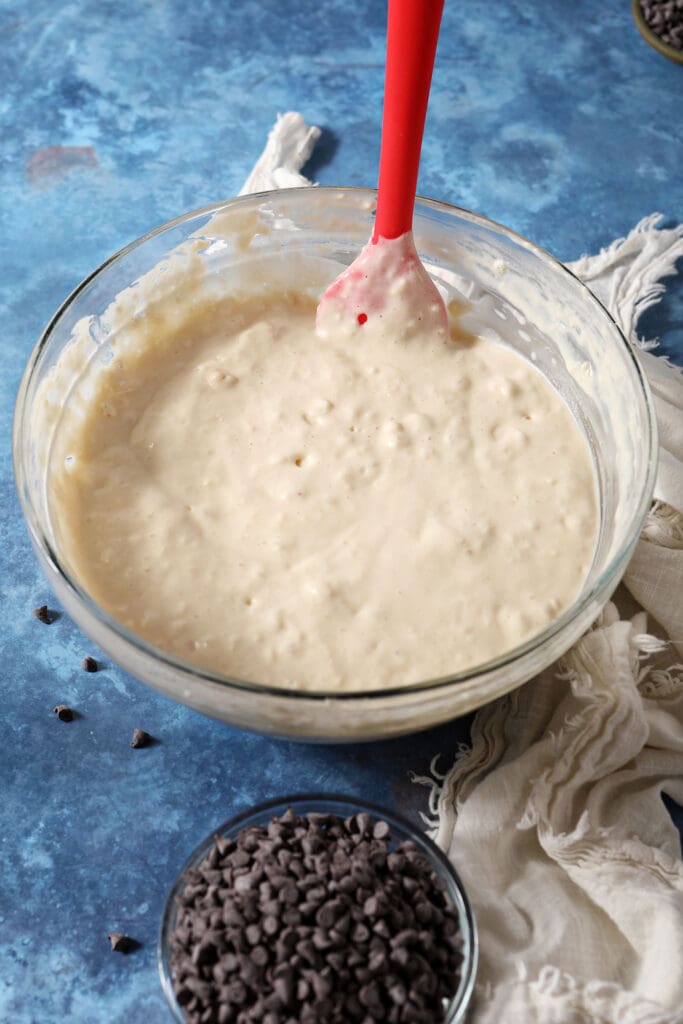
Once the wet ingredients are well combined, pour them directly into the flour mixture.
Use a rubber spatula to gently stir them together until just combined.
If you overmix the batter, the waffles will become tougher, so just stir until the flour is incorporated. It’s OK if this homemade batter has small lumps.
Set the batter aside, and let the batter rest for 5-10 minutes. It can rest up to 30 minutes without issue.
While it rests, heat your waffle iron and give it a spritz of nonstick cooking spray. You could also brush it with melted butter.
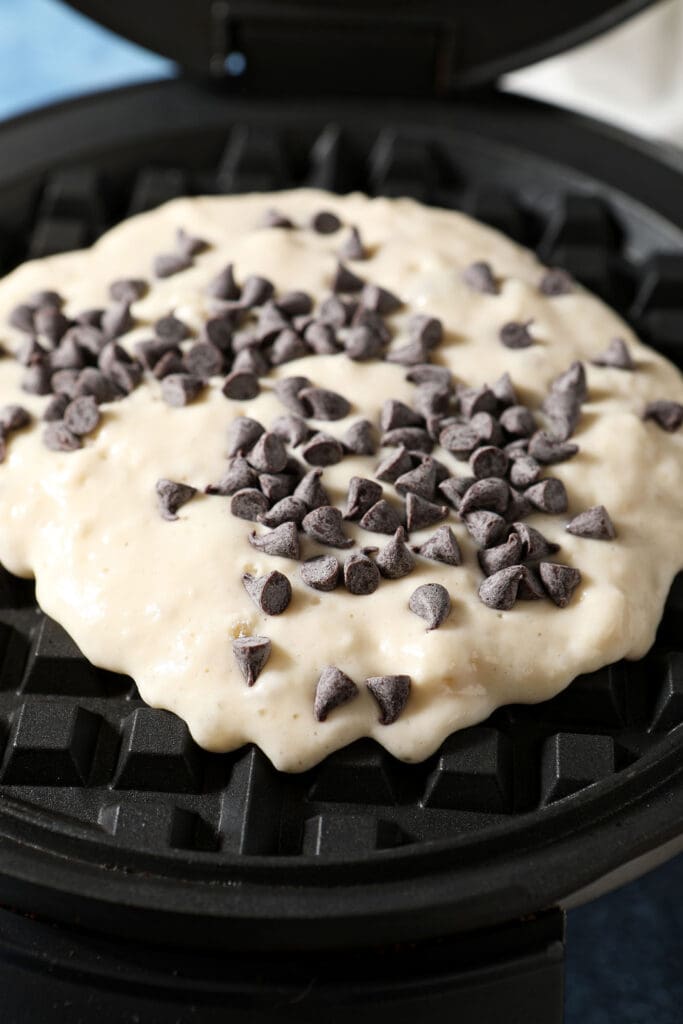
Use a cookie scoop or a measuring cup to pour batter onto the hot waffle iron. Sprinkle on about a tablespoon of mini chocolate chips over the batter.
We add the chocolate chips at this point so we can evenly sprinkle them over the batter without them being too concentrated in one spot or another.
We’re using a ½ cup scooper for these waffles. This will be dependent on the size of your waffle iron.
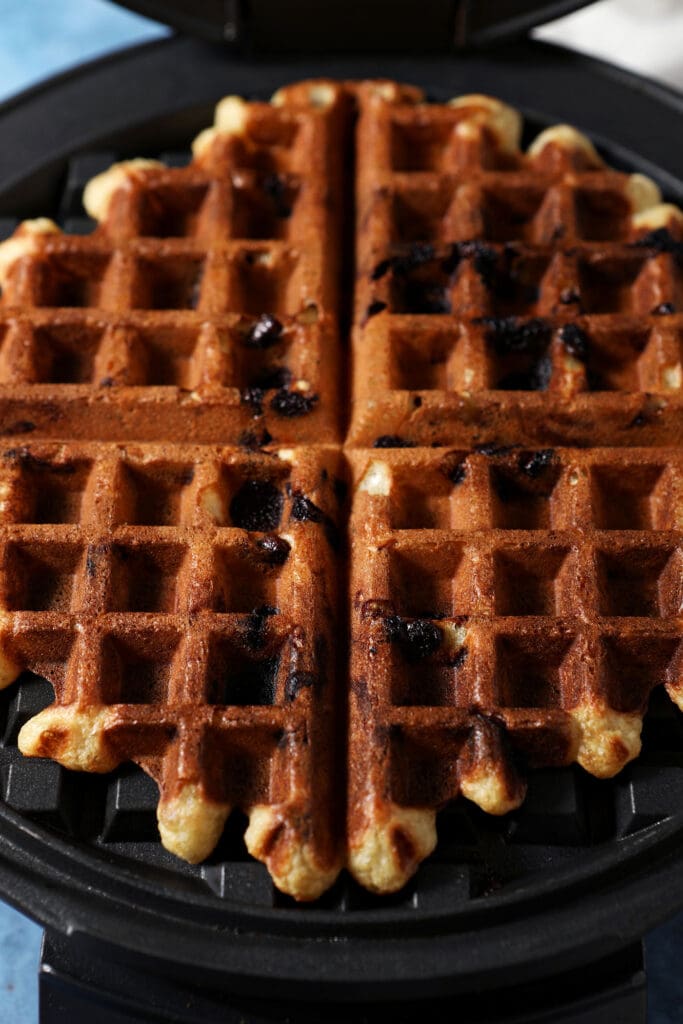
Cook for 2-3 minutes, or until your waffle iron alerts you to the waffle being done. Open the waffle iron and remove when golden brown and delicious.
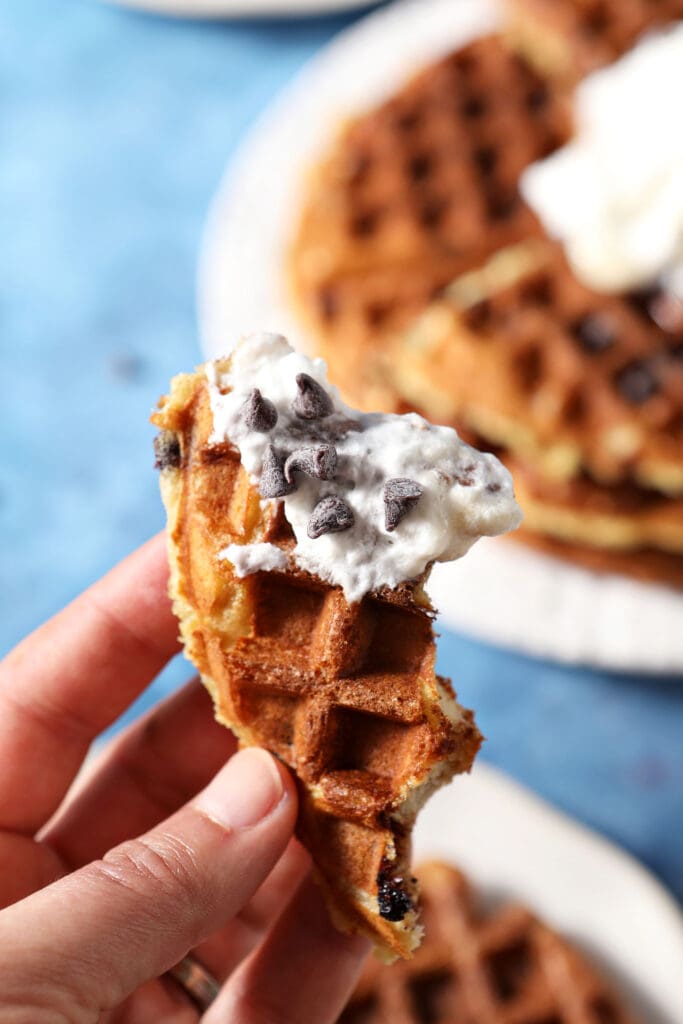
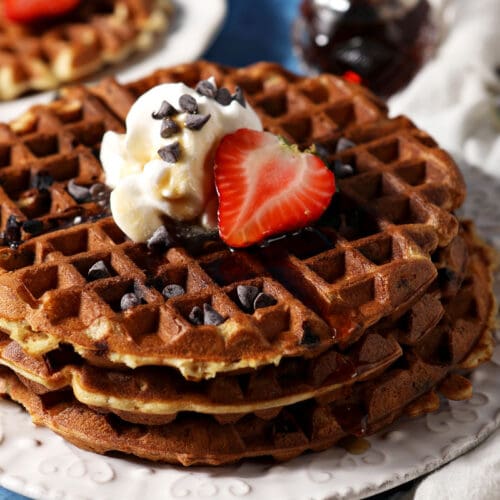
Serve your waffle with your favorite toppings. I recommend trying them with fresh fruit (like strawberries, as shown in these photos), a pat of butter, a dollop of peanut butter or sweetened whipped cream, extra chocolate chips or a drizzle of pure maple syrup.
How to store and freeze
Leftover waffles store and freeze well! Store the cooked waffles in an airtight container in the refrigerator for 3-4 days. Reheat in the oven or a toaster oven on a lower heat until crispy.
To freeze, line a sheet pan with wax paper or parchment paper. Lay out the leftover waffles in a single layer. Transfer to the freezer, and freeze until frozen. Transfer to a plastic freezer bag and keep frozen for up to 3 months.
To reheat, defrost in the refrigerator OR defrost for 30 seconds in the microwave, then toast until crispy.

Erin’s Easy Entertaining Tips
Chocolate Chip Waffles are a total treat for an at-home brunch!
While waffles are something that I previously thought might be fussy to prepare for brunch on weekend mornings, you can absolutely make these for that! It just requires a little patience, planning and working ahead to make them before guests arrive. (Because if you’re like me, you’re not going to want to make each waffle individually for your guests.)
Here are a few tips and tricks to transforming these waffles into a brunch centerpiece:
- Depending on the amount of people you’re serving, you can double this recipe. You can also half it if you’re not feeding a crowd.
- Make the waffles before guests arrive, and keep them warm in the oven. We put ours on a baking sheet or two* (affiliate link) and keep them warm in a 200°F oven. You could also reheat them in a toaster oven so you do not have soggy waffles.
- Transform your table into a waffle bar! Offer various toppings, like real maple syrup, sweetened whipped cream, strawberry syrup, fresh berries or hot fudge sauce and let guests dress their own.

Frequently Asked Questions
I really like to use miniature chocolate chips because they disperse well in the batter and don’t stick to the waffle iron.
In my opinion, to secret to fluffy waffles is mixing the wet and dry ingredients separately so you don’t overmix the batter once they’re combined. Also, making sure your leaveners are fresh so that the waffles puff up!
The combination of buttermilk and these ingredients makes for the perfect balance! Also, to get a crispy exterior on your waffles, your waffle iron needs to be warmed up, as well as have a little fat on it. We brush ours with butter, but you can also spritz it with nonstick cooking spray.
Quick Tips and Tricks for the Best Waffles
- Don’t overmix your batter! Just mix the batter until it has just come together. Lumps are OK. If you mix until it’s smooth, the waffles won’t be as fluffy.
- Use a cookie scoop or measuring cup to ensure all your waffles are similarly sized.
- Leftover waffles? Freeze ’em! Line a baking sheet with wax paper, place the completely cooled waffles on the paper in a single layer and pop them in the freezer for 4-6 hours. When the waffles are fully frozen, transfer to a freezer baggie. Reheat in the toaster oven, toaster or the oven until warmed through.
Here’s how you make these beauties…
Chocolate Chip Waffles
EQUIPMENT
As an Amazon Associate and member of other affiliate programs, I earn from qualifying purchases.
Ingredients
- 2 ¼ cups all-purpose flour
- 2 tablespoons granulated sugar
- 1 tablespoon baking powder
- 1 teaspoon baking soda
- ½ teaspoon kosher salt
- 2 cups buttermilk
- 2 large eggs
- ¼ cup flavorless oil avocado vegetable, canola all OK
- 1 ½ teaspoons pure vanilla extract
- ½ cup mini chocolate chips
Want to save this?
Instructions
- Combine flour, sugar, baking powder, baking soda and salt in a large bowl. Whisk to combine. Set aside.
- Pour the buttermilk, eggs, oil and vanilla extract into a liquid measuring cup. Whisk thoroughly until combined. (The eggs need to be completely incorporated.)
- Pour the wet ingredients into the dry ingredients.
- Stir until just combined. The batter does not need to be completely smooth, so do not mix it until it is smooth or it will be overmixed.
- Pour ½ cup of the waffle batter into a greased, hot waffle iron. (This will be dependent on the size of your waffle maker, so you might need more or less, and depending on this, you will have more or less waffles.)
- Sprinkle about a tablespoon of chocolate chips over the batter, and close the waffle iron.
- Cook until crispy and cooked through, about 3-4 minutes per waffle depending on your waffle iron.
- Repeat until all the waffles have been made and enjoy!
Video
Notes
Nutrition

About the Author:
Erin Parker is a Southern gal living in Texas with her husband and two daughters. She started The Speckled Palate to share what she was cooking as a newlywed… and over the years, it’s evolved to capture her love for hosting. Specifically, the EASIEST, lowest key entertaining because everyone deserves to see their people and connect over good food. Learn more about her…
Before leaving a comment or rating, ask yourself: