
Ground Beef Meat Pies

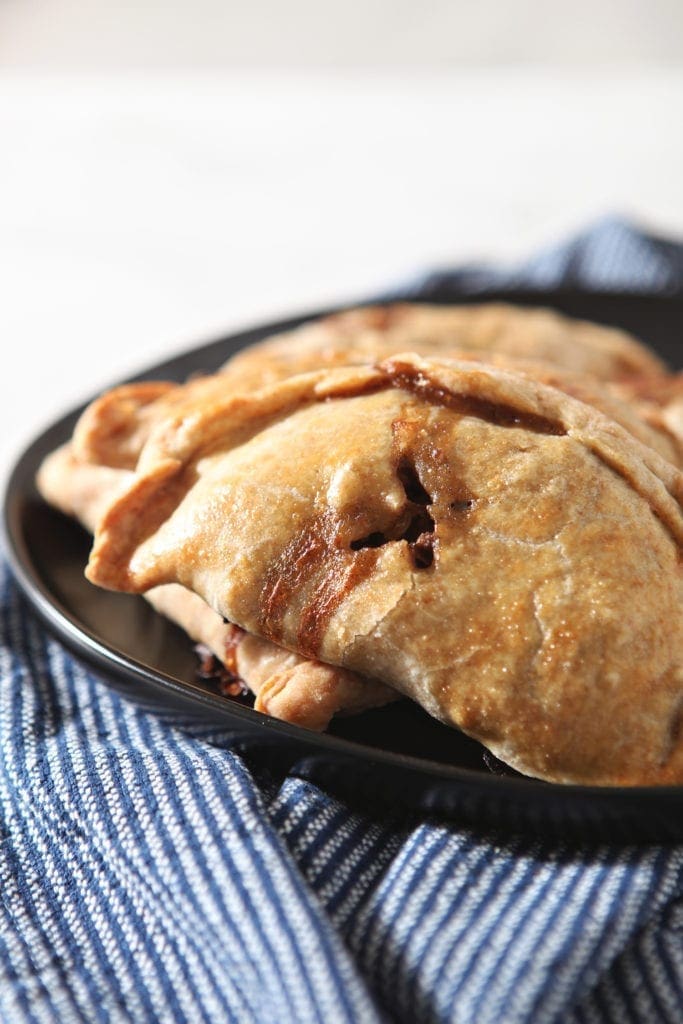
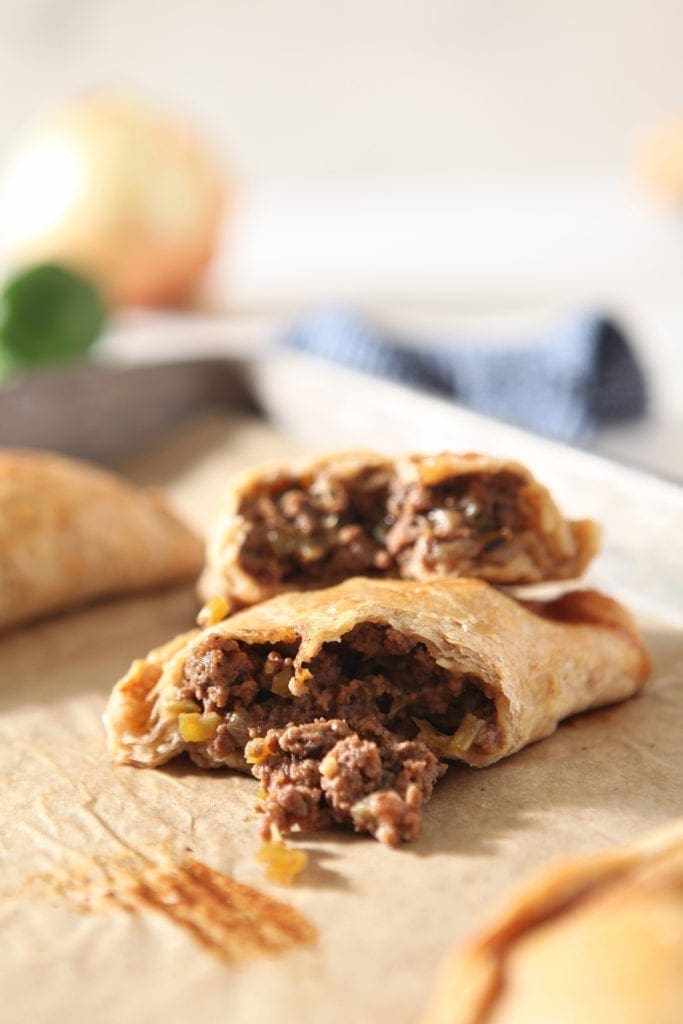
Made famous in Central Louisiana, Natchitoches Meat Pies are traditional savory hand pies. Learn how to make this handheld meat pie recipe with a flavorful Panorama Meats ground beef filling, wrapped in a flaky pastry crust. They’re perfect for sharing at any type of gathering. Makes 14-16 hand pies.

Want to save this?
This post was originally created for and sponsored by Panorama Meats. This brand’s products are no longer available for purchase.
This post contains affiliate links.
There was a surprising headliner at our engagement party ten years ago.
You see, Winston’s from South Louisiana, and when his family hosted an engagement party for us, we didn’t realize the standout of the day would be the MEAT PIES.
Yes, you read that correctly.
Our engagement party was held at an old school South Louisiana establishment, and the chef made all sorts of old school Louisiana dishes for the party.
The next day (and in the following years), all I heard about was meat pies. Mountains of meat pies. Showers of meat pies. Meat pie for daaaaaaaaaays.
Why I love this recipe:
Natchitoches Meat Pies, stuffed with meaty filling and surrounded by a flaky pastry crust, are a Louisiana specialty. They hail from the Central Louisiana town of Natchitoches (pronounced Nack-uh-dish).
They’re similar to an empanada with slightly different seasonings and close to a tourtiere, too.
So today, we’re making ‘em at home so you can have a taste of South Louisiana, too.
I want you to know that this meat pie recipe tastes authentic, and it also takes a little time. So before you get started, know that you’re going to start and stop on this recipe a few times before your meat pies are baked and beautiful.
In my opinion, they’re worth the trouble because the flavor is outstanding!
Other beef recipes to try: Beef Taco Pasta Salad | Grilled Steak Flatbread Pizza | Homemade Loaded Queso | Texas Chili | French Onion Steak Pasta | Beef Poutine Fries and Gravy
Looking for a handheld appetizer recipe, but unsure where to start? Check out my Appetizers recipe index for inspiration!
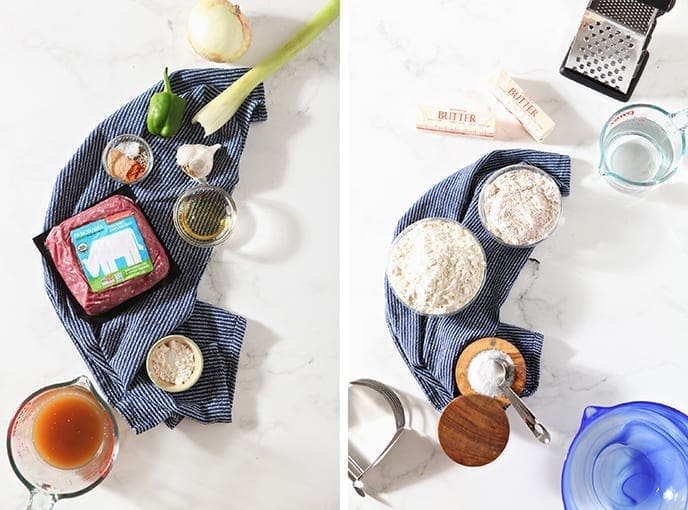
What you’ll need to make this recipe
The Speckled Palate participates in affiliate programs. As an Amazon Associate, I earn a commission from qualifying purchases. Please refer to my disclosure page for more information about these affiliate programs.
- A sharp knife and cutting board
- Cast iron skillet or a large saucepan
- A large mixing bowl (to make your pie crust)
- Cheese grater (to shred the butter!)
- Pastry dough blender
- Rolling pin
- 5-6” round biscuit cutter (or a small dessert plate)
Let’s talk ingredients!
In addition to the tools above, you’re going to need some ingredients to make this recipe, too! Chances are, you might already have some of them in your fridge or pantry. Scroll down to the recipe card for the full measurements and instructions.
Here’s what you need to grab at the grocery store:
- Extra virgin olive oil — or another neutral oil
- The Holy Trinity — this is a combination of yellow (or white) onion, green bell pepper and celery that is prevalant in many Louisiana dishes. It’s similar to a mirepoix, except you don’t need carrots.
- Garlic — this adds more flavor to the mixture. I like to chop my own, but the jarred kind works, too.
- Ground beef — I used 93/7 lean ground beef because it cooks up quick and adds incredible flavor to a trinity of traditional South Louisiana veggies without weighing them down by extra fat.
- Spices and seasonings — we’re using a combination of kosher salt (medium grain is the best); Creole seasoning, black pepper and cayenne pepper to season the meat pie filling.
- All-purpose flour — you’ll need this for both the filling and the pie crust. We keep the unbleached kind in our house.
- Beef stock — if you can find the low sodium kind, get that!
- Unsalted butter — this needs to be extremely cold. I like to throw mine in the freezer before grating it.
- Whole wheat flour — I love using whole wheat flour in this recipe because it adds a nuttiness to the pie crust and pairs beautifully with the all-purpose flour.
- Water — it needs to be cold, and the amount you use is going to be dependent on the weather where you live. Fun, right?

How to make this Meat Pie recipe
Make the Meat Filling
Chop the onion, bell pepper, celery and garlic. We want them to be as chopped as finely as possible because nobody wants giant chunks of veggies in a meat pie.
You could also do this step with a food processor. Just don’t puree the veggies or that will affect the texture of the filling.
Heat a cast iron skillet over medium-high heat and drizzle in the oil.
Once hot, add the veggies, and season with salt and pepper.
Cook the veggies for 3-5 minutes and move them around the skillet with a wooden spoon until they’re translucent. You don’t want them to have any color on them, but we want the veggies to soften up.
Add the ground beef, and season with salt, Creole seasoning, black pepper and cayenne pepper.
Unsure about all that spice? Here’s what you can do:
- Season with half of the suggested Creole seasoning, black and cayenne peppers. Just remember, you can add spice, but you can’t take it away!
- If you have Creole seasoning with salt in it, skip the additional salt, as a regular Creole seasoning will be salty enough.
Break up the meat using the back of a wooden spoon, and brown it.
Once browned, sprinkle in the flour. Stir that into the meat mixture, cooking for about a minute.
WHY DO WE ADD FLOUR?
This is the base of our meat pie gravy. The flour when combined with the stock will cause the liquid to thicken as it cooks.
Next, pour in the beef stock. Stir it with the other ingredients, and cook for 1-2 minutes, or until most of the liquid thickens.
Remove from the heat, and transfer to a food-safe airtight container.
Refrigerate for 2-3 hours, or until cold. Do not skip this step because your shortcrust pastry dough will fall apart if the filling is hot!
Make the Pastry Dough
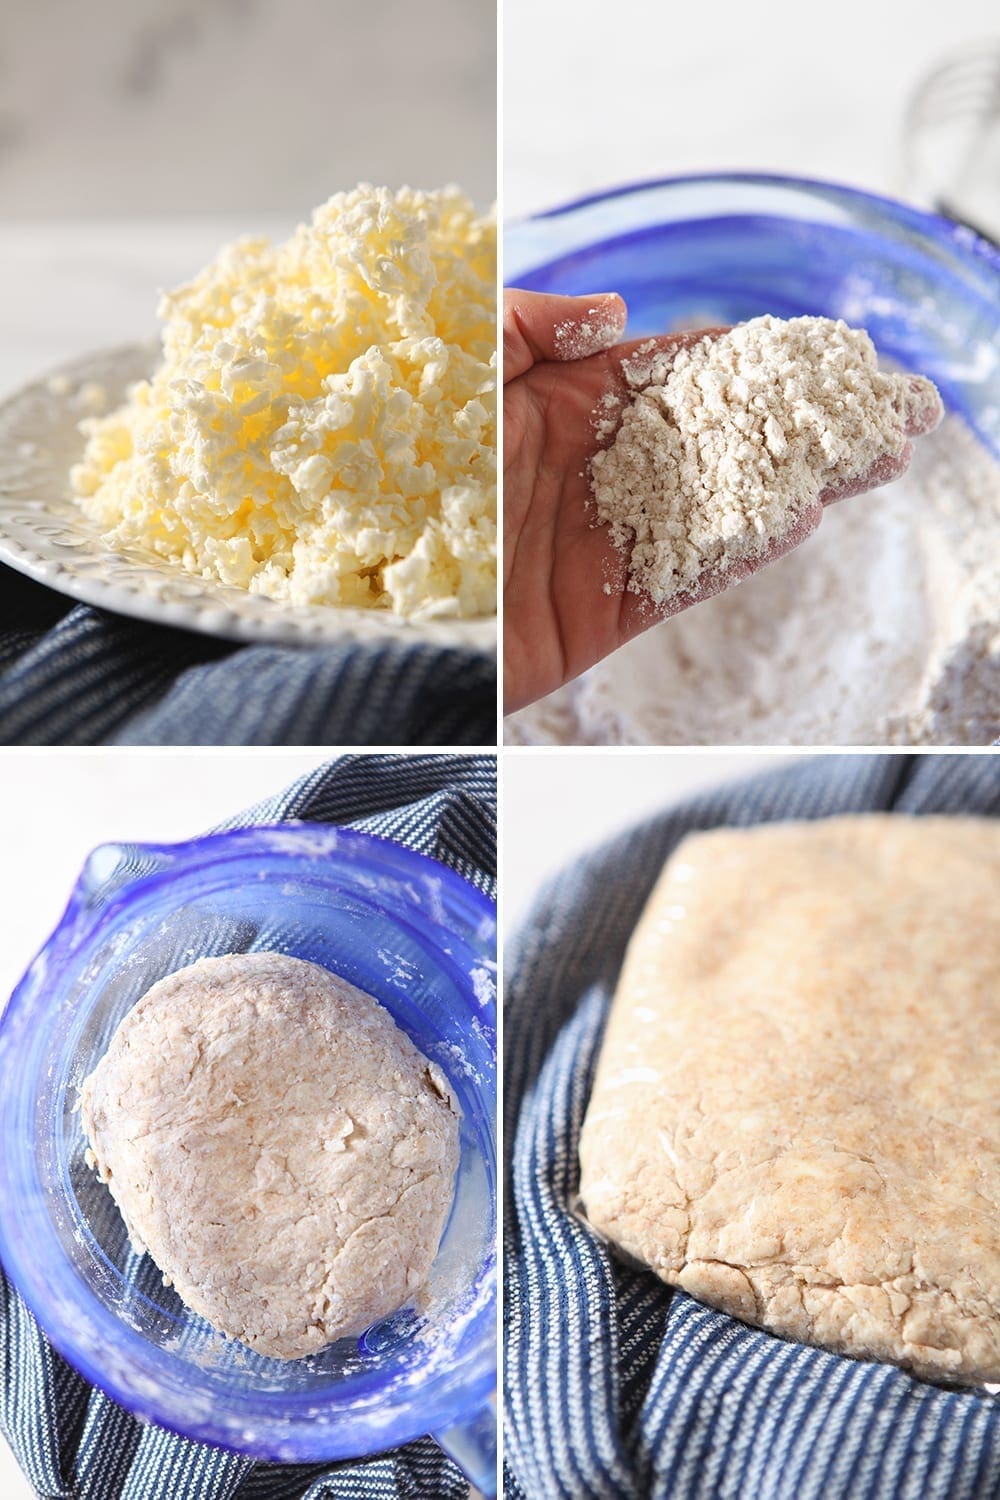
Prepare the butter. Use a cheese grater to grate the cold butter. Transfer it back to the freezer to stay as cold as possible.
This is going to help the butter disperse better in the dough. Trust me. I do this with biscuits, too.
Sift the flours and salt through a fine mesh strainer into a large bowl.
Chill the water. Pour the water into a glass with ice cubes. This is going to keep the dough cold — an essential when we make pastry dough!
Use a dough blender or a fork to cut the butter into the flour mixture. When you’re done, the butter should be the size of peas and the texture of wet sand.
Use a tablespoon to spoon the cold water on top of the flour-butter mixture. (I did this in ¼ cup sequences, then when the dough started coming together, added the water 1 tablespoon at a time.)
Use a rubber spatula to gently fold the flour over the liquid. Move the spatula from the side to the bottom in a scooping motion and gently incorporate the ingredients. Do not stir.
Add additional water as needed. You want the dough to just hold together when pressed, and you should be able to see flecks of butter in the crust. It should not be sticky or wet.
Shape the dough into a round and wrap tightly in plastic wrap.
Refrigerate at least one hour, though you can certainly refrigerate it longer if you want. (I threw mine in the fridge overnight.)
Form the mini meat pies.
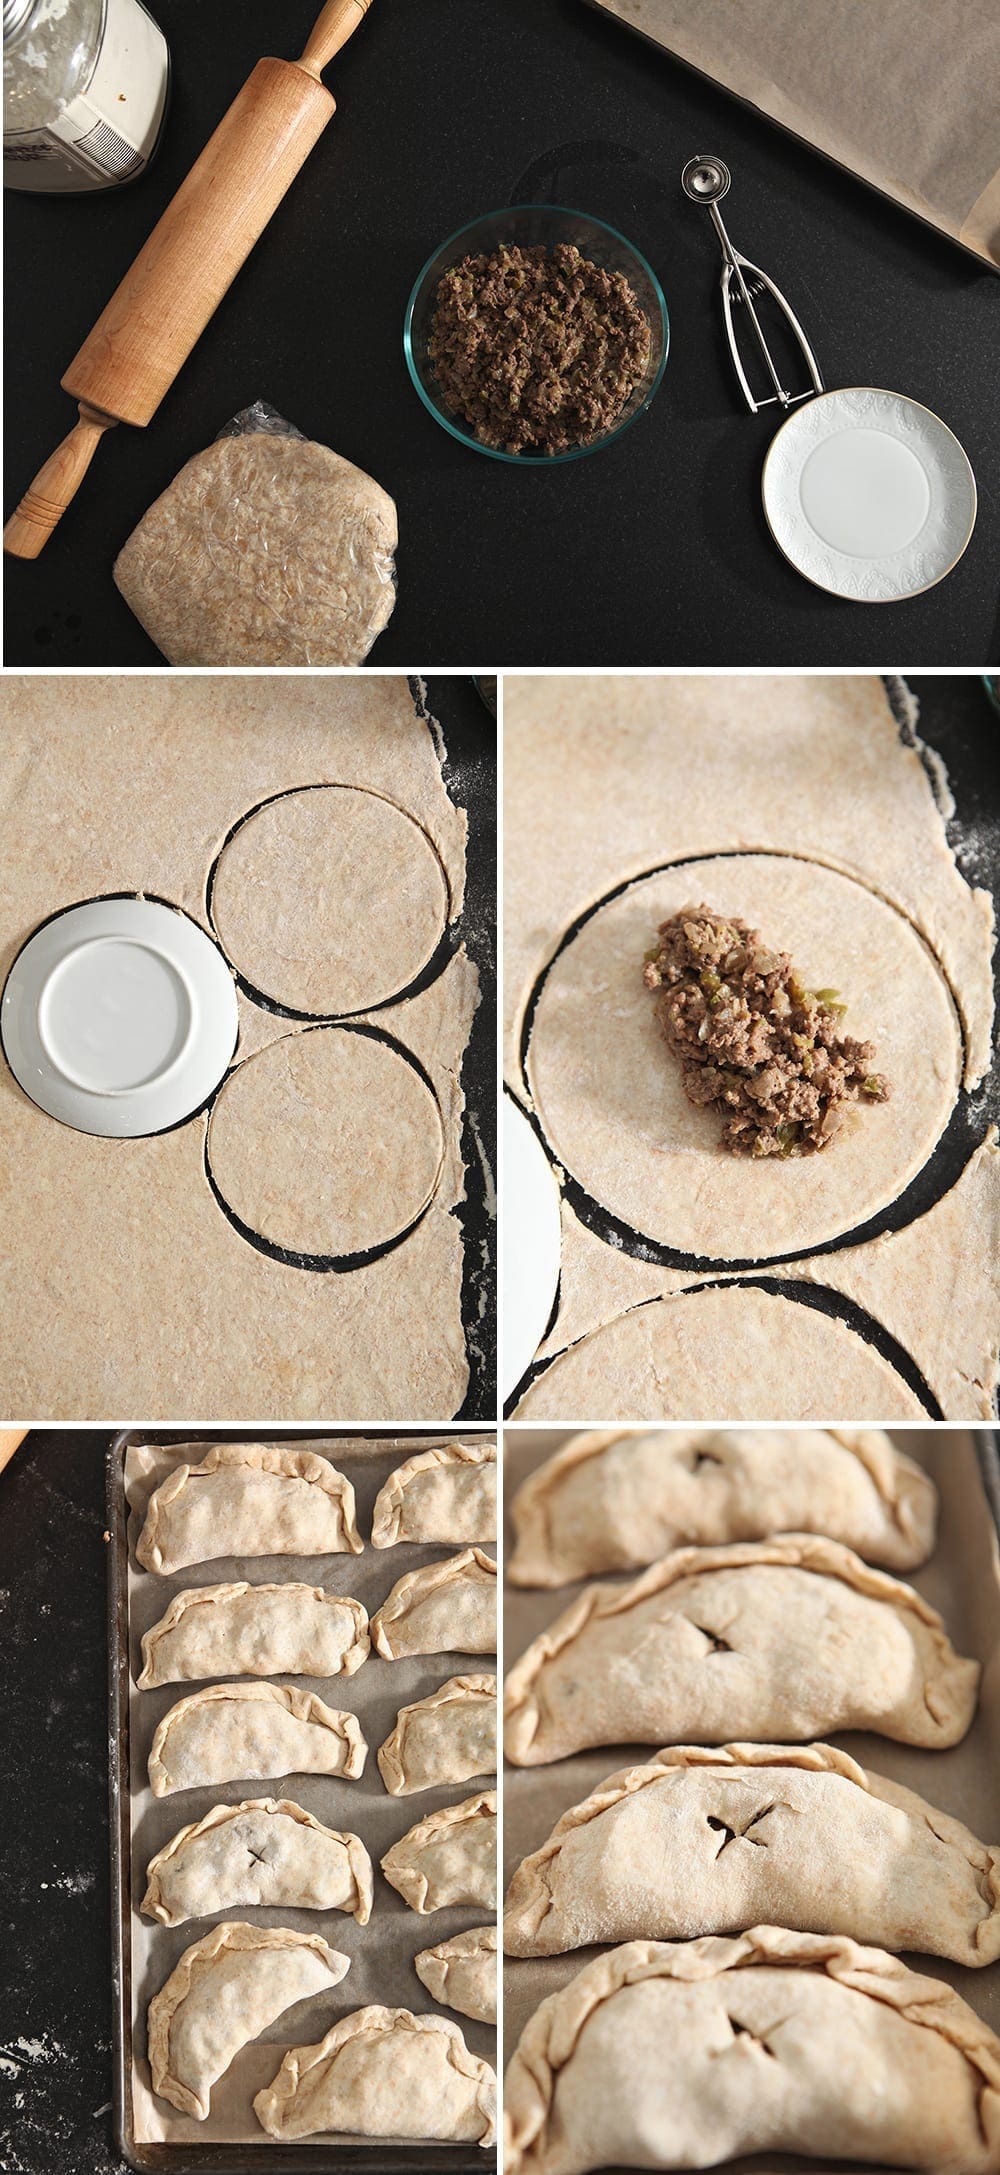
Roll the dough. Flour a flat surface, and then place the chilled dough on top of it. Sprinkle that with flour, too. Roll it out using a rolling pin until it’s about ¼” thick.
Pro tip!
The key is working quickly and efficiently, but also knowing that if the crust is too thick, it won’t fold well over the meat pies. If it’s too thin, it will fall apart as you’re pressing working with it.
Use a large biscuit cutter or a small dessert plate to cut the dough into 5-6” rounds. You can go smaller, but I like a bigger shape for this so they’re truly hand pies. It’s also easier to work with when the rounds are larger.
Add the beef filling on top of the dough, then fold the dough rounds in half, pressing the edges using your fingers and crimp or seal with a fork’s tines. Make sure they’re truly sealed because if not, they’ll burst in the oven.
Repeat the process until all the hand pies have been made, then use a fork or a knife to poke a few holes in the top of the meat pies. (I did mine in a + on the very top, but you can do whatever shape/pattern makes you happy.)
Freeze the hand pies on a wax paper-lined baking sheet or refrigerate for 1-2 hours so the dough can firm up.
Why do we refrigerate the pies? As you work with the dough, it’ll get warm, and this makes for a dicey baking situation.
DID YOU KNOW?
You can also freeze them days ahead of your event. If you do this, just know the bake time will be longer because they’re frozen solid.
Bake the hand pies.
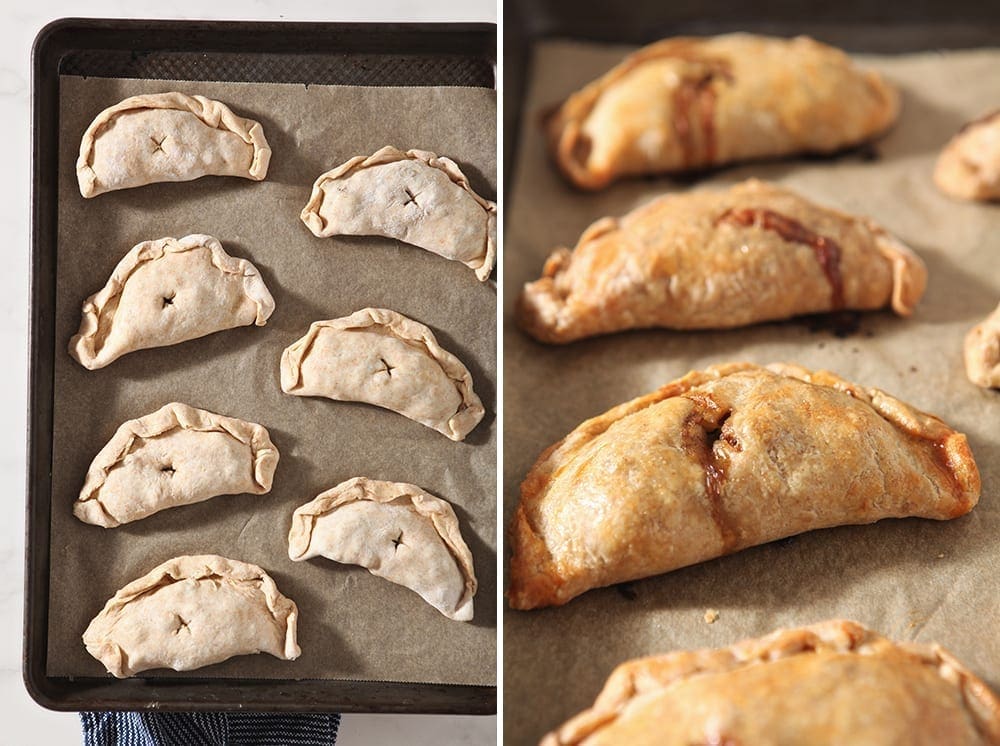
When the meat pies are chilled and you’re about ready to eat, preheat the oven and line a baking sheet with parchment paper. Place the meat pies (frozen or chilled) on the prepared baking sheet.
Make egg wash. Crack a large egg into a bowl, and use a fork to break the yolk. Gently brush this on top of the meat pies.
The bake time will vary, depending on what you did with the pies earlier.
- If they’re chilled from the fridge (but not frozen), they’ll bake for 30-35 minutes.
- If they’re frozen, your bake time will be closer to 45-50.
- Knowing this, you need to keep an eye on them near the end of the cooking cycle, because every oven is different.
Once golden brown and bubbly, remove them from the oven and let cool slightly before serving and enjoying!
Erin’s Easy Entertaining Tips
Louisiana-style mini meat pies are the perfect finger food to serve as a snack at a laid-back gathering because guests can hold them in their hands AND eat them with ease.
To say we love these meat pies is an understatement, and they never last long.
However, meat pies are a bit fussy when it comes to entertaining because they take a lot of time and planning.
I’ve compiled a few tips and tricks for you below to help you succeed! I also want you to eat all the meat pies your heart desires.
- Make the components 1-2 days in advance. Bake them off before guests arrive.
- Work in batches. Yes, hand pies are fussy, but if you break up the preparation pieces, they are easier. Make the filling. Chill it. Make the pastry dough. Chill it. Roll out the dough when cold. Fill and seal them up. Chill the meat pies again until it’s baking time.
- Involve the kids. Depending on your kid’s age and skill level, there is a lot they can assist with in this recipe, from chopping to sautéing to making the pastry dough and filling it, too!
Frequently Asked Questions
These meat pies are a regional dish and are also known as Natchitoches meat pies. They are hand-held pastries with savory, meaty filling!
Some of the meat pies have a different protein, like crawfish or ground pork, but we like the beef meat pies the best. Which is why we’re sharing it with you here!
This meat pie recipe is brilliant because we pour in the beef stock before the beef has a chance to overcook! That way, it’s nice and saucy and delicious without becoming too dry.
To freeze these individual meat pies, I place them on a wax or parchment paper-lined baking sheet in the freezer. Once they’re frozen solid (about 4-5 hours), I transfer them to a freezer-safe plastic bag and seal it up so I can use them whenever in the future. To refrigerate the meat pies, I place them on a lined baking sheet, but then cover with plastic wrap so they don’t absorb any weird scents/flavors from the fridge.
Unfortunately, no, there is not. Working with hot filling and cool crust is a recipe for disaster, so you need to take the time to space it out and do it right! My recommendation is making these 1-2 days before any gathering and taking your time, knowing full well that they will take time.
Yes, you can, though I’ll be honest with you: I had a really hard time working with store-bought crust for this meat pie recipe because I couldn’t get it to roll the way I wanted, and it ended up being too thick and crumbly for my liking.
Everyone’s tastebuds are different, so I can’t answer that for you… but you can certainly go light on the Creole seasoning at first. When the meat has cooked through, give it a taste and go from there. You can always add in more of the spices, but you can’t take them away once they’re in the pot.
Quick tips for making this classic Meat Pie recipe
- Make the filling and pie crust up to 4 days before. You want both of these to be chilled when you’re making the pies, so putting together the components in advance and keeping ‘em cool in the fridge is clutch.
- Go light on the seasoning at first. If you’re concerned the seasonings will be too much, just add half of the Creole seasoning. Taste the meat once it’s cooked. Add the rest of the seasonings or leave it as is.
- Make the pies in advance, and freeze them. This is my favorite party trick because it makes entertaining a breeze! When the pies are ready in the freezer, all you have to do is bake them!
- Store in a covered food storage container for 1-2 days in the fridge after baking.
- To reheat, toast in the toaster oven. Because heating them in the microwave will make the pastry tough and soggy.
Looking for a meat pie recipe with potatoes? Check out my Mashed Potato Beef Hand Pies!

Here’s how you can make this recipe…
Ground Beef Meat Pies
EQUIPMENT
As an Amazon Associate and member of other affiliate programs, I earn from qualifying purchases.
Ingredients
Meat Pie Filling
- 1 tablespoon extra virgin olive oil
- 1 yellow onion (about 1 cup finely diced )
- ½ green bell pepper (about ½ cup finely diced )
- 1 rib celery (about ⅓ cup finely diced )
- 3 garlic cloves minced
- 16 oz. ground beef
- 1 teaspoon kosher salt
- ¾ teaspoon Tony Chachere’s Salt-Free Creole Seasoning
- ½ teaspoon black pepper freshly ground
- ¼ teaspoon cayenne pepper
- 1 tablespoon all-purpose flour
- ½ cup beef stock low sodium, if possible
Pastry Crust
- 1 cup unsalted butter frozen
- 2 cups all-purpose flour
- 1 cup whole wheat flour
- 1 tablespoon kosher salt
- 1 ½ cup water could need more or less, depending on the weather conditions
Instructions
Make the Meat Pie Filling
- Use a sharp knife to chop 1 yellow onion, ½ green bell pepper, 1 rib celery and 3 garlic cloves finely. (You want it to be as chopped as possible because you don’t want giant chunks of veggies in the meat pies.)
- Heat 1 tablespoon extra virgin olive oil in a cast iron skillet over medium-high heat.
- When the skillet is hot, add the veggies, and season with salt and pepper. Cook for 3-5 minutes, or until the vegetables are translucent.
- When the veggies are translucent, add the 16 oz. ground beef. Season with 1 teaspoon kosher salt, ¾ teaspoon Tony Chachere’s Salt-Free Creole Seasoning, ½ teaspoon black pepper and ¼ teaspoon cayenne pepper.
- Break up the meat using the back of a wooden spoon, and move around the skillet as it cooks.
- When the beef has browned, sprinkle in 1 tablespoon all-purpose flour, and cook for 1-2 minutes. (We want this to be mixed with the beef mixture so that it can thicken the stock, which is poured in next.)
- Pour in ½ cup beef stock, and stir to mix with the ingredients. Cook for 1-2 minutes, or until most of the liquid has been absorbed by the meat mixture.
- Remove from the heat, and transfer to a food-safe storage container. Refrigerate for 2-3 hours, or until cold.
Make the Pie Crust
- With a cheese grater, grate the frozen 1 cup unsalted butter. Once everythinghas been grated, transfer the butter back to the freezer to stay cool.
- Sift the 2 cups all-purpose flour and1 cup whole wheat flour with 1 tablespoon kosher salt in a large glass bowl.
- Pour 1 ½ cup water into a glass with ice cubes.
- Remove the butter from the freezer.
- Using a dough blender or a fork, cut the butter into the flour mixture until the fats appear to be the size of peas and the texture of wet sand.
- Add ¼ cup of water on top of the flour-butter mixture at a time.
Use a plastic spatula to lightly fold the flour over the liquid. Do not stir. - Add ¼ cup of water at a time until the dough begins coming
together, then add water 1 tablespoon at a time so that you don’t make it too wet. - When it’s ready, the dough should just hold together when
pressed, and you should be able to see flecks of butter in the crust. - Form the dough into a round and wrap tightly in plastic wrap.
- Refrigerate at least one hour or overnight.
Make The Meat Pies
- On a flat, floured surface, roll out the dough using a rolling pin until ¼” thick.
- Using a large biscuit cutter or a small dessert plate to cut the dough into 5-6” rounds. (You can go smaller, but I like a bigger hand pie for this. It’s also easier to work with when the rounds are larger.)
- Measure 2 heaping tablespoons of the filling into the center of the dough.
- Fold the dough rounds in half, pressing the edges using your fingers and crimp or seal with a fork’s tines. (You want to make sure they’re truly sealed, or they’ll burst in the oven.)
- Repeat the process until all the hand pies have been made.
- Using the fork or a knife, poke a few holes into the top of the hand pies.
- FREEZE or refrigerate 1-2 hours so the dough can firm up again. (If freezing for days on end, the bake time will be longer. You can also let the meat pies unfreeze in the refrigerator 1-2 hours before baking.)
Bake the Meat Pies
- Preheat the oven to 350°F. Line a sheet pan with parchment paper, and set aside.
- Crack an egg into a bowl. Use a fork to break the yolk.
- Place the chilled (frozen or refrigerated) meat pies on the prepared baking sheet. Brush the tops with the egg wash.
- Once the oven is preheated, bake the meat pies for 30-35 minutes if refrigerated. Bake them for 45-55 minutes if frozen. (Keep in mind that the bake time will vary depending on the size and how chilled your hand pies are, so keep an eye on yours!)
- Once golden brown, remove from the oven, and let cool slightly before serving.
Notes
- Make the filling and pie crust up to 4 days before. You want both of these to be chilled when you’re forming and filling the pies, so making them well in advance and keeping ‘em cool in the fridge is clutch.
- Go light on the seasoning at first. We like our food well spiced, but everyone’s tastebuds are different. Add half of the Creole seasoning at first, and once the meat is cooked, taste it to see how it tastes. If it’s good, then leave it as is. If you want more flavor, add in the rest of the seasoning.
- Make the pies in advance, and freeze them. This is my favorite party trick because it makes entertaining a breeze! When the pies are ready in the freezer, all you have to do is bake them!
- Store in a covered food storage container for 1-2 days in the fridge after baking.
- To reheat, toast in the toaster oven. Because heating them in the microwave will make the pastry tough and soggy.
Nutrition

About the Author:
Erin Parker is the recipe developer, food photographer and founder of The Speckled Palate, where she shares recipes, many Southern and Louisiana-inspired, and easy, low-key entertaining ideas since 2011. Whether you’re searching for a weeknight dinner or a party menu, Erin’s recipes are made for sharing with the people you love. Learn more about Erin and learn more about TSP.


As a native Louisianan and all-around bon vivant, I can say that these meat pies live up to their name. Rich and full-bodied, with a dash of spice on the inside then surrounded by a wonderfully flaky crust that holds the filling well so eating is not messy.“Ça, c’est bon!”
SO happy to hear these meat pies live up to their name! Here’s to LOTS more of ’em this fall and winter. Ça, c’est bon, indeed!
I made these this week! So, so good! Perfect recipe and the instructions were excellent. The seasonings are spot on and the pastry was so flaky – really love these! They’re part of the family now. Thank you!
Oh, Mary. This makes me SO happy to hear! Thank you for your feedback and leaving a comment. Seriously–this makes my day!
Great recipe thank you for sharing! This was my first time trying this. I followed the instructions as stated and it turned out great for me. I definitely recommend!
So happy this worked out for you, Bon! These meat pies are just the best, so I hope you’re enjoying them!