
Eggnog Cookies
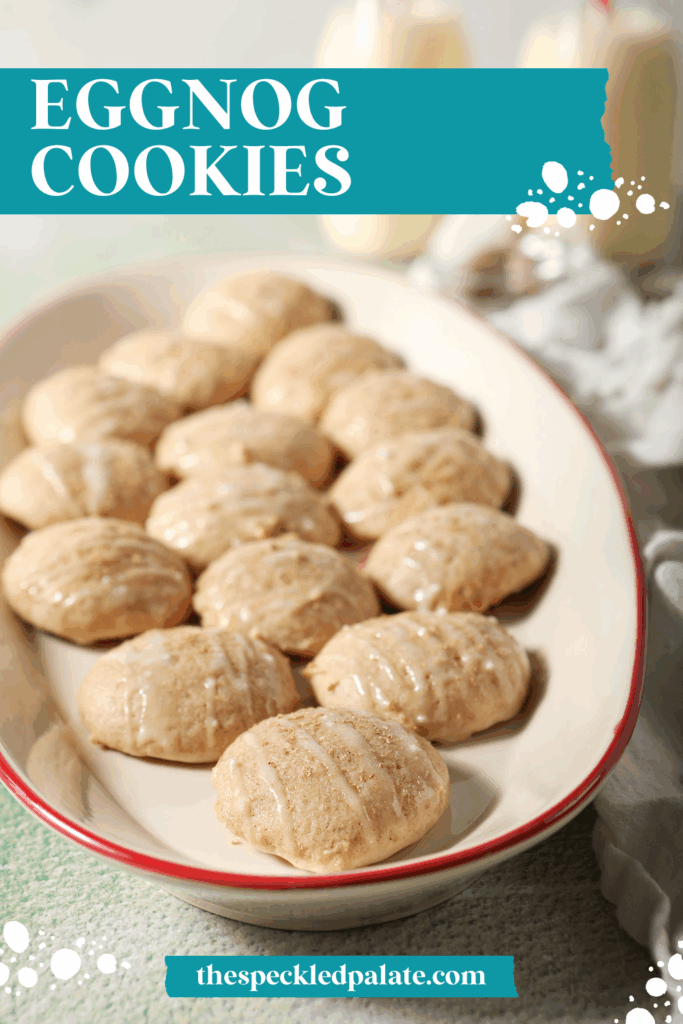
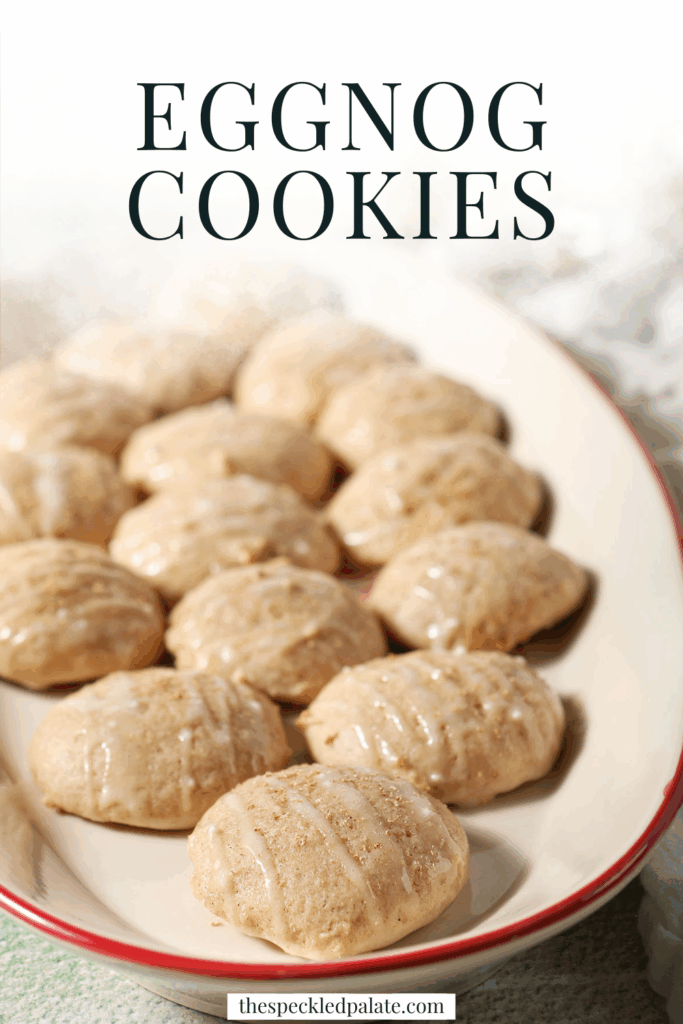
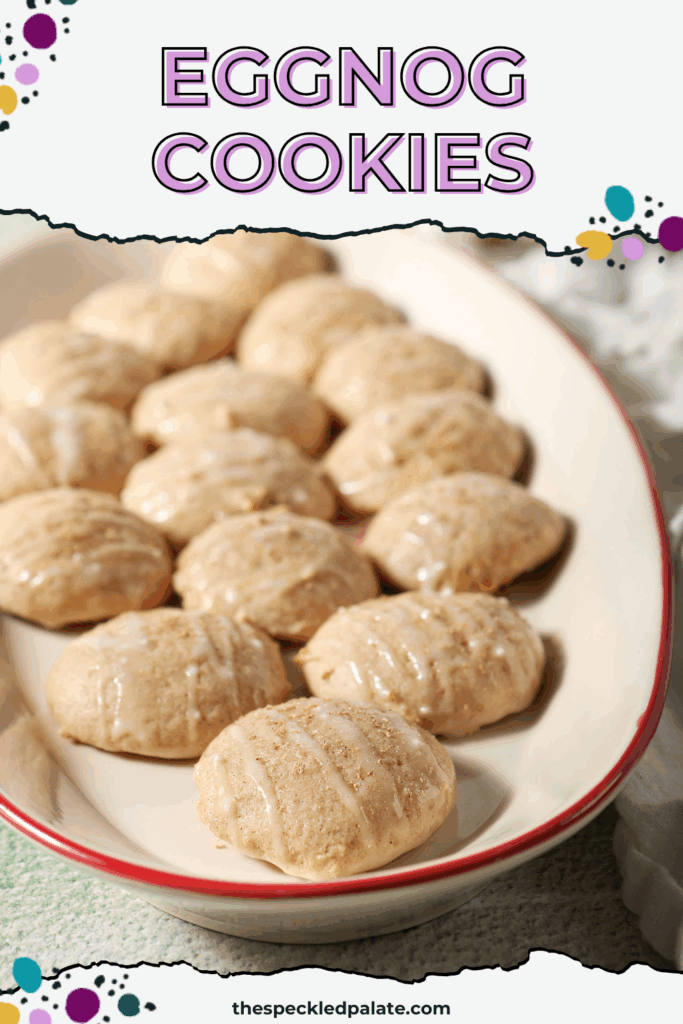
Fluffy and light Eggnog Cookies melt in your mouth with every bite. Easy to make and perfectly spiced, this soft cookie tastes just like the beloved holiday beverage and is finished with an eggnog icing drizzle.
This post contains affiliate links.
Earlier this year, I really wanted to get ahead on an Eggnog Muffin recipe. Then I realized very quickly that eggnog is not available in stores in September.
Which meant I made a batch in my own kitchen… and it was surprisingly simple and sooooooo delicious.
After knocking out the initial recipe, I started wondering what other recipes I could add eggnog to.
Turns out, eggnog in cookies is brilliant. (The amount of egg yolks in eggnog alone help give the cookie dough a boost and a light and fluffy mouthfeel.)
In fact, my older daughter told me that it was the best cookie recipe that I’ve baked in a while.
Why I love this recipe:
What’s not to love about the combination of rich eggnog with cookie dough?
This cookie recipe is adapted from my Lemon Drop Cookies, which call for milk and felt like a good jumping off point. While I did three separate tests to see what worked best, the eggnog cookie recipe isn’t too far from what it was adapted from. (Just, you know, a different flavor profile and vibe.)
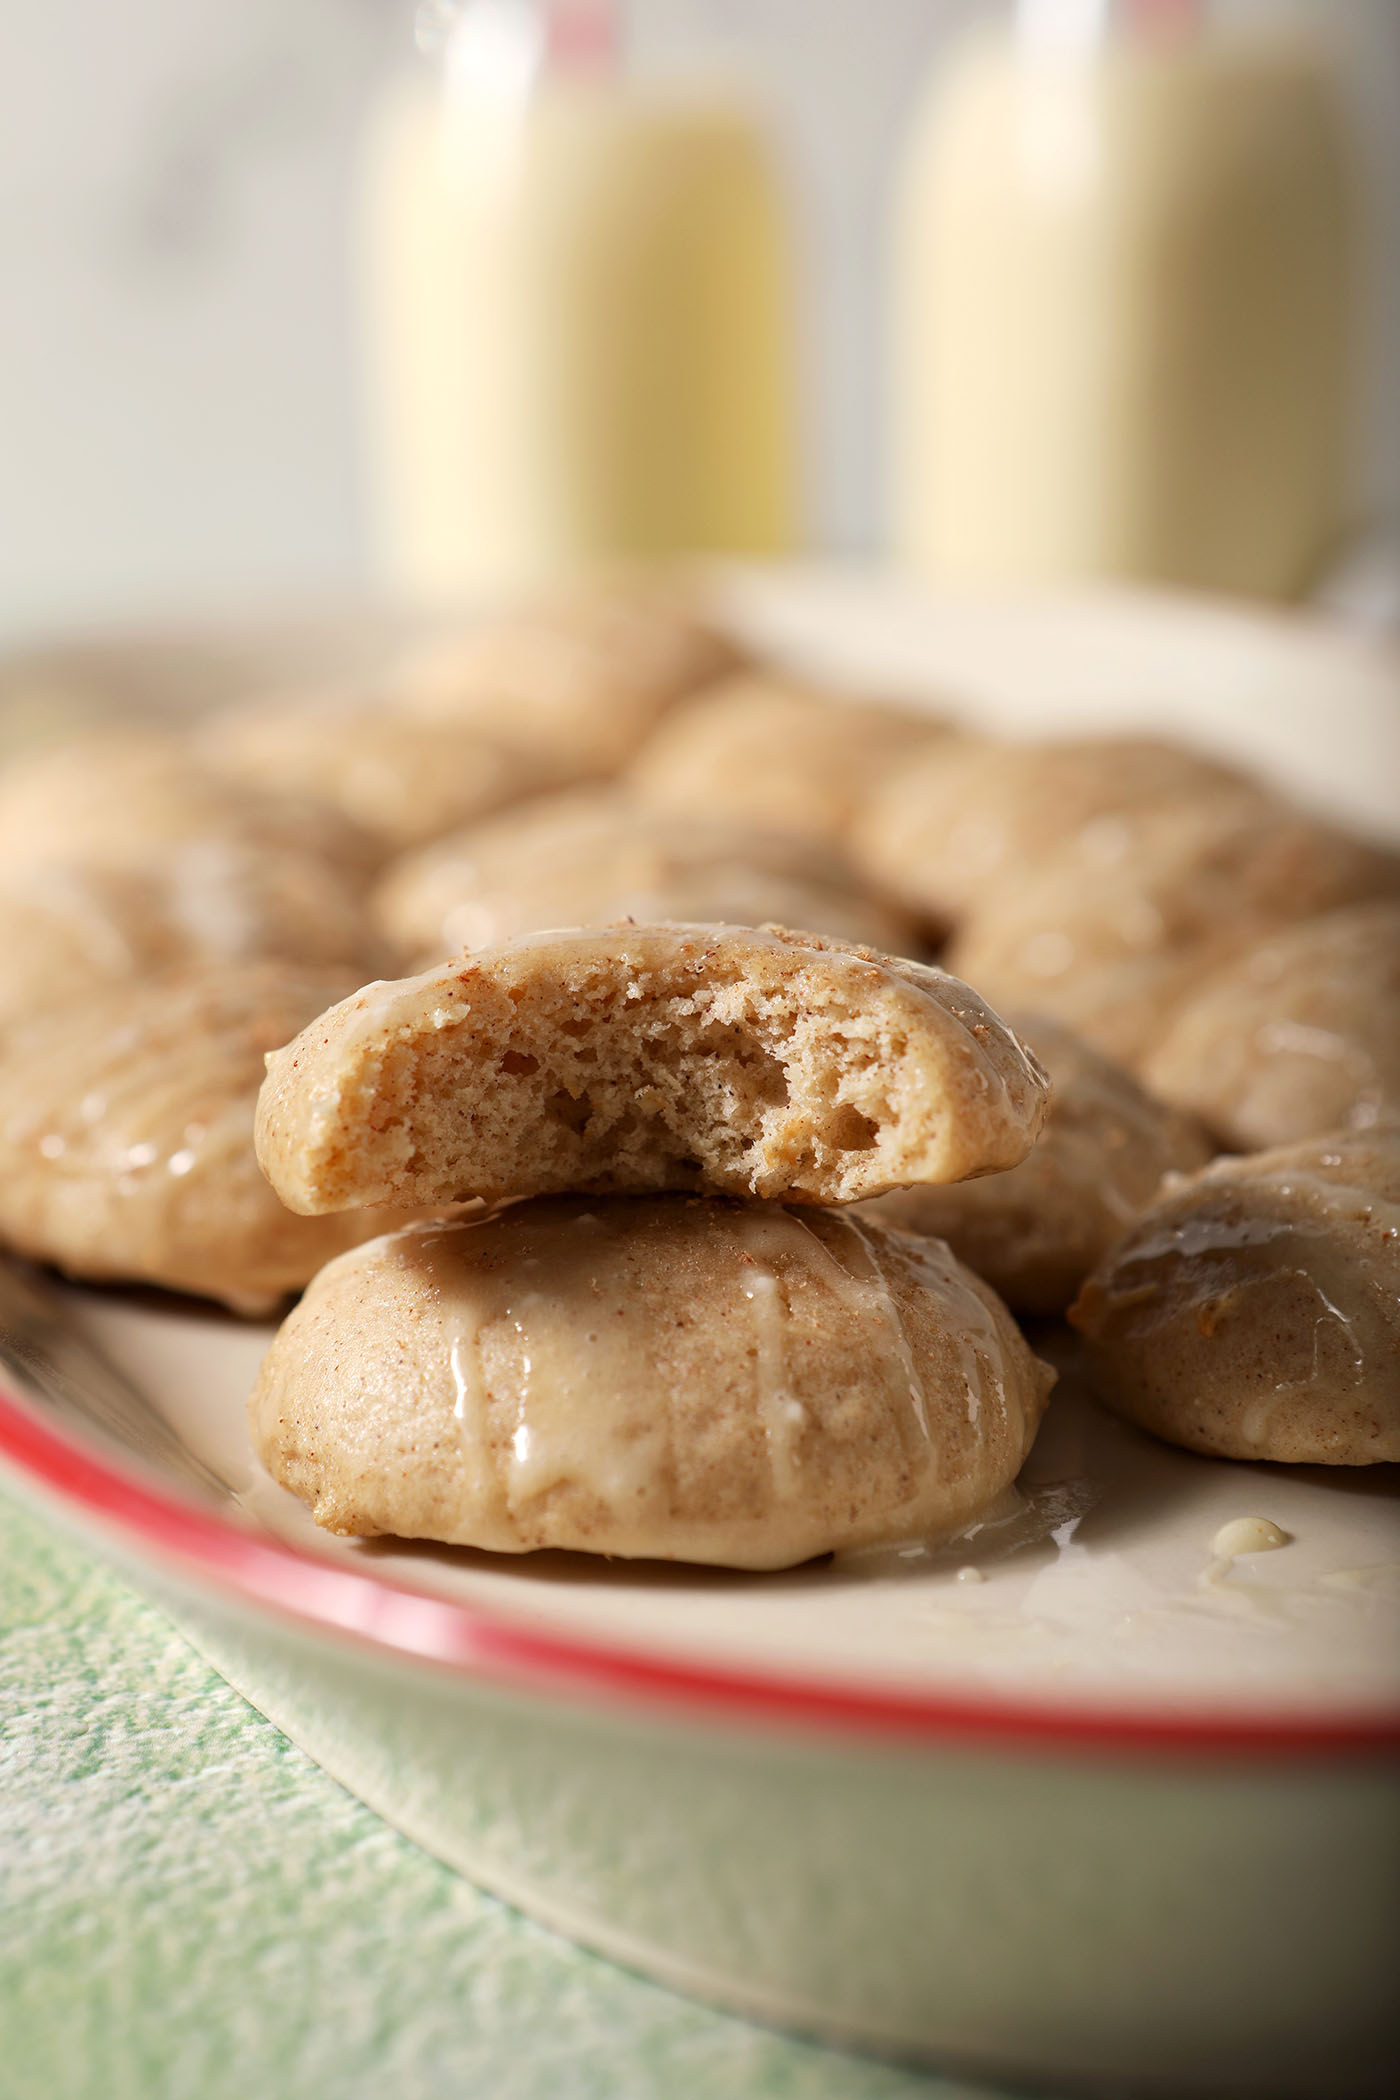
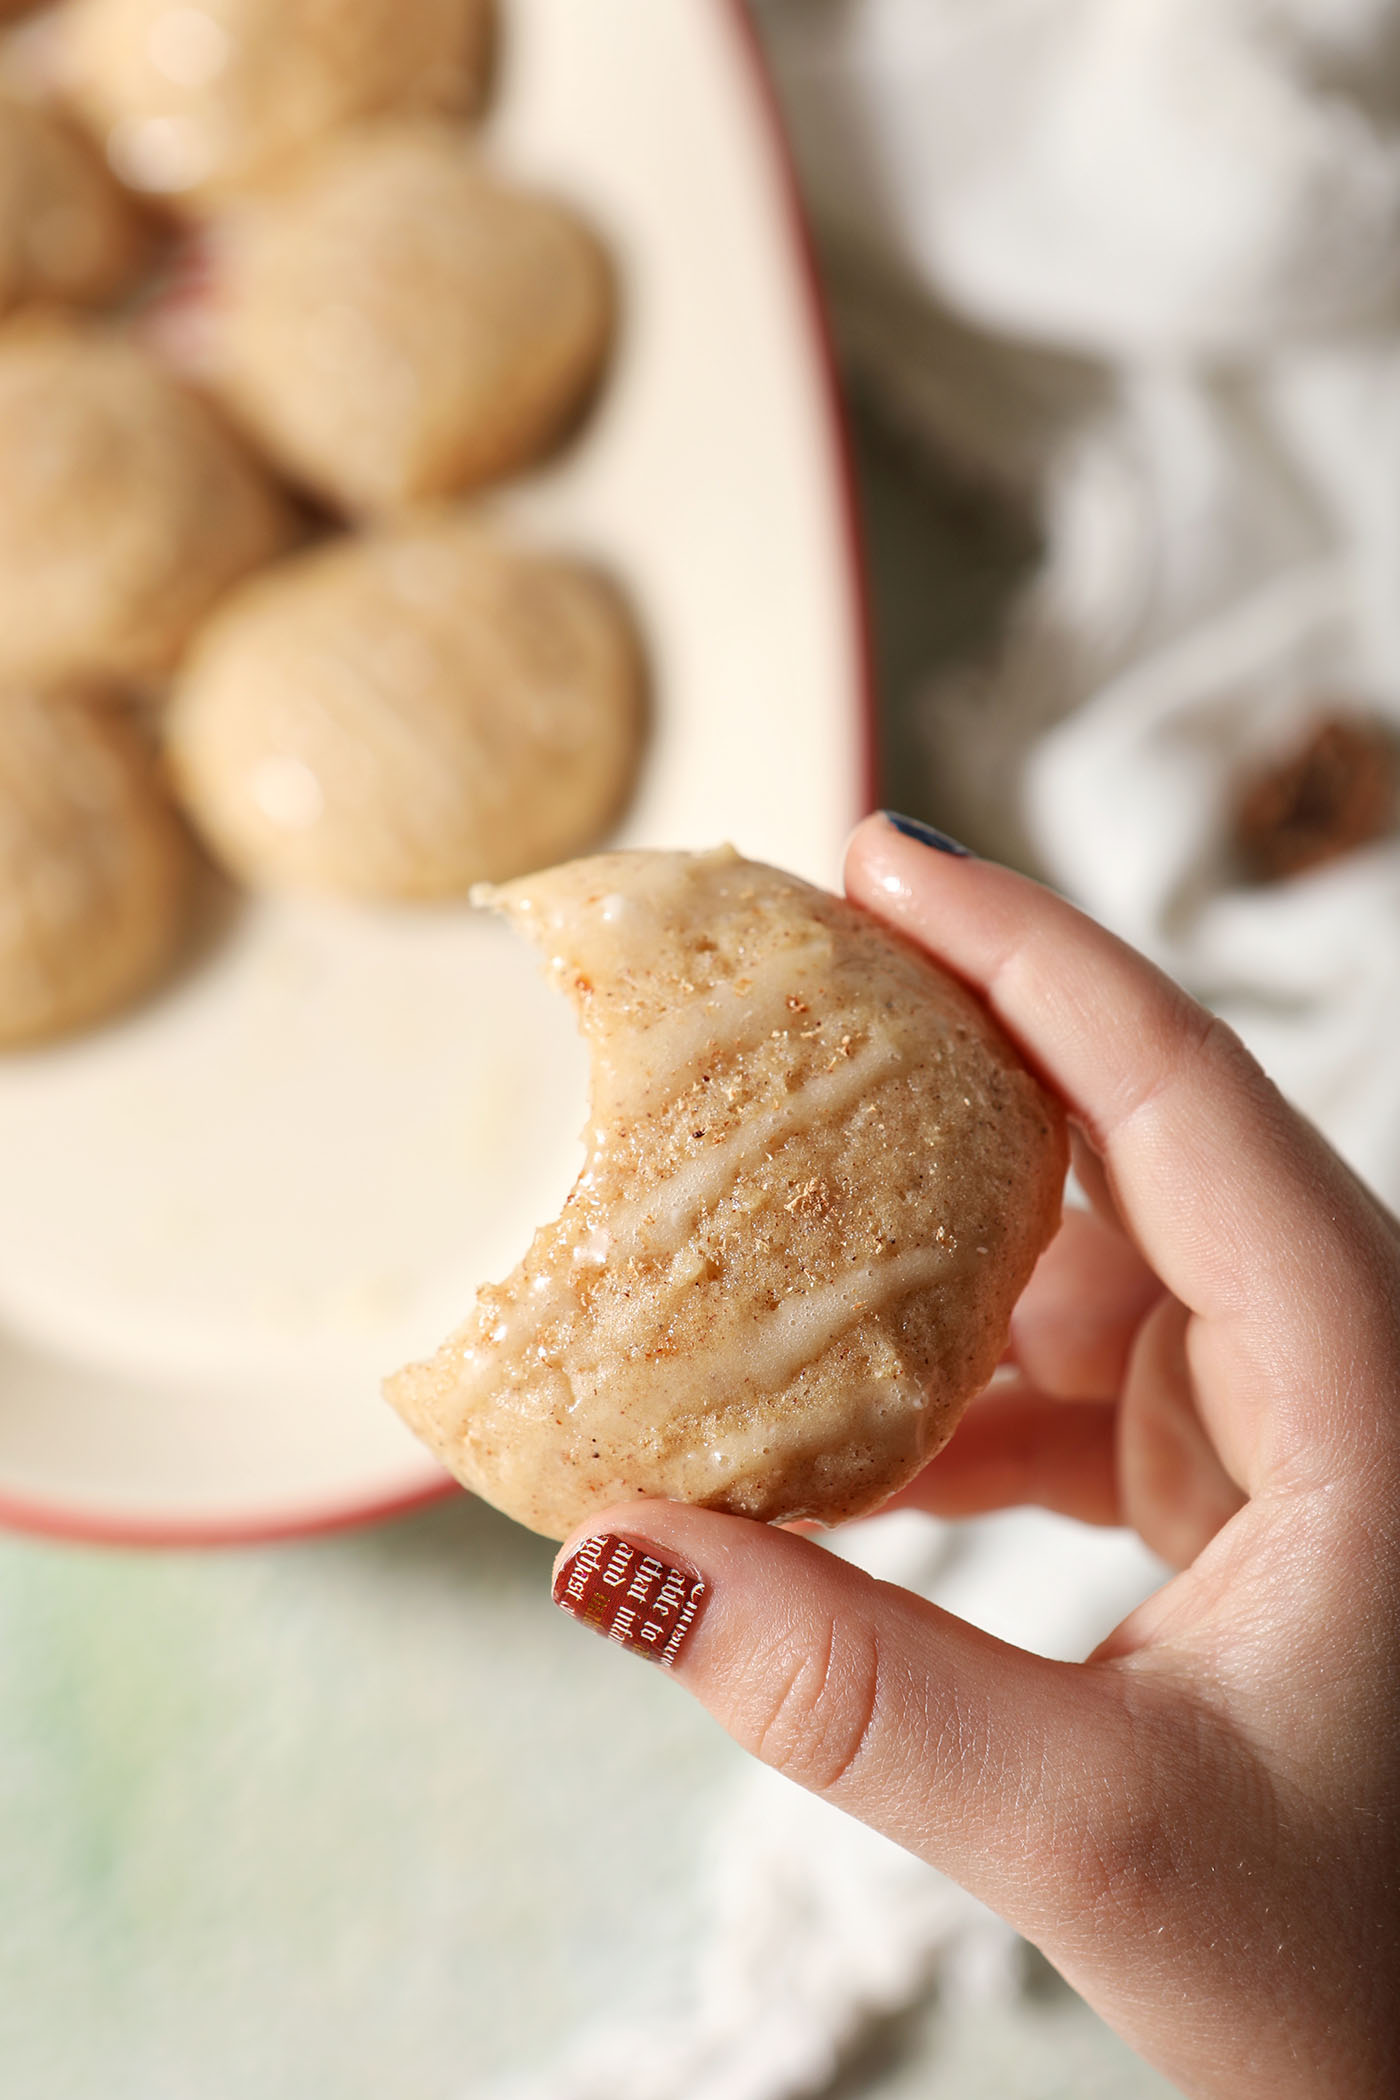
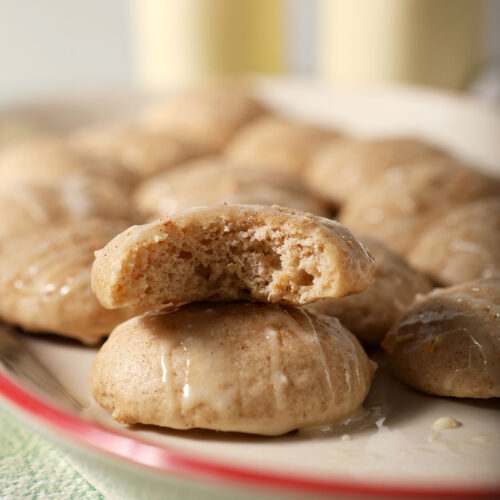
The resulting cookies are incredibly tender, spiced and full of all those holiday flavors we know and love.
They are also impossibly soft, making them almost melt-in-your-mouth delicious.
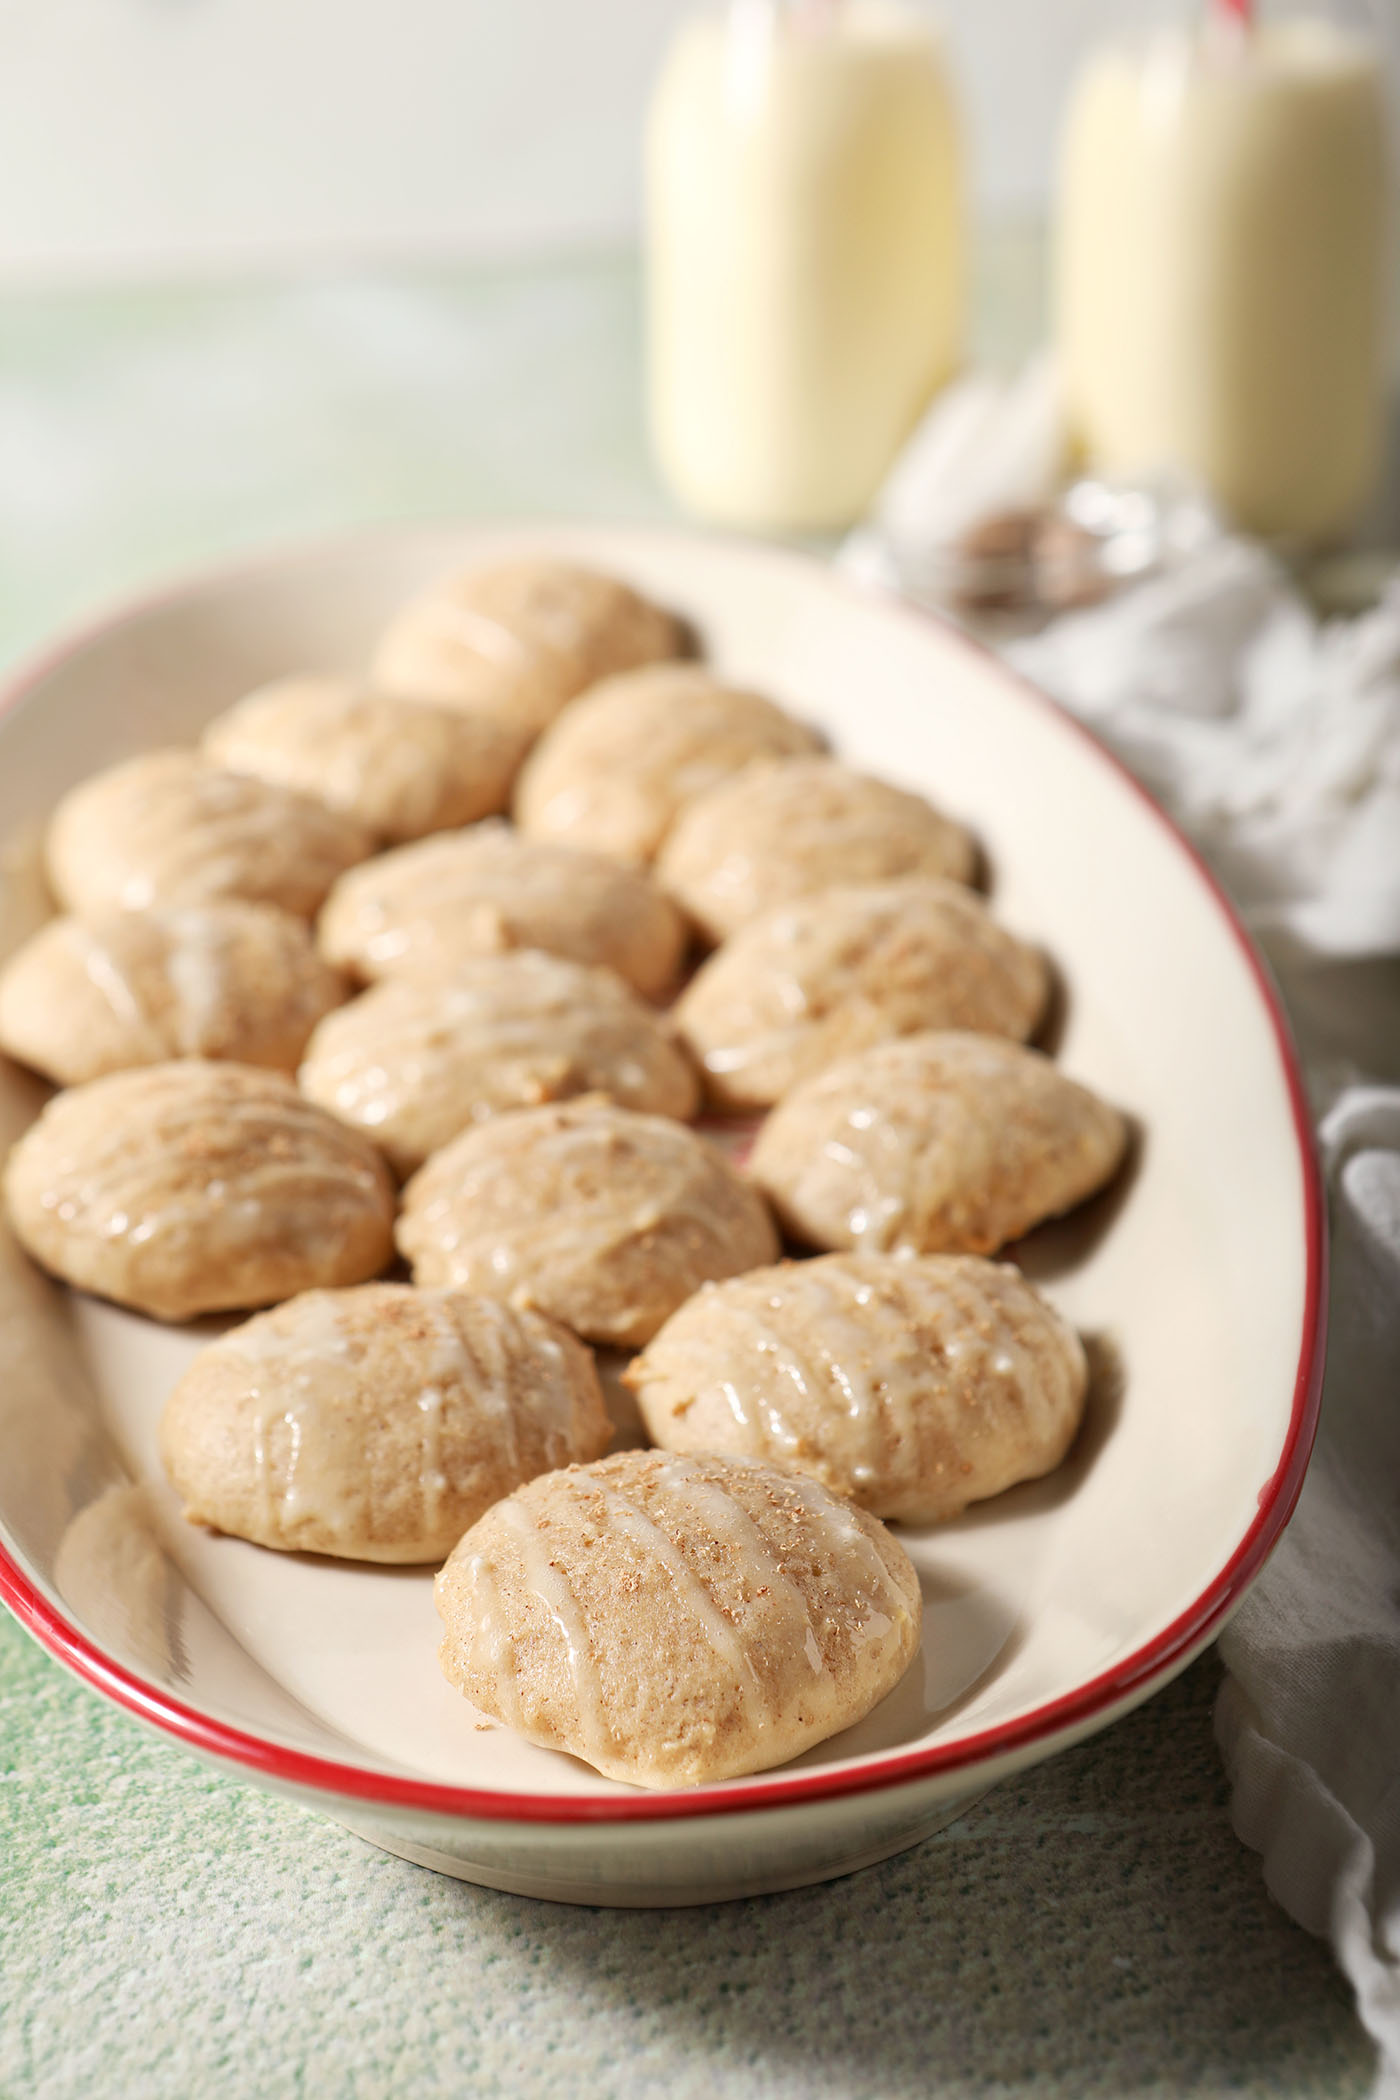
When they’ve cooled from the oven and you’re ready to serve them, finish them with an eggnog icing drizzle and a sprinkle of fresh nutmeg.
This flavorful cookie is perfect for sharing with the people you love, baking for neighbors or for leaving out for Santa.
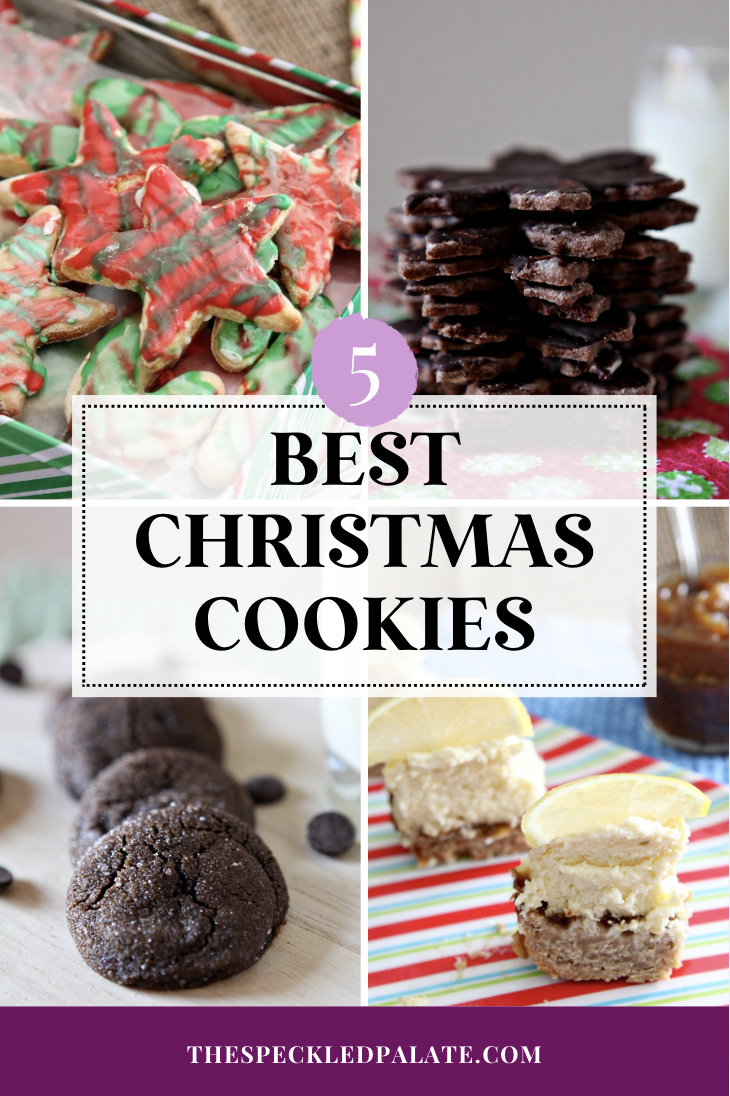
More festive cookie recipes to try this season: Peppermint Chocolate Chip Cookies | Ginger Rosemary Shortbread Cookies | Cranberry Orange Ginger Biscotti | Gingersnap Cookies

Let’s talk about The Sweetest Season and Cookies for Kids Cancer!
The Sweetest Season is my annual holiday cookie week.
In 2011, I decided to share my favorite Christmas cookies… then invited other bloggers to join me. The celebration grew, we changed the name to make it more inclusive, my friend Susannah stepped in to help and the rest is history.
And now, every year, food bloggers get together to share new holiday cookie recipes.
This year, we’re raising money in support of Cookies for Kids’ Cancer, a recognized 501(c)3 non-profit organization dedicated to funding research for new, innovative and less-toxic treatments for childhood cancer.
Since 2008, Cookies for Kids’ Cancer has granted nearly $18 million to pediatric cancer research in the form of 100+ research grants to leading pediatric cancer centers. More than 35 treatments available to kids battling cancer today were stemmed from these grants.
We’d love for you to help us raise money for this cause! You can donate through our fundraising page.
Currently, Cookies for Kids’ Cancer is in a matching window with their friends at OXO. This means OXO will match every dollar up to $100,000 raised through the end of 2025. So whatever money we raise will automatically double!
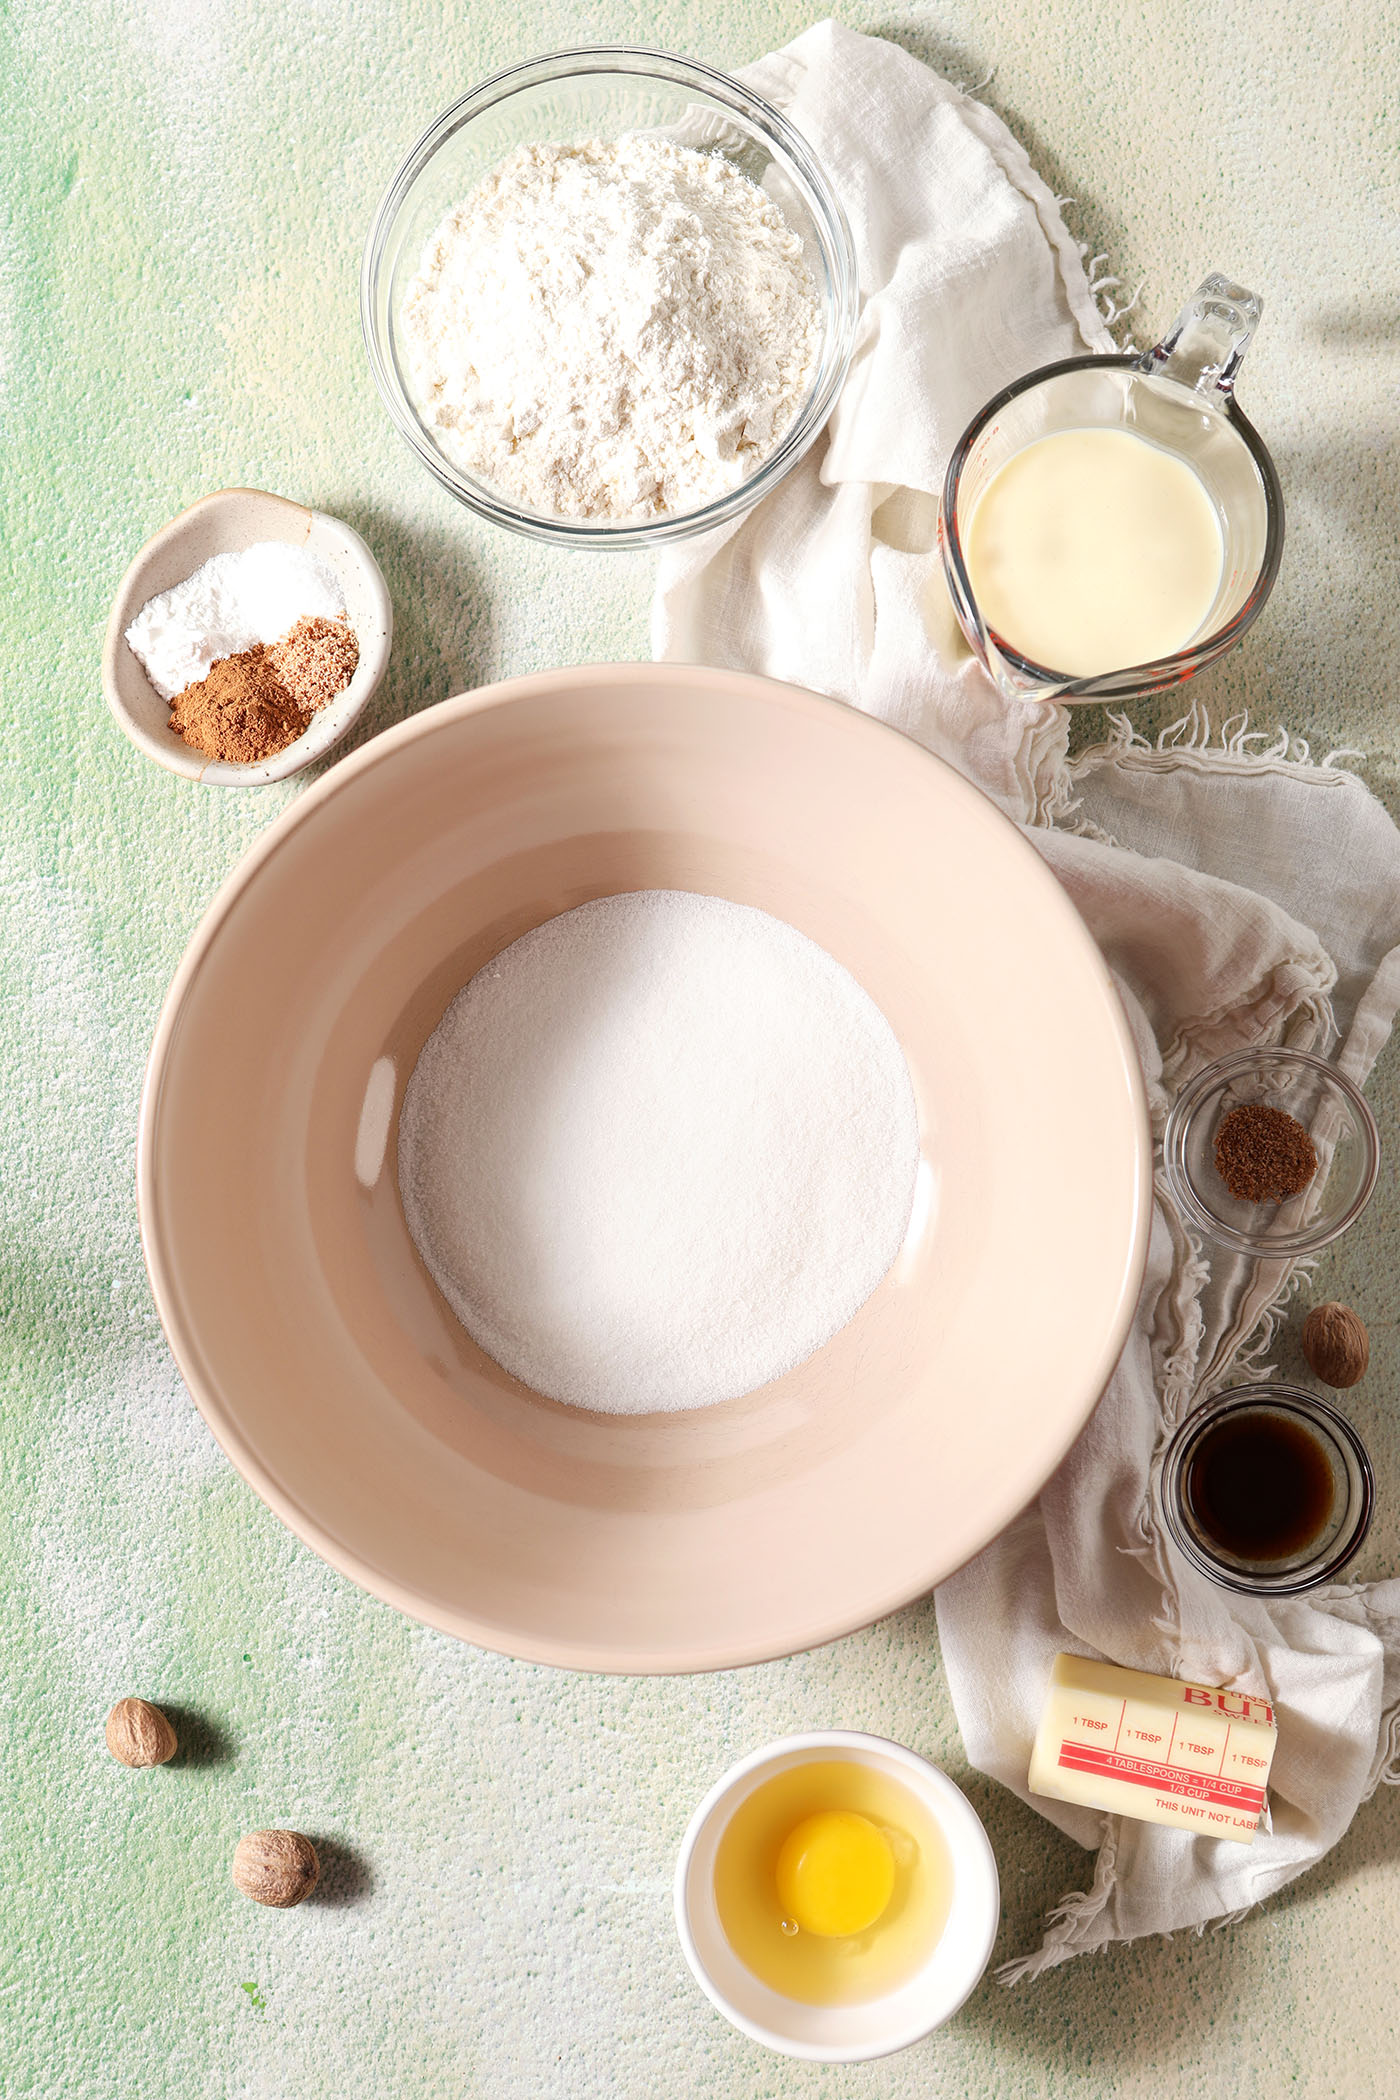
What you need to make this recipe:
The Speckled Palate participates in affiliate programs. As an Amazon Associate, I earn a commission from qualifying purchases. Please refer to my disclosure page for more information about these affiliate programs.
- Rimmed baking sheet or cookie sheets
- Nonstick baking mat or parchment paper
- An electric mixer, like a stand mixer or hand mixer
- Kitchen scale or measuring cups and spoons
- Large mixing bowl
- Zester
- 1-tablespoon cookie scoop
Let’s talk ingredients!
In addition to the tools above, you’re going to need some ingredients to make this recipe, too! Chances are, you might already have some of them in your fridge or pantry. Scroll down to the recipe card for the full measurements and instructions.
Here’s what you’ll need to grab from the grocery store:
- All-purpose flour — also known as AP flour, this is the base of our dry ingredients. I have not tried making this recipe with a different type of flour or a gluten-free flour blend and do not recommend that currently.
- Baking powder — this is our leavener. Make sure yours is fresh! This is not the same thing as baking soda, so please make sure you grab the right ingredient.
- Kosher salt— medium grain kosher salt is what I use in all my recipes. (Diamond Crystal is my favorite brand.) You may use a similarly sized sea salt. This helps balance out the sweetness of the recipe, so please do not skip it.
- Spices — we use a combination of ground cinnamon and freshly grated nutmeg in the cookie dough for both fragrance and flavor. They enhance and play so nicely with the eggnog flavor. We use bonus nutmeg as a garnish, too. I like to grate mine fresh, but you can use the jarred kind if that’s all you’ve got.
- Unsalted butter— unsalted butter is the best butter for cookies because you can control the salt level of your cookies.
- Granulated sugar — also known as white sugar, this is our sweetener for the cookie dough. I do not recommend replacing it with a brown sugar or a lower calorie sugar replacement.
- Egg — set it out with the butter to come to room temperature about 30-45 minutes before making the batter. You’ll need a singular large egg.
- Vanilla extract — always use the best vanilla you can afford! It’s expensive these days, but it really does level up your baking.
- Eggnog — these cookies will not be eggnog cookies if you skip this. I tested this recipe with homemade eggnog, which is significantly thicker than store-bought eggnog, as well as storebought. I have not tried it with a dairy free or egg-free substitute. Not only is the eggnog going to add flavor to the cookie dough, but it also impacts the texture.
How to make Eggnog Cookies
Mix the dry ingredients. Measure the flour, baking powder, ground cinnamon, freshly grated nutmeg and kosher salt into a medium bowl.
Whisk together, then set aside.
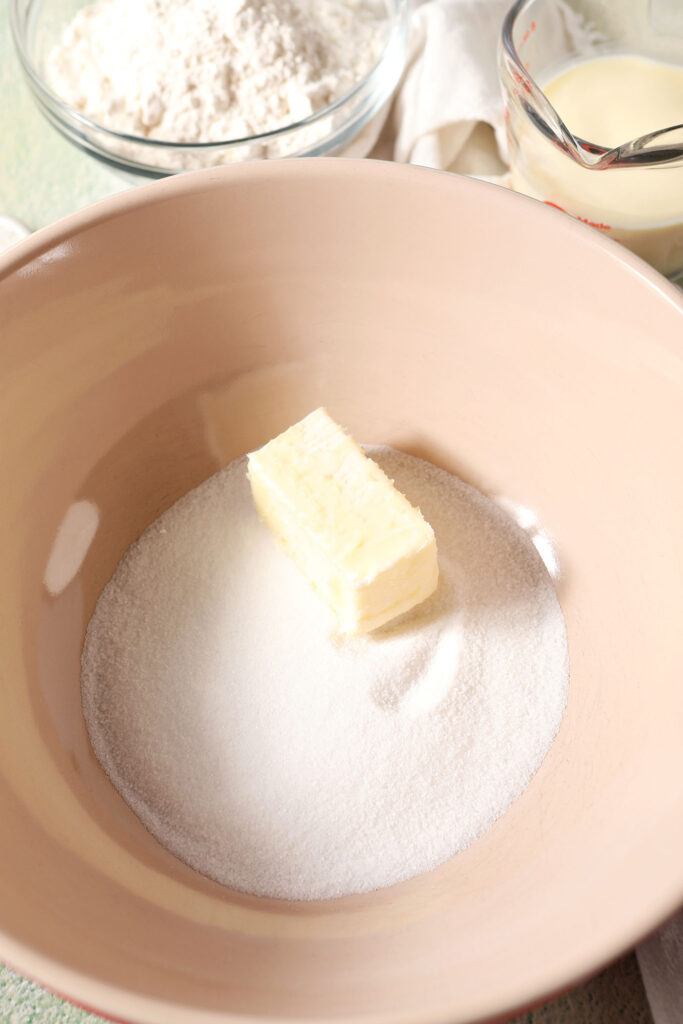
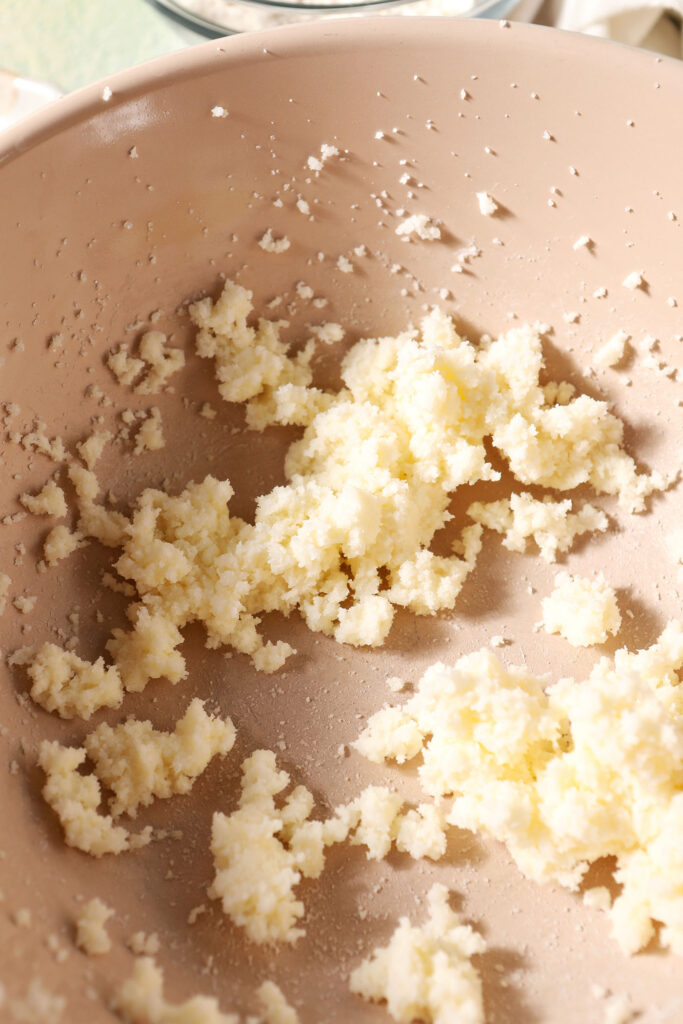
Cream the softened butter and sugar together in a large bowl using a hand mixer or stand mixer until light and fluffy.
This will take 2-3 minutes.
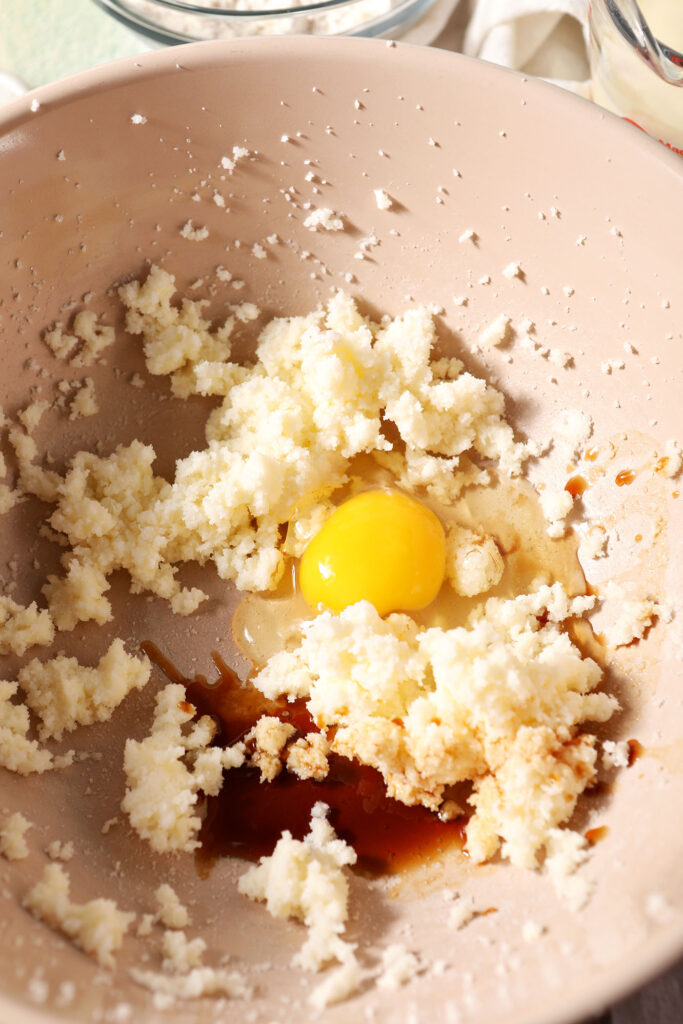
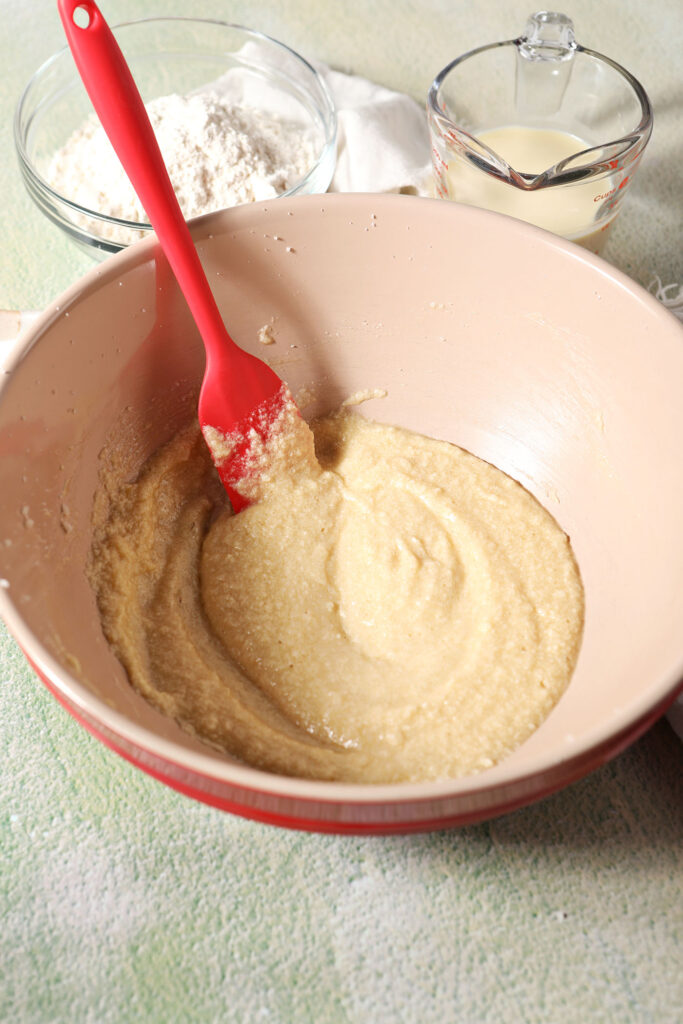
Crack the egg into the bowl with the wet ingredients.
Add the vanilla, too, and blend until smooth, about 2 minutes.
Want to save this?
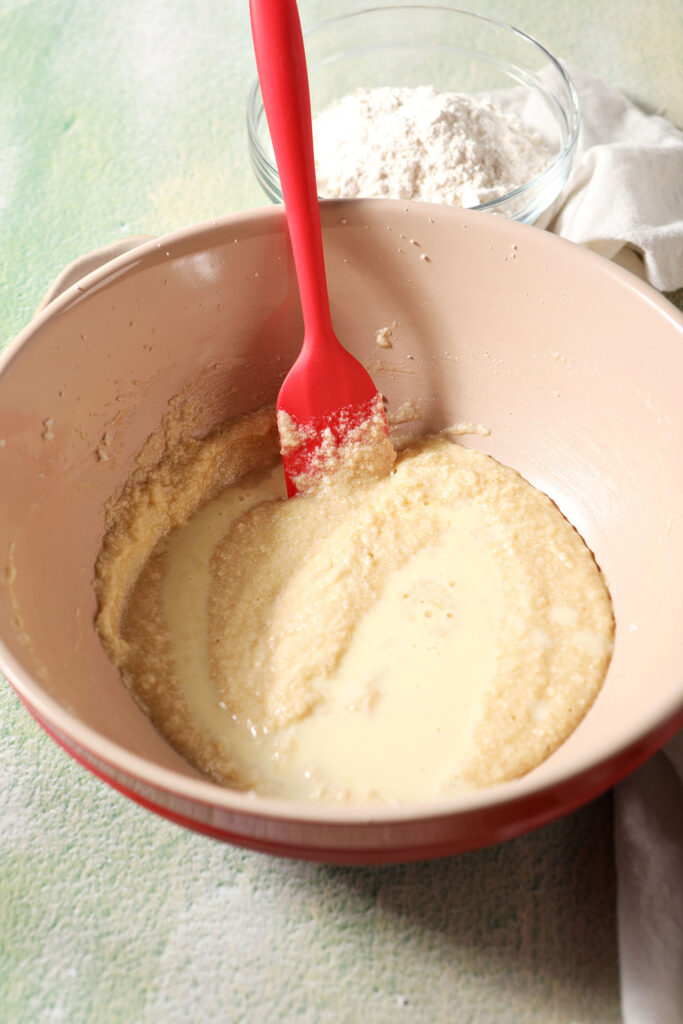
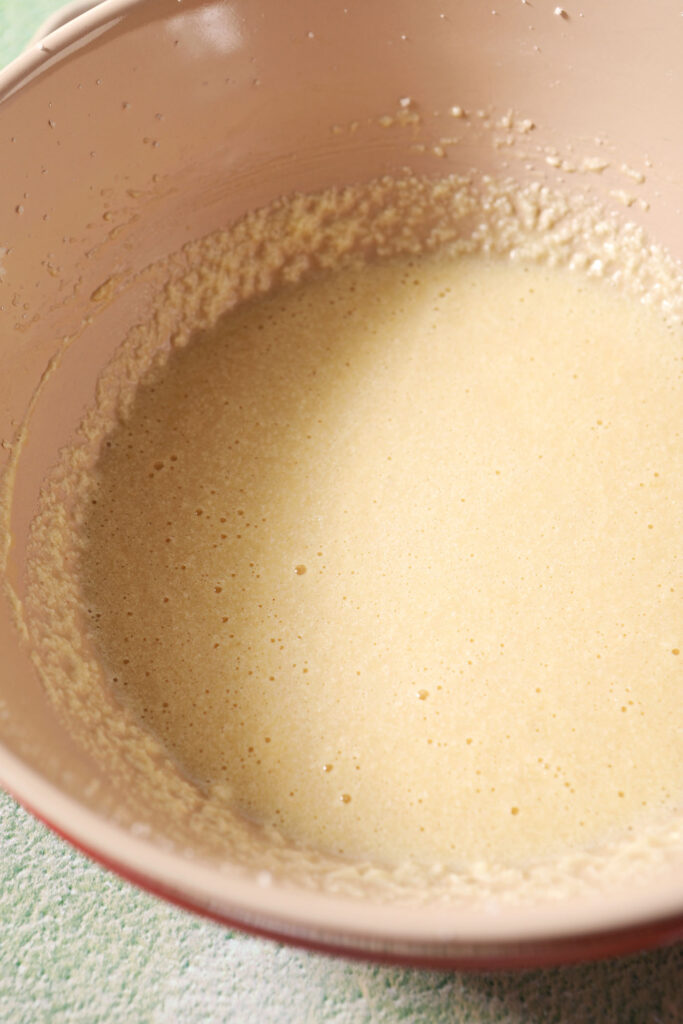
Pour in the eggnog to the wet ingredients.
Gently mix until combined using a rubber spatula.
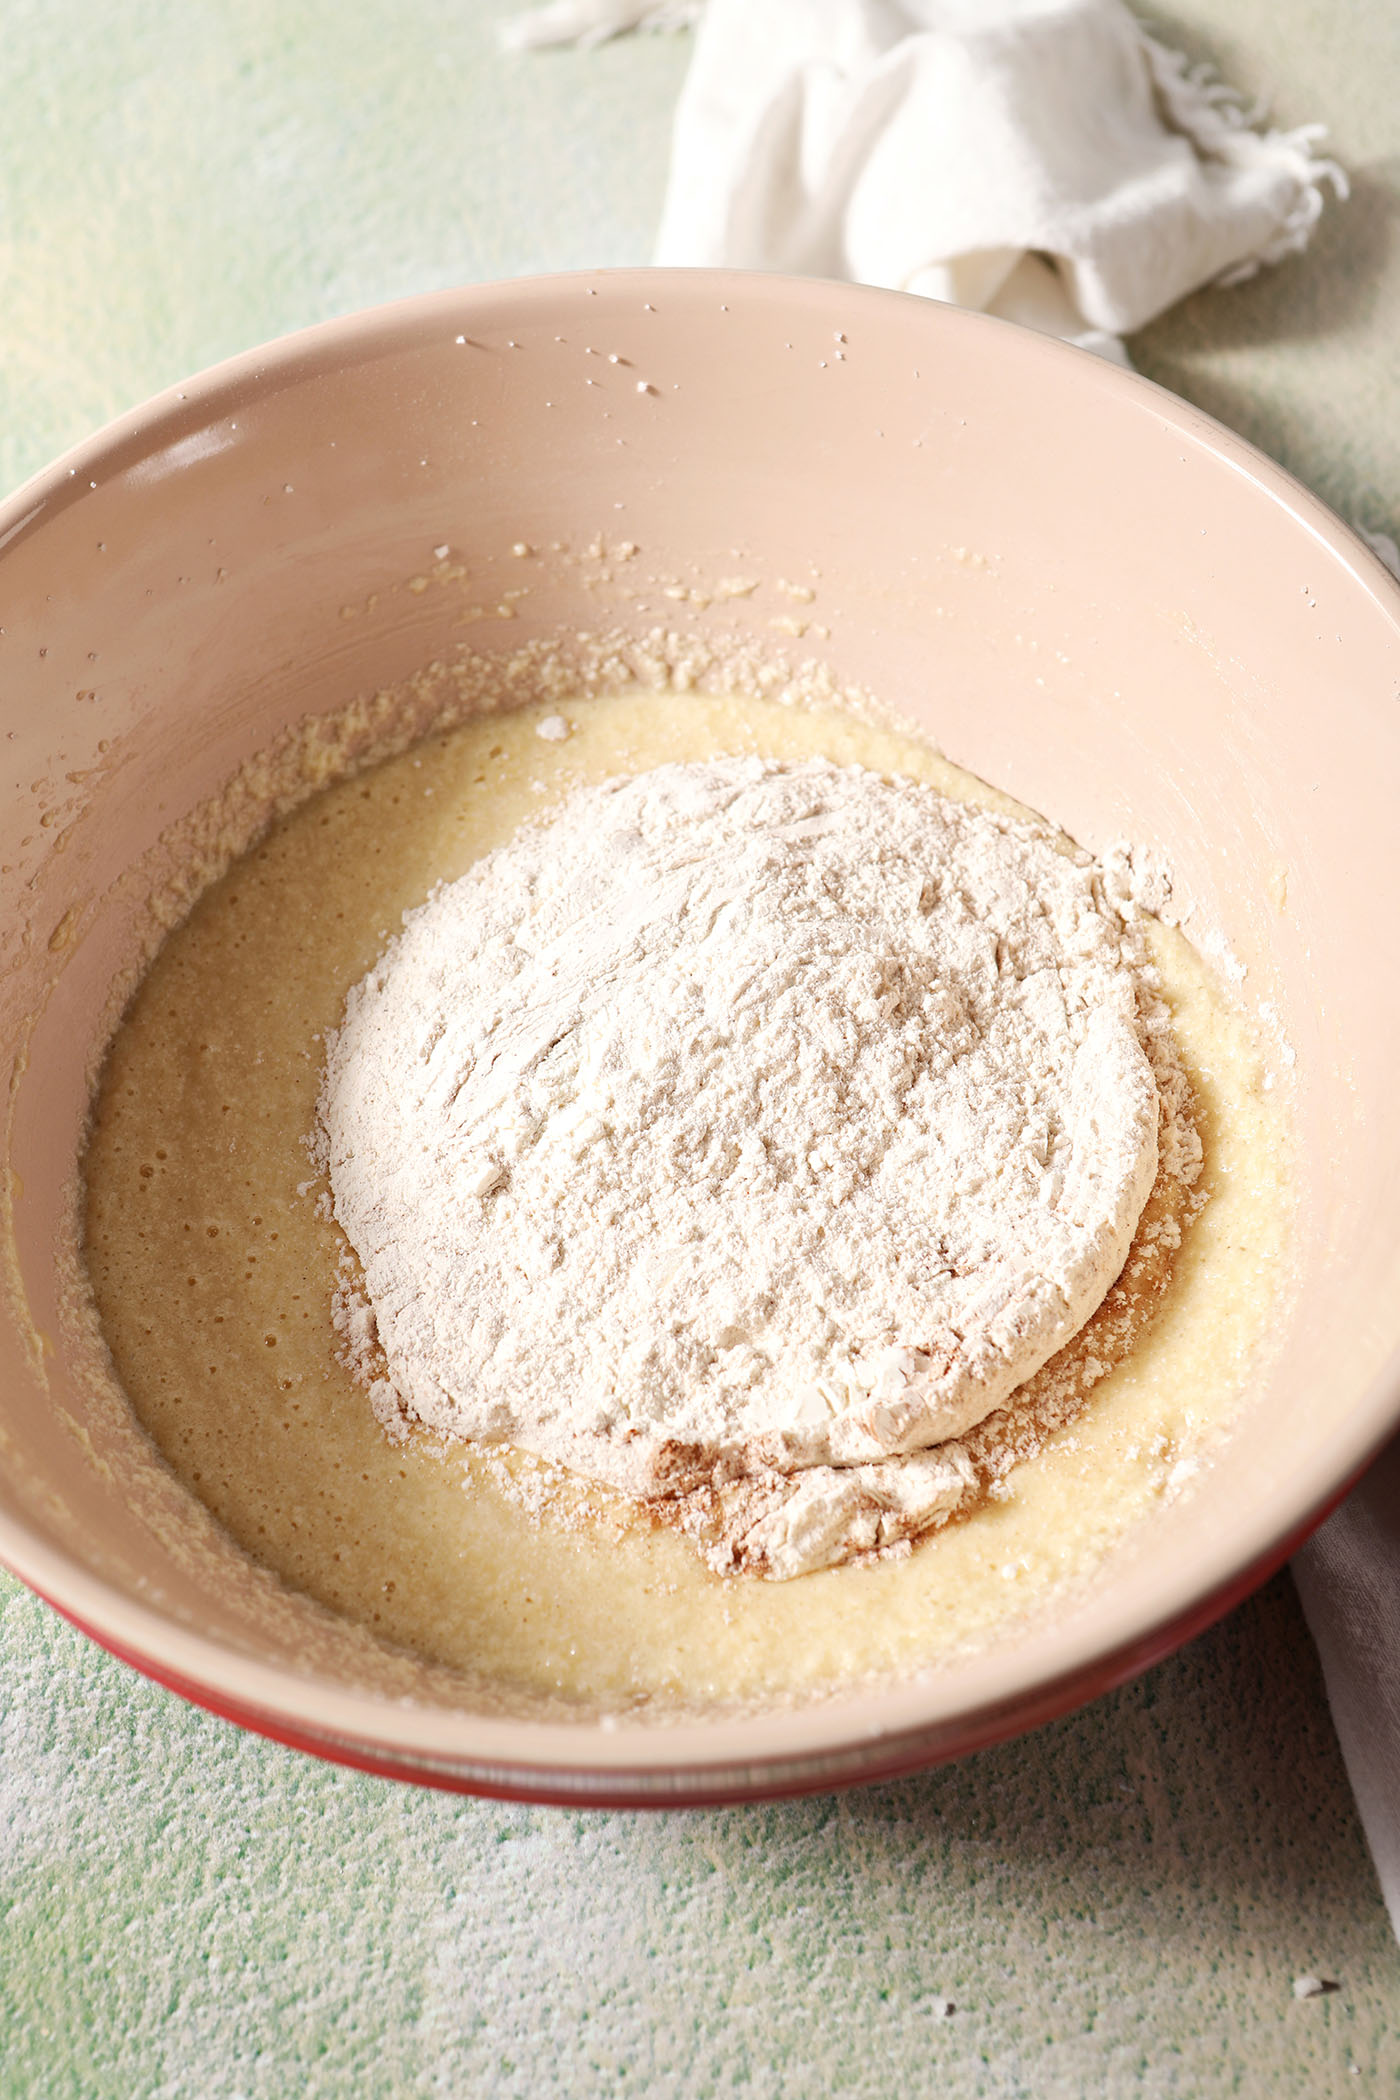
Combine all the ingredients. Sprinkle the dry ingredients into the wet ingredients. Mix until just combined.
Cover the bowl with plastic wrap. Refrigerate for at least two hours.
DID YOU KNOW?
Your cookie dough can also chill overnight if that’s better for you. Just make sure that it’s sealed well.

Once the cookies have chilled, here’s how to bake them:
Preheat the oven, and line two large sheet pans with parchment paper or a nonstick baking mat. Set aside.
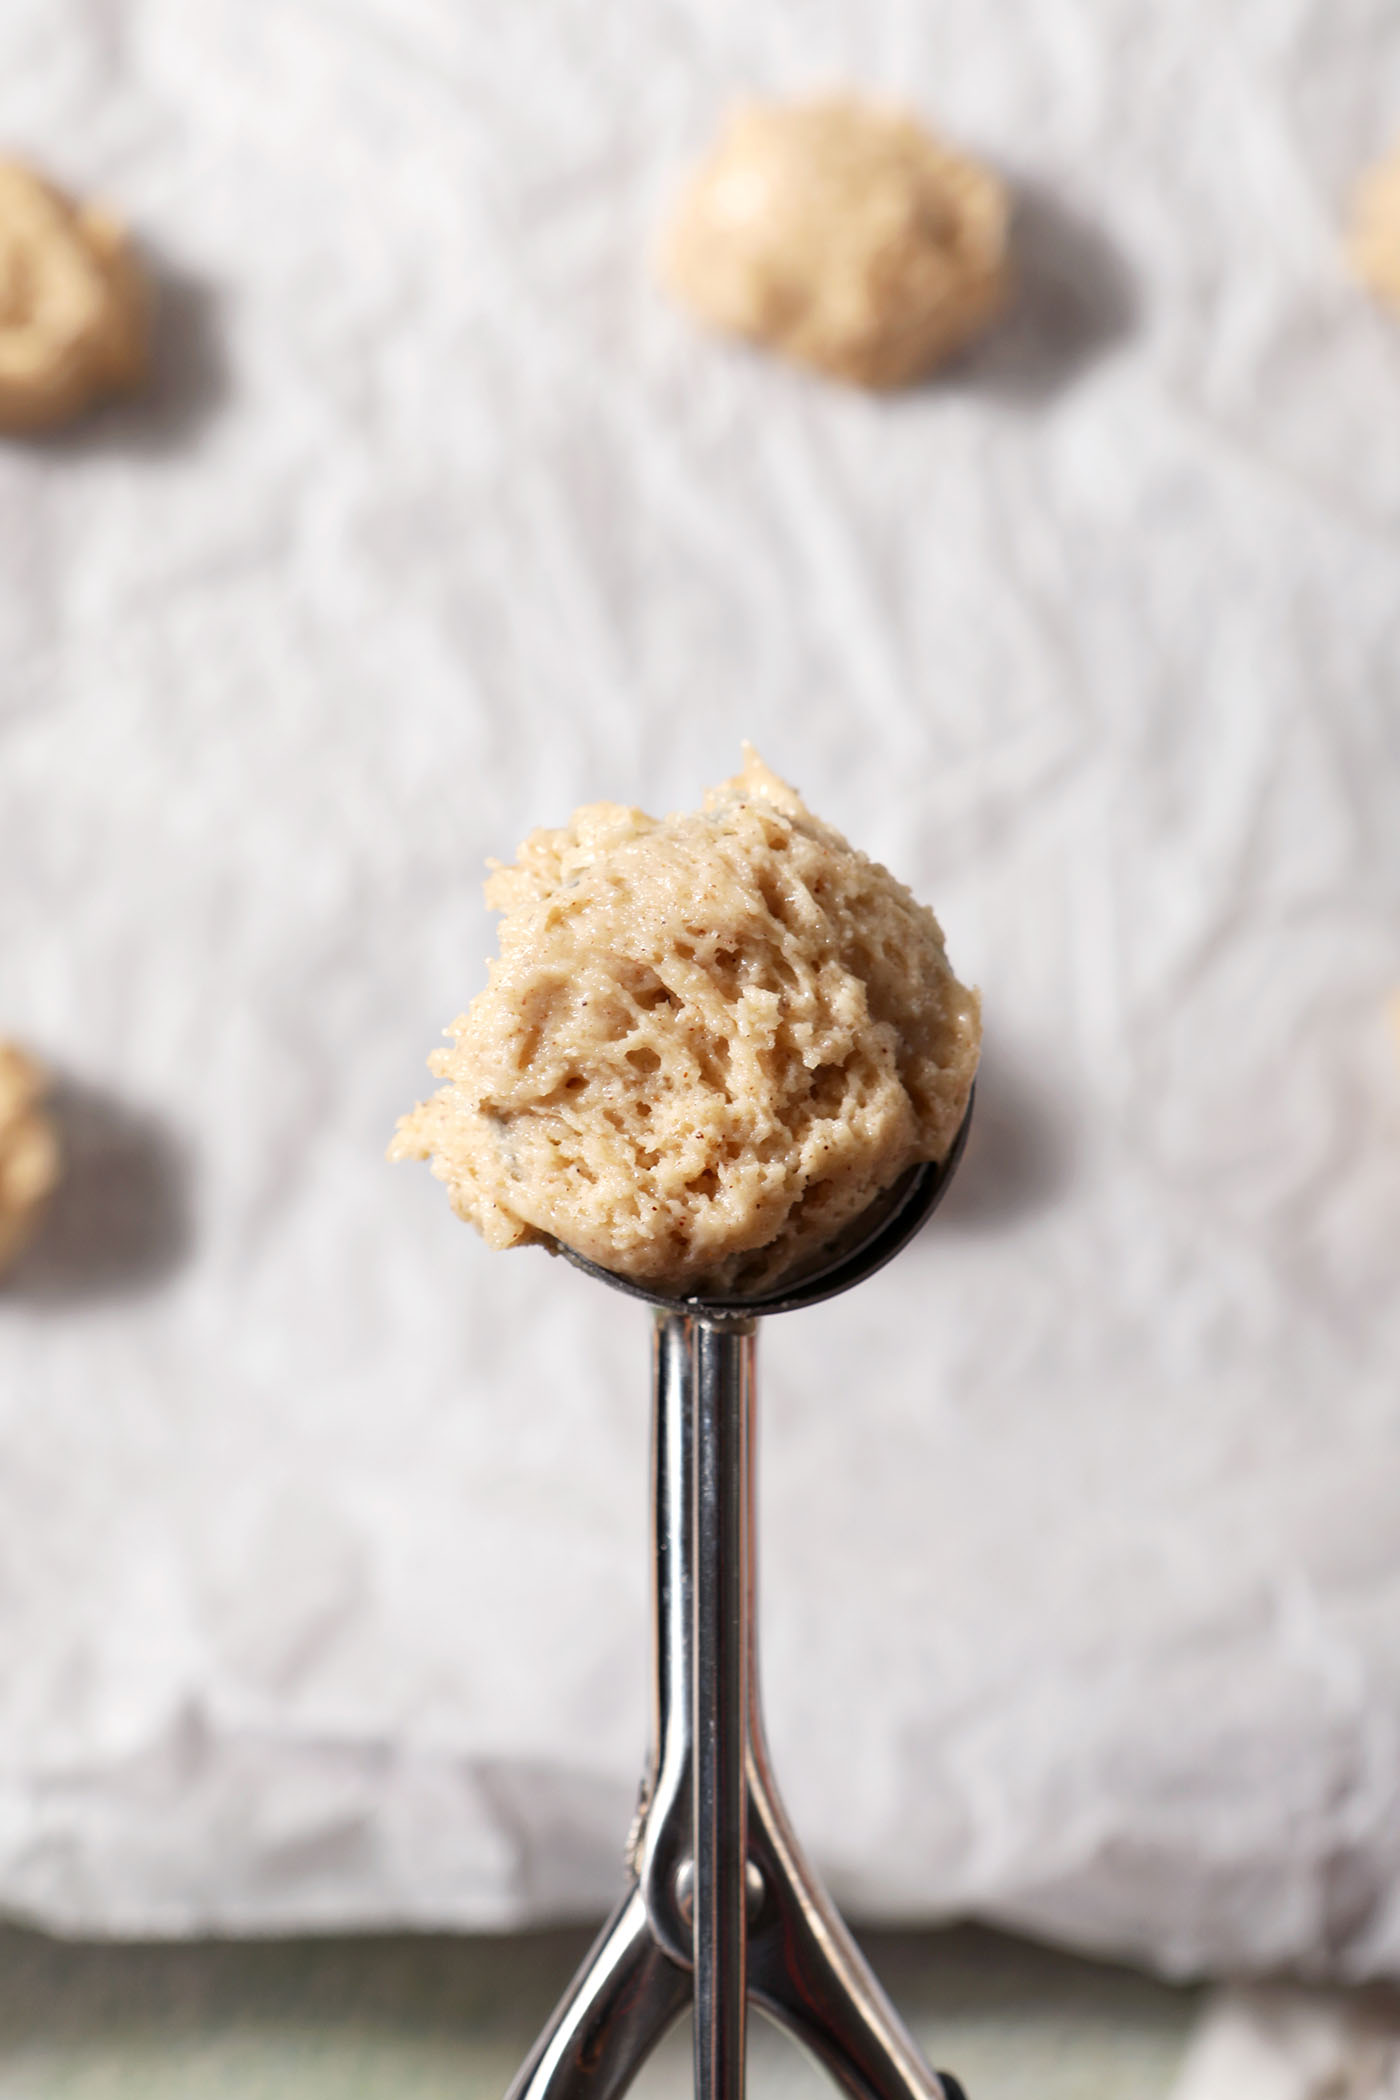
Scoop the cookie dough using a 1-tablespoon cookie scoop. The cookie dough is quite soft, so be gentle.
Dollop the cookie dough onto the lined baking sheets. Give them about 1.5-2 inches of space between each so that the cookies can spread slightly as they bake.
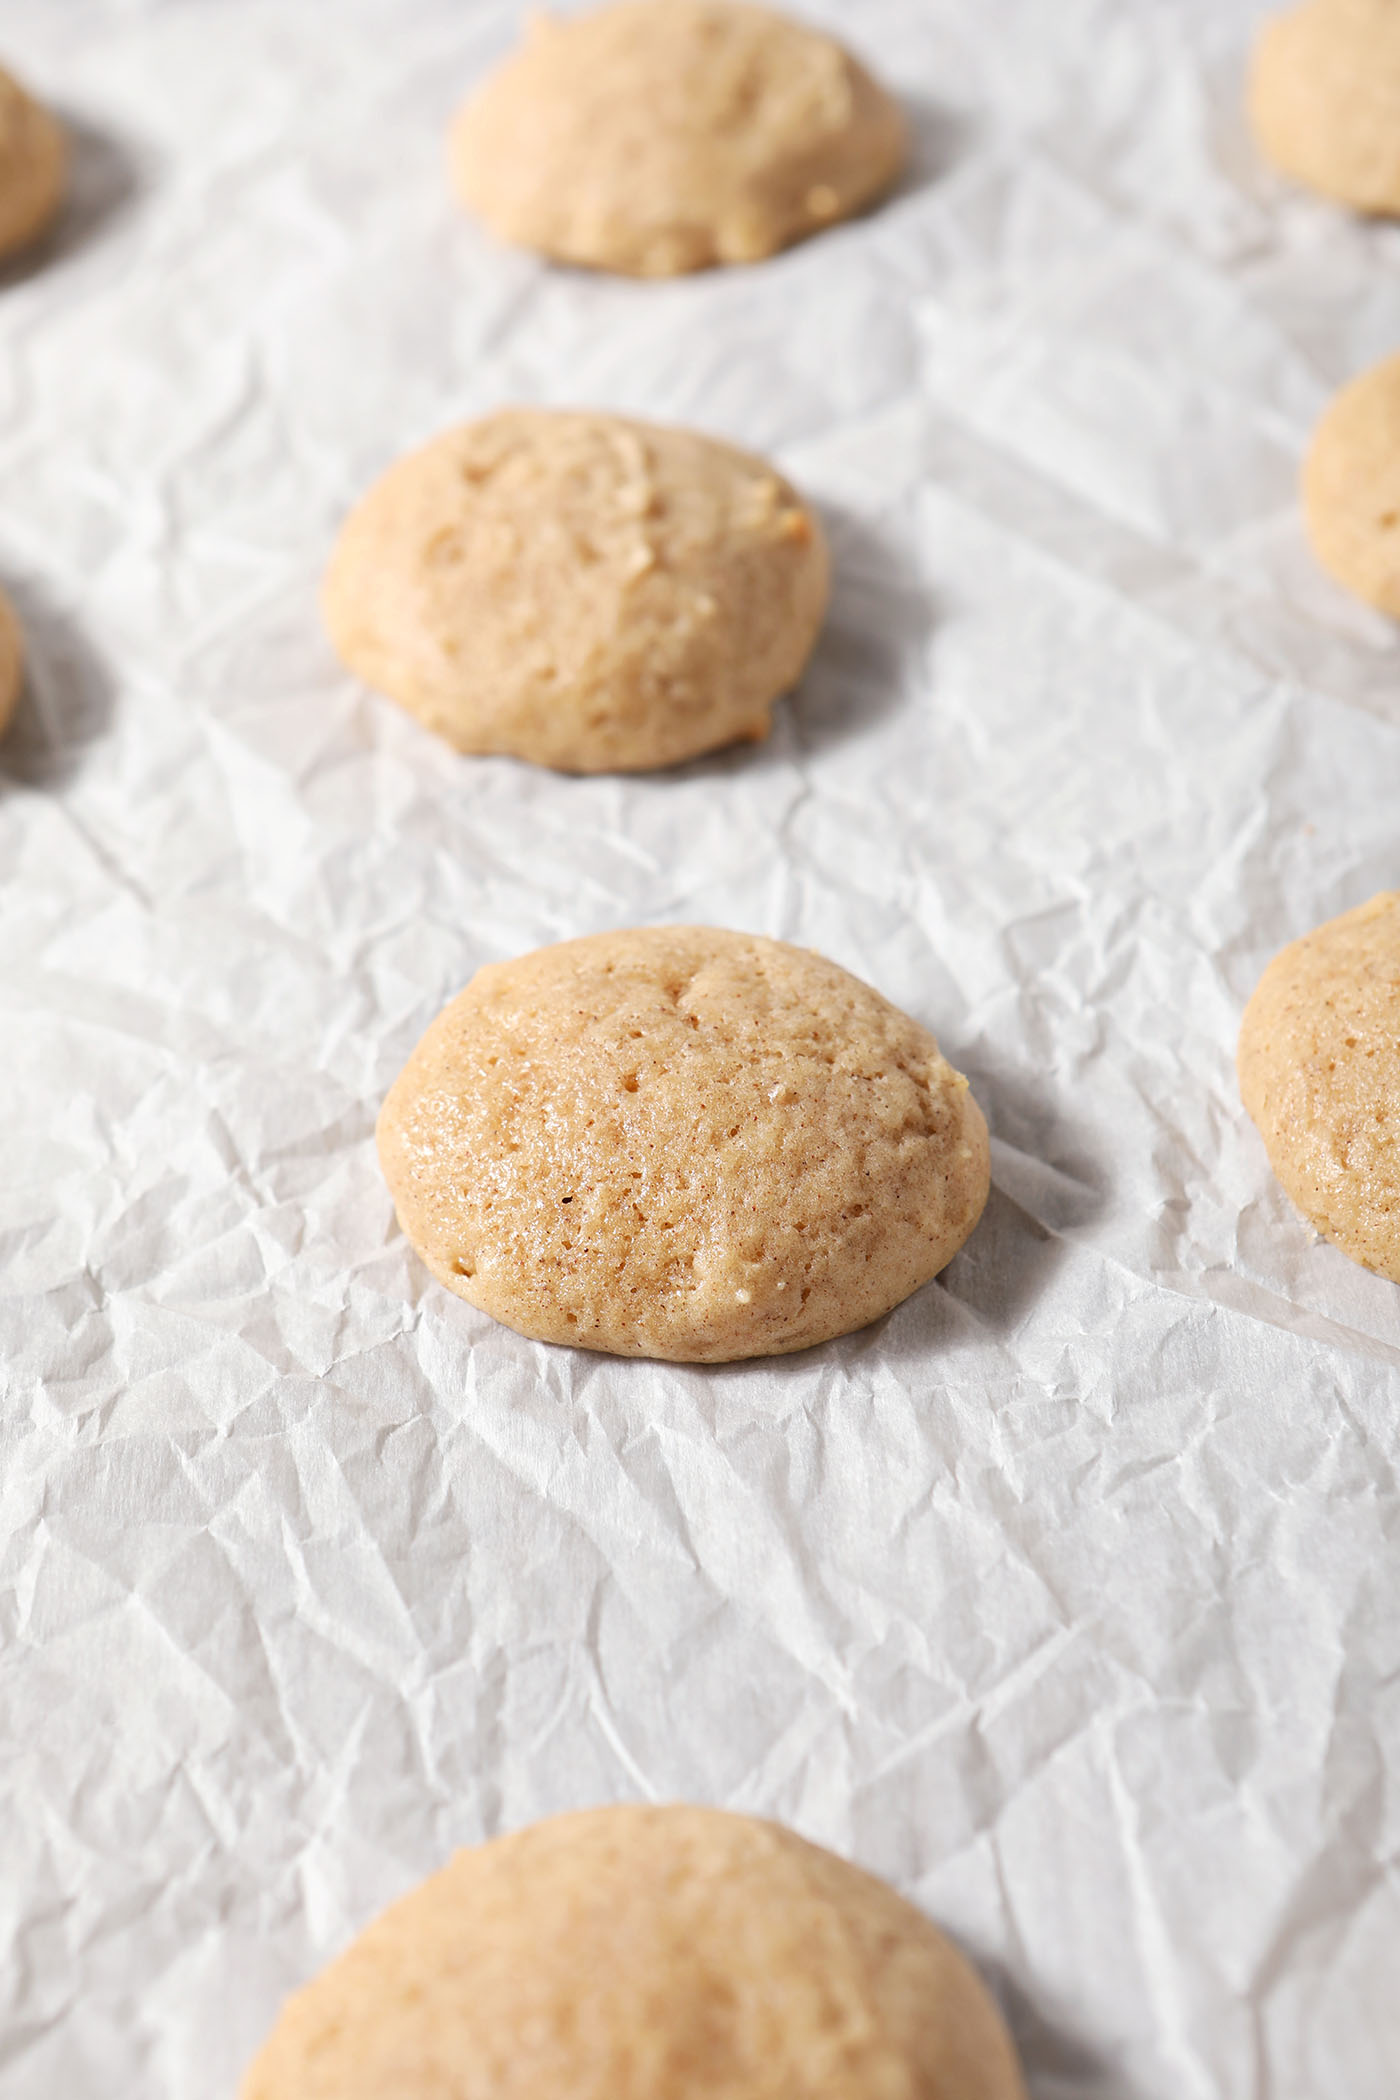
Bake in the preheated oven for 9-10 minutes, or until golden brown and delicious.
Transfer to a wire cooling rack, and let cool completely.
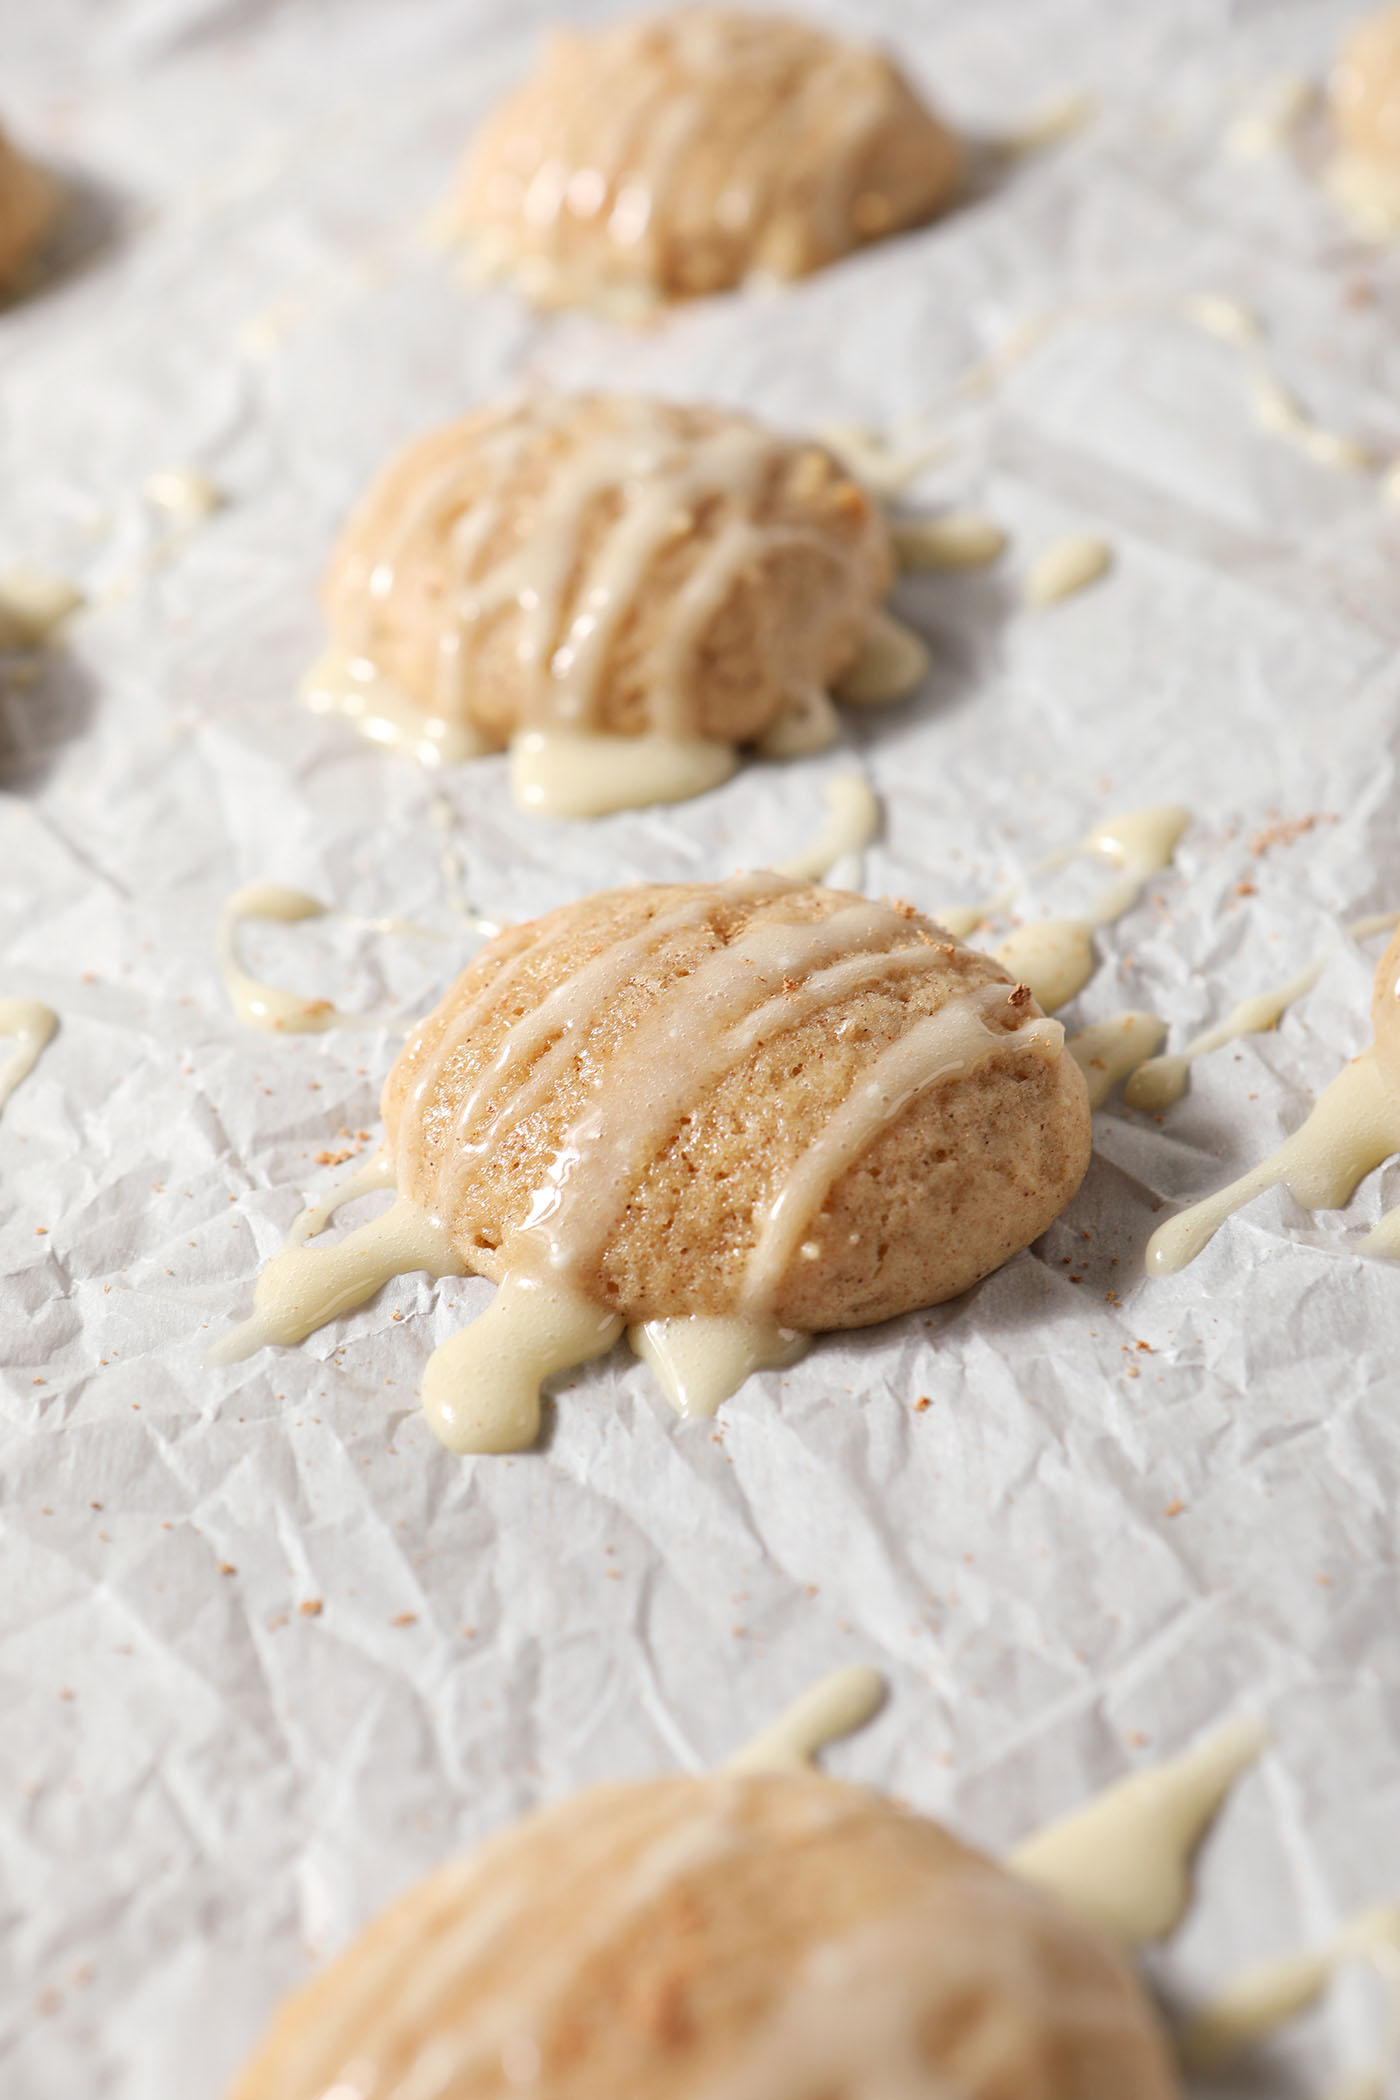
Mix the icing. Run the powdered sugar through a fine mesh strainer into a small bowl, and pour the eggnog on top. Add a pinch of salt. Stir to combine.
Frost the cookies. Transfer the icing to a piping bag and snip the tip. Drizzle it over the cookies in whatever pattern you like. Add additional freshly grated nutmeg as a garnish.
Enjoy with a glass of eggnog or milk.
How to store:
Store these cookies in a food-safe, airtight container in the refrigerator for 3-4 days. This is important since the icing involves eggnog.
Create layers of cookies in your storage container. I like to use parchment or wax paper between layers to prevent them from stick to one another.
Do not store them with other cookies because the spices used in these will creep into others.
Erin’s Easy Entertaining Tips
Whether you’re hosting a cookie exchange, having a bake sale or are simply baking cookies to enjoy at home just because, this Eggnog Cookie recipe is perfect for this holiday season.
Simply put, these cookies taste like a celebration and like this special season we’re in.
If I were to bake and share these while entertaining, here are some things I might do:
- Make the cookie dough early. Let it chill in the fridge and bake the day of. You can bake them early, make the icing but don’t ice until you’re ready to serve them.
- Lots of guests? Make a double batch. If you’re using a kitchen scale, you can safely double this recipe without the fear of it going haywire. If you’re using traditional cups and measuring spoons, please make it twice so that the cookies turn out.
- Create a dessert table! Who wouldn’t love a spread of their favorite desserts? Take inspiration from my ‘how to make a cookie gift box’ post and use it to create a whole table. Ask guests to bring a sweet for the table, too!

Quick tips and tricks to the best eggnog cookies:
- Let the dough chill for at least 2 hours… or longer. The cookie dough will be soft, even after chilling. It holds up in the fridge for a few days, too.
- Store them properly. Because there is eggnog in the frosting, these need to be refrigerated. If you want to share them, you can bake the cookies off early and then adding the icing drizzle just before serving.
- Share them with someone you love. Pack ‘em up in a cookie gift box to share with friends and family. Just be sure to pack them separately, as these strongly spiced cookies could seep flavor into other more subtle cookies.
If you’re an eggnog lover, here’s how you can make these cookies at your home…
Eggnog Cookies
EQUIPMENT
As an Amazon Associate and member of other affiliate programs, I earn from qualifying purchases.
Ingredients
- ¼ cup unsalted butter softened (½ stick)
- ½ cup granulated sugar
- 1 large egg at room temperature
- 1 teaspoon pure vanilla extract
- ½ cup eggnog
- 1 ½ cups all-purpose flour
- 1 teaspoon baking powder
- ½ teaspoon kosher salt
- ¾ teaspoon ground cinnamon
- ¼ teaspoon freshly grated nutmeg
Eggnog Icing Drizzle
- ½ cup powdered sugar
- 2 tablespoons eggnog
- A pinch of kosher salt
Want to save this?
Instructions
- Measure the flour, baking powder, ground cinnamon, freshly grated nutmeg and kosher salt in a medium bowl. Whisk together, then set aside.
- Cream the softened butter and sugar together in a large bowl using a hand mixer or in the bowl of a stand mixer fitted with the paddle attachment until light and fluffy. This will take 2-3 minutes.
- Crack the egg into the bowl with the wet ingredients. Add the vanilla, too, and blend until smooth, about 2 minutes.
- Pour the eggnog into the wet ingredients. Gently mix until combined using a rubber spatula.
- Sprinkle the dry ingredients into the wet ingredients. Mix until just combined.
- Cover the bowl with plastic wrap, and refrigerate for at least two hours. (Your cookie dough can also chill overnight.)
- Once the cookies have chilled, preheat the oven to 375F. Line two large sheet pans with parchment paper or a nonstick baking mat. Set aside.
- Scoop the cookie dough using a 1-tablespoon cookie scoop onto the prepared sheet pan. The cookie dough is quite soft, so be gentle. Give the cookies about 1.5-2 inches of space between each so that they can spread slightly as they bake.
- Bake in the preheated oven for 9-10 minutes, or until golden brown and the edges just set.
- Let them sit on the pan for 5-10 minutes, then transfer to a wire cooling rack. Let cool completely.
- Mix the icing. Run the powdered sugar through a fine mesh strainer into a small bowl, and pour the eggnog on top. Add a pinch of salt. Stir to combine.
- Transfer the icing to a piping bag and snip the tip. Drizzle it over the cookies in whatever pattern you like. Add additional freshly grated nutmeg as a garnish.
- Enjoy with a glass of eggnog or milk.
Video
Notes
Nutrition

About the Author:
Erin Parker is a Southern gal living in Texas with her husband and two daughters. She started The Speckled Palate to share what she was cooking as a newlywed… and over the years, it’s evolved to capture her love for hosting. Specifically, the EASIEST, lowest key entertaining because everyone deserves to see their people and connect over good food. Learn more about her…
Before leaving a comment or rating, ask yourself: